by Texas Homesteader ~
This Instant Pot Pepperoncini Roast Recipe is simple & uses only 3 ingredients. This is by far the easiest pot roast recipe in my Homestead Kitchen.
(Note: Some links in this post will take you to other related articles for further information. But links preceded with * are affiliate links. If you click and buy something I could receive a tiny commission.)
Instant Pot Pepperoncini Roast Ingredients
There are only 3 ingredients in my pepperoncini pot roast recipe:
A roast
An onion
One 16-oz jar of sliced Pepperoncini
Many Pepperoncini roast recipes call for all manner of extra ingredients. Packets of various mixes for instance.
But in my opinion it’s totally not necessary. RancherMan declares that this roast is perfect just as it is & not to add a thing. (blushes)
Oh RancherMan, you sweet-talking man you!
Plus, let’s be honest – if a recipe is delicious without adding extra ‘fluff’, I’m going for it. In and out of the kitchen fast to serve up delicious homemade meals? That’s my jam.
You too? Well read on, dear friends. You’re NOT gonna believe how easy this is!
Easy Instant Pot Pepperoni Roast
Wondering how easy? Let me paint you a picture:
Sear roast
Sauté an onion (or two!)
Add an entire jar of Pepperoncini, juice and all
Allow the IP to cook about 30 minutes and BOOM! Dinner is served.
How To Sear A Roast In An Instant Pot
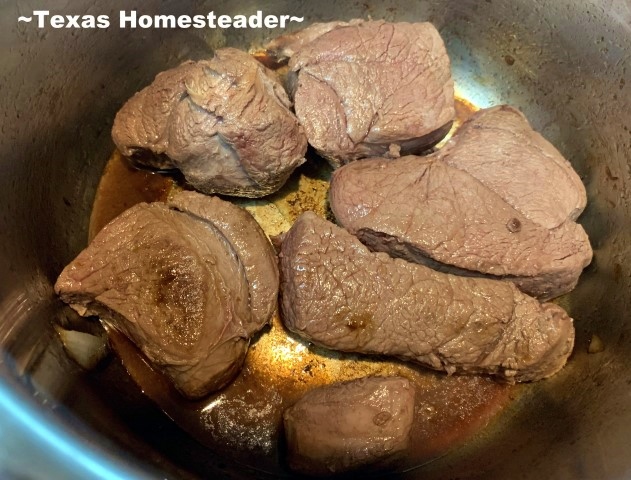
Searing the roast will help seal in the juices, so I usually do that. (Although not always. See ‘lazy cook’ statement above)
I cut a 3-4 lb roast into 5-6 chunks. By cutting the roast into smaller pieces before cooking assures the cooked shredded roast pieces are nice & short.
Plus the chunks cook faster than a whole roast would. Supper on the table faster is a good thing, my friends.
Add a couple of tablespoons of bacon grease into the Instant Pot
Press ‘sauté’ on high heat.
After the fat melts place the roast pieces inside
Sear each surface for a couple of minutes
Remove seared roast pieces and set them aside.
Sautéing The Onion
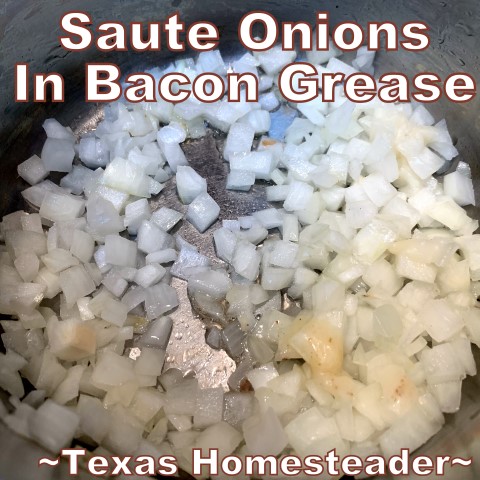
To sauté the onion add another tablespoon of bacon grease to the inner liner of my Instant Pot. When the grease melted I added my onion and cooked it for a couple of minutes before setting it aside as well.
Shortcut Note: Since the onions cook pretty completely down in this recipe, oftentimes I can skip this whole onion-sautéing step altogether by using the Sauteed Onion Shortcut I shared with y’all a short time ago.
That way I can just toss a handful of those pre-sautéed onions on top of the roast when it’s ready to cook and this recipe comes together even faster!
No onion chopping/sautéing is even necessary for this recipe that way! Shortcuts, my friends. Shortcuts.
Deglazing The Instant Pot Pan
You’ll want to deglaze the pot of any stuck-on bits now. But this is easy too:
With the IP set to sauté wile the inner liner is still hot, splash in a little juice from the pepperoncini jar and deglaze the pot with a wooden spatula. It usually takes less than a minute.
Cooking The Instant Pot Roast
Place the seared roast pieces into the deglazed IP inner liner and top it with sautéed onions. Pour a whole jar of sliced Pepperoncini on top, juice & all.
There’s no need to add any additional seasonings – not even salt & pepper. The jar of sliced Pepperoncini with its juice will usually provide all the flavor that’s needed.
Optional Potatoes & Carrots With Pot Roast
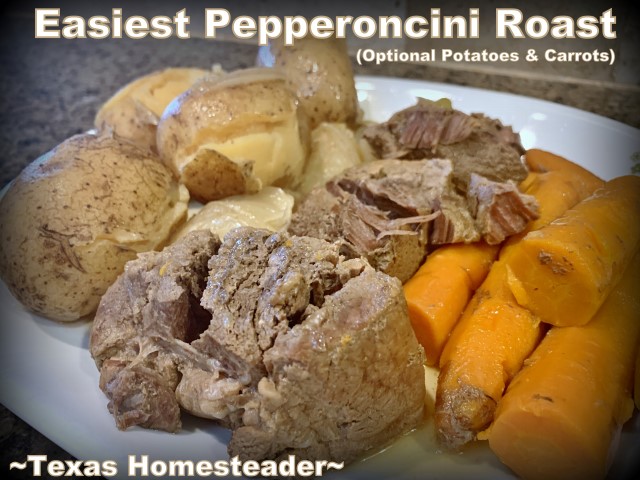
Although it’s not officially part of the recipe, right before I replace the IP lid to cook the roast I often top everything with a few whole scrubbed potatoes & carrots.
I mean, it’s gonna all cook at the same time with no additional hands-on from me. So why not have it provide the main entrée and the side dishes too?
(Another dinnertime shortcut? Why yes, yes it is!)
But 30 minutes cooking in an Instant Pot is a long cooking time for veggies that have been cut into smaller pieces.
So I make sure to use whole fist-sized potatoes and the largest whole carrots I have. The carrots will still be super soft but I can usually gently transfer them just fine to my plate.
Cooking The Roast In An Instant Pot
To cook the Instant Pot Pepperoncini Roast:
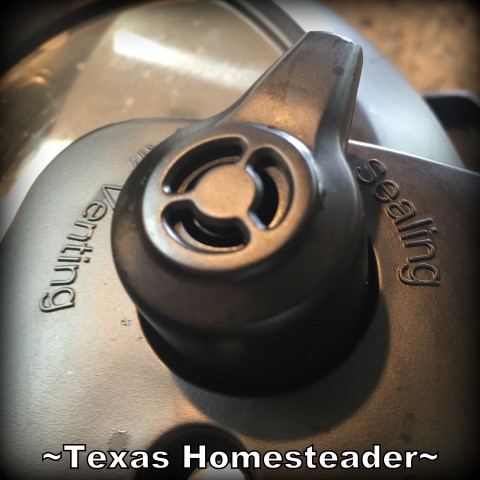
Lock in lid (make sure the knob is turned to ‘sealing’)
Pressure Cook’ on high pressure for 30 minutes.
Since the roast is cut into chunks it allows a fast cooking time. Dinner in a flash? YES PLEASE!
After cooking allow 10 minutes natural release before turning the valve to finish dropping the pressure.
Meat & Wild Game Internal Temperature Recommendations
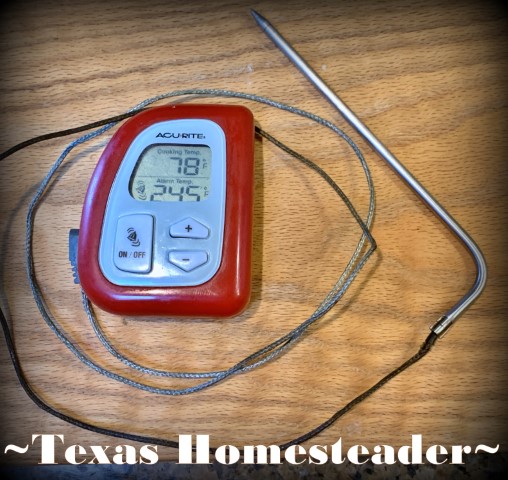
First I’ll check the internal temps of this meat using an instant-read thermometer. (references at the end of this post)
Beef Roast internal temperature should read 145°F – 155°F.
Wild Venison the recommended internal temp according to the extension service (reference link below) should be 145°F.
Wild Pork it should be 140-150°F according to a wild-game cooking site (reference link below).
A quick probe with an *Instant Read Thermometer proves that we’re good to go. So the roast was moved to a platter and allowed to rest while I gathered our plates & utensils and set the table.
Leftover Roast Options
There are lots of ways to enjoy pepperoncini roast leftovers, but our favorites are:
Pulled Pork Enchiladas
Carnitas Tacos
Pulled Pork BBQ Sandwiches
The simplest way is to just shred the leftover roast and pile it high in flour tortillas. RancherMan loves it this way!
And once again I utilize a shortcut. This is the fastest way of all for Shredding Cooked Roast.
What??! MORE cooking shortcuts? I’m seeing a trend here…
Shortcuts in the kitchen, my friends. They’re my constant kitchen companions and absolutely a lazy cook’s best friends! LOL
Here’s my simple Instant Pot Pepperoncini Roast Recipe.
Did you make this Pepperoncini Roast? Please rate the recipe in your comment below!
Simple Pepperoncini Instant Pot Roast (optional with potatoes & carrots)
The easiest pot roast I've ever made. Seer roast, saute onions, and dump a jar of sliced pepperocini in & cook 35 minutes. Done & DONE! ~TxH~
Ingredients
- 3-4 lb Beef chuck roast I use a venison or wild hog roast
- 1 16-oz jar SLICED pickled Pepperoncini peppers I chose medium-heat peppers
- 1-2 onions diced or cut into quarters
- 4-6 medium-sized potatoes optional
- 2-3 Whole carrots optional
Instructions
-
Cut the roast into 4 to 6 chunks. Trim as much of the fat as possible from the chunks of roast. (It's fine if some fat remains)
-
Press the SAUTÉ key on the instant pot. Wait for the pot to indicate "HOT" before adding ingredients.
-
Add 2 tablespoons oil to the heated pot. Sauté roast pieces for 2 to 3 minutes per side, or until nicely seared. Transfer seared roast to a plate. Set aside.
-
Press CANCEL and then select SAUTÉ again. Add the onions to the pot and sauté for 2 to 3 minutes or until tender, stirring to scrape up any browned bits from the bottom. Add a splash of Pepperoncini juice if necessary to help deglaze the pan. Hit 'CANCEL' to turn IP off. Remove onions & set aside.
-
Arrange chunks of seared roast in a single thickness in the IP liner. Top with onions. Add potatoes, carrots (if using). Don't stir.
-
Add the entire contents of the Pepperoncini jar, juice and all, over the vegetables. Don't stir.
-
Place the lid on the Instant Pot. Press the MANUAL button, select HIGH, and set the time to 30 minutes (making sure the steam release handle is in the "Sealing" position).
-
After the cooking is complete allow the Instant Pot to do a natural release for 10 minutes. Then press CANCEL, then using a long handled spoon, push the steam release handle to the "Venting" position to allow any remaining pressure to release completely before you open the pot.
-
Use instant-read thermometer to assure internal meat temperature has reached 145℉ - 155℉ for beef roast. (140 - 150 for pork roast, 145℉ venison roast)
If you've included carrots & potatoes, transfer them to a serving dish and keep warm. Transfer the roast to a serving platter and let it rest 5 minutes before serving.
Recipe Notes
If you want to thicken the juices:
In a small bowl stir together 2 tablespoons water and 2 tablespoons cornstarch. Whisk the mixture into the Instant Pot and simmer for about 5 minutes or until the juice has thickened to your liking, stirring occasionally.
Press CANCEL and unplug the Instant Pot.
Serve roast with the vegetables, ladle thickened juice over roast
RECIPE NOTES
This recipe was tested in my 6 Quart Instant Pot DUO60. Obviously other models may have different settings than those noted in the recipe.
If including carrots & potatoes use only whole carrots & whole medium-sized potatoes. Smaller pieces of vegetables will be overcooked.
For timing your meal remember, the cook time doesn't include time it takes for the Instant Pot to come to pressure or to naturally release which should take an extra 10 to 15 minutes in total for this recipe.
If gravy is not as thick as you'd like after simmering with the cornstarch slurry, mix together an additional 1 tablespoon water with 1 tablespoon cornstarch and whisk it in to the thicken further.
Venison roast 145 degrees internal temperature
Wild pork roast 140 degrees (medium-well) to 150 degrees (well done) internal temperature
References:
Other Instant Pot Recipes:
Pressure Cooker Broth
Pressure Cooker Roasts
Pressure Cooker Pasta & Rice
- How To Make Boxed Mac & Cheese In An IP
- One-Pot Meal – Spaghetti & Meat Sauce
- Instant Pot Goulash – Comfort Food FAST!
- Foolproof Instant Pot White Rice
Pressure Cooker Dessert
Pressure Cooker Beans
Pressure Cooker: Other
- Homemade Yogurt: Instant Pot Method
- Instant Pot Boiled Eggs WITHOUT The Shell!
- Homemade Tamales – Faster In An Instant Pot
Air Fryer Recipes
- Fried Chicken In An Air Fryer
- Crispy Southwest Egg Rolls
- Air Fryer Salmon Patties
- Crunchy Air-Fried Roasted Chickpeas
See ALL Our Instant Pot Posts!
Want to see other Leftover Pork Roast Meal Ideas?
Pork Roast Recipes:
- Slow-Cooker Pork Roast w/Veggies
- Instant Pot Roast with Brown Gravy- Comfort Food FAST
- Slow-Cooker Pork Roast w/Red Wine
- Italian-Flavored Pork Roast
- Pecan-Smoked Pork Roast
- Simplest 3-Ingredient Pepperoncini Roast
- (Easily Shredding Pot Roast in Minutes)
Recipes Using Leftover Roast:
- Carnitas Tacos
- (MYO Crispy Taco Shells in Minutes)
- Pulled Pork Enchiladas
- Hearty Meaty Stew
- Homemade Pork Tamales
- Pulled Pork BBQ
- (Homemade Honey-Sweetened BBQ Sauce)
- BBQ Rub & Beer-Based Mop Sauce Recipe
New Meals Remade With Leftovers
Pork
- Planned Leftovers: Easy Slow-Cooker Pork Roast
- How To Quickly Shred Leftover Roast
- Hearty Stew – Quickest Planned Leftover Meal Of All
- Pulled Pork Enchiladas From Leftover Roast
- Planned Leftovers: Carnitas Tacos From Pork Roast
Beef
Chicken/Poultry
- Chicken Fried Rice Using Cold Leftover Rice
- Leftover Chicken & Zucchini Noodles with Herb Bombs
- Chicken Tortilla Soup From Leftovers
- Homemade Chicken Pot Pie Made Easy
- Chicken & Dumplings Using Leftover Chicken
- Leftover Chicken Into Quick Chicken Fried Rice
- Leftover Turkey & Dressing Into Patties
Vegetables
Other Leftover Posts
- Leftover Biscuit Dough? Make Cinnamon Rolls!
- Using It ALL – The Art Of Eliminating Leftover Food
- Homemade Meals Every Day – The EASY Way!
…and MUCH MORE!
See All Our Recipes
C’mon by & sit a spell! Come hang out at our Facebook Page. It’s like sitting in a front porch rocker with a glass of cold iced tea. There are lots of good folks sharing! And you can also follow along on Pinterest, on Twitter and on Instagram.


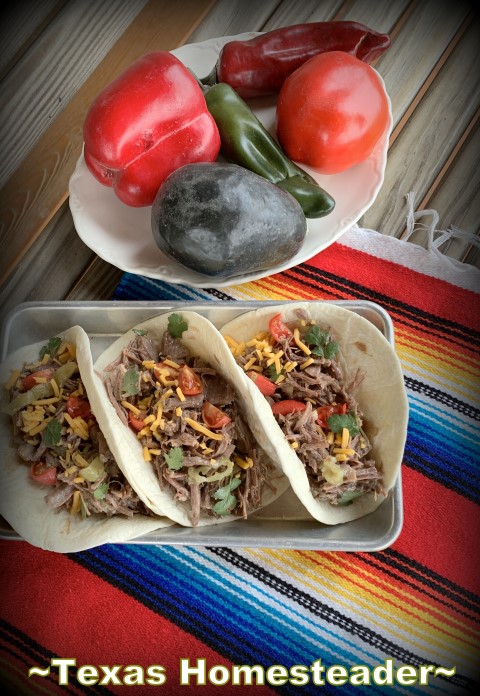


I served this for a dinner gathering and it received rave reviews. I didn’t tell them how easy it was! With the leftovers I made the Carnitas Tacos (also from this site) and it was delicious! 5 stars all the way!