
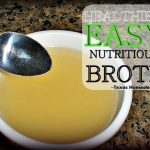
by Texas Homesteader ~
You can make faster, easier healthy Homemade Broth in an Instant Pot – literally push-button convenience cooking. Making your own healthy broth has really never been easier! Come see how I make and preserve it.

Simple Ingredients for Homemade Broth
My homemade bone broth is as pure as it can be with only 3 ingredients:
Bones & small meat scraps
Water
A splash of vinegar
Do You Add Salt To Homemade Broth?
You can certainly add salt to your homemade broth, but I don’t. To me it’s easier to add salt when I’m actually using my broth for cooking.
Sometimes there’ll be enough salt in my dish already without adding any additionally. Other times a small sprinkling of salt will be all that’s needed.

You know what they say – you can add salt, but once it’s there you can’t take it out.
So my broth is always made without additional salt or seasonings. Just pure, natural, healthy broth.
Do You Add Vegetable Trimmings To Bone Broth?
Some people like to add vegetable trimmings to their homemade broth. But (to me at least) sometimes veggie trimmings might add the wrong flavor than what I’m trying to attain with a dish I’m using broth for.
For instance – to me, carrots add a sweetness to my broth. And while that may be ok in a stew, it’s not really desired in my chili.
So to keep everything simple I don’t add any veggie trimmings to my broth. But if that’s something you think you’d like don’t hesitate to drop ’em in!
Making Homemade Broth In An Instant Pot
OK, really folks, it doesn’t get any easier than this. Into my Instant Pot inner liner I toss in the bones I’ve reserved in the freezer for my broth. Then I cover the bones to the fill line with water.
A splash of vinegar is added – it’s said that the vinegar draws more calcium from the bones and into your broth.
Then I replace the IP lid & twist to lock
Set the vent to ‘SEALING’
Press the +/- button to set the cook time to 2 hours
Walk away.
(Feel free to tweak the time if you like, but this is the time that works best for me.)

When the broth is done I allow the pressure to release naturally. There’s lots of hot brothy volume contained in the IP so this can take 45 minutes or so!
Then I use a large strainer spoon to remove the larger bones and pour the remaining broth through a hand-held strainer to remove the smaller bones.
I typically strain my broth into a large stainless steel stock pot and allow it to cool slightly. Finally I place the strained broth into the refrigerator to cool completely.
Can You Make Broth With The Same Bones Twice?
I always toss those bones right back into the Instant Pot and give ’em another go.
I’ll fill with water, splash a little vinegar and repeat the broth-making process. It’s always worked like a charm for me.
At the end of the second batch those bones have done all they can do and are very soft & crumbly. So I’ll often toss them into my *Tumbling Composter.

How To Remove The Fat From Homemade Broth
I allow my homemade broth to thoroughly chill in the refrigerator overnight. When the broth is fully chilled the fat will rise to the top. I simply scrape the fat away.
Some people use this fat for cooking and such, but in our household Bacon Grease is king.

So having no other use for this fat I simply place it into a Repurposed Plastic Jar I keep in the refrigerator for grease. (pouring grease down the sink is a recipe for disaster, y’all!)
When that jar’s full I screw the lid on tight and toss the whole thing in the trash.
What Recipes Use Homemade Broth?
You can store your broth in the fridge for about a week. Go ahead, use it for all sorts of deliciousness throughout the week and marvel at your self sufficiency!
I always start by using some up immediately in dishes that require a hefty amount of broth such as:
Homemade Soups
Instant Pot Spaghetti
Cowboy Black Bean & Beef Chili
Dry Pinto Beans In An Instant Pot
Batch Cooking Rice In An Instant Pot
How To Freeze Homemade Broth
If you want to preserve your broth for a longer time you can store it in the freezer. I like to section it off into plastic peanut butter jars, label and freeze.

Others might pour their broth into ice cube trays or small plastic margarine containers & such. Whatever volume you think you’ll use your broth, the world is your oyster here.
Can You Pressure Can Homemade Broth In Mason Jars?
Homemade broth can be preserved in mason jars by pressure canning it.
Although summer in NE Texas is too dang hot & humid to can, during the winter months I like to pressure-can my broth.
Then those shining jars of broth are ready & waiting in my own pantry – no thawing required.

However you decide to do it, making your own Instant Pot broth is incredibly easy. Pat yourself on the back for your money-saving, healthy eating, self-sufficiency moxxy!
Did you make this Instant Pot Broth? Please rate the recipe in your comment below!
Instant Pot Bone Broth
Healtby homemade broth can be made even faster and easier using an Instant Pot pressure cooker. I add bones/meat trimmings, water and vinegar and pressure cook for 2 hours. Cheap, healthy & delicious! ~ Texas Homesteader ~
Ingredients
- Beef, Pork, Chicken or Turkey Bones
- Splash of Vinegar
Instructions
Instructions:
-
Place bones into Instant Pot liner and then fill with water to max line
-
Add splash of vinegar to draw additional calcium from the bones
-
Place & lock Instant Pot lid, set vent to 'SEALING' and press BEANS/BROTH function.
-
Press +/- and set time to 2 hrs.
-
When done, allow IP to release pressure naturally. Then strain by pouring through a strainer to remove bone and bone pieces. Place strained broth in the refrigerator to cool for 12-24 hours. Fat will float to the top when it cools.
-
NOTE: I oftentimes cook these same bones a 2nd time. When the broth is strained I return the bones into the IP and add more water & splash of vinegar. Process bones again - this time bones will be soft and crumbly.
-
When broth is fully chilled, scrape fat layer from the top of the broth to remove fat. Refrigerate, freeze or pressure can.
Recipe Notes
OPTIONAL CANNING STEP:
To pressure-can the broth. 10 lbs pressure for 20 min pints, 25 minutes quarts
~TxH~
This post categorized in 
Tagged in ![]()
![]()
Links In This Post:
- Food Waste: Onion Trimmings Into Onion Powder
- *Loving My Tumbling Composter
- Ways To Reuse Bacon Grease
- Don’t Flush Cooking Grease Down The Drain
- Easily Pressure-Canning Homemade Broth
Other Instant Pot Recipes:
Pressure Cooker Broth
Pressure Cooker Roasts
Pressure Cooker Pasta & Rice
- How To Make Boxed Mac & Cheese In An IP
- One-Pot Meal – Spaghetti & Meat Sauce
- Instant Pot Goulash – Comfort Food FAST!
- Foolproof Instant Pot White Rice
Pressure Cooker Dessert
Pressure Cooker Beans
Pressure Cooker: Other
- Homemade Yogurt: Instant Pot Method
- Instant Pot Boiled Eggs WITHOUT The Shell!
- Homemade Tamales – Faster In An Instant Pot
Air Fryer Recipes
- Fried Chicken In An Air Fryer
- Crispy Southwest Egg Rolls
- Air Fryer Salmon Patties
- Crunchy Air-Fried Roasted Chickpeas
See ALL Our Instant Pot Posts!
Our Favorite Soups
Soup Tips
- Endless Soup For A Weeks’ Worth Of Lunches
- Faster, EASIER Homemade Broth In An Instant Pot
- (Pressure Canning Broth)
- 10 Delicious Quick Soup Ideas
Beef Soups
Chicken Soups
Vegetable Soups
See All Our Soup Recipes
Other Simple-Life Articles
Simple Living
- Living Deliberately: Voluntary Simplicity
- How To Live The Simple Life Even In An HOA
- Building Your Life With Your Own Two Hands
- The Fast Life: Slowing Down, Living MORE!
Old Fashioned Tips
Eco-Friendly
Preparedness
- How To Stay Warm When The Power Goes Out
- Get Prepared Now For Power Outage Emergencies
- Preparedness Using The Sun: Solar Cooking
Make It Yourself
- Easy Laundry Detergent Recipe
- How To Make Your Own Laundry-Scent Booster
- Easy Air Freshener In Cute Repurposed Jar
- Lavender-Scented Gardener’s Hand Scrub

C’mon by & sit a spell! Come hang out at our Facebook Page. It’s like sitting in a front porch rocker with a glass of cold iced tea – lots of good folks sharing! You can also follow along on Pinterest, on Twitter or on Instagram.
If you’d like to receive an email each time a new blog post goes live it’s EASY to Subscribe to our blog!
This is the only way I’ll make homemade broth now. So easy, so good and so nutritious!