by Texas Homesteader ~
Making homemade chicken broth is beyond easy, super healthy and makes use of bones/trimmings that used to be just thrown away!
And there’s a special ingredient to make it more calcium rich. Check it out.
Ways To Eat ALL Of A Chicken
I made a delicious slow cooker chicken dinner recently. Now y’all know I like the Cook-Once, Eat-Twice method of cooking. There are many ways I can use leftover cooked chicken: One Chicken Enjoyed 6 Ways
So after supper I removed the meat from the bones & sectioned the chicken into meal-sized servings for the freezer.
But there’s still much more food left in that sad looking and picked-clean bird. So my thoughts turn to that delicious potential.
I don’t have a specific recipe for homemade broth. But that’s the beautiful part, you don’t really NEED one!
Making Homemade Broth In A Slow Cooker
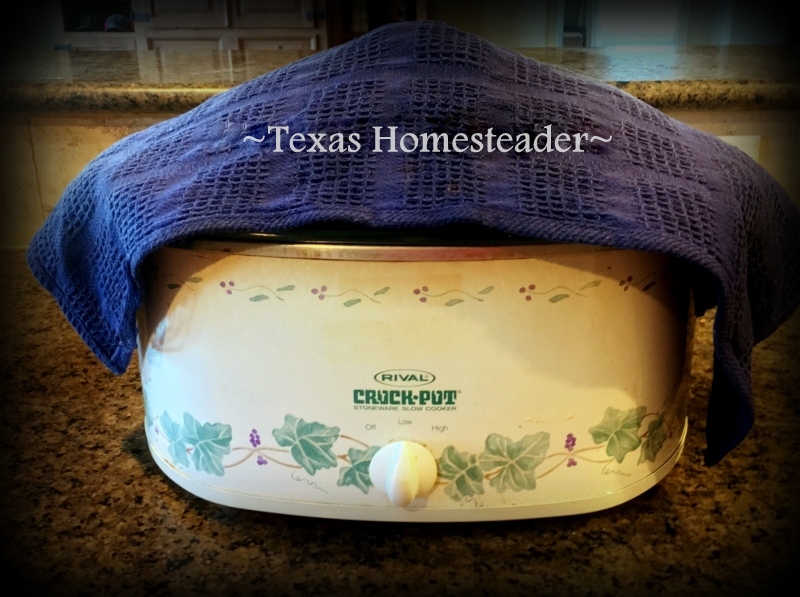
If you’re making broth in a slow cooker just toss all the leftover bones, skin and even the trimmings pulled from the chicken before it was cooked into a slow cooker. Then fill it the rest of the way with water.
Some people also throw in scraps of raw veggies like onion trimmings or the tips or peelings of carrots, etc.
I usually don’t but you certainly could add those things as well if you wish.
When the slow cooker is filled add a splash of vinegar. I’ve read that vinegar draws more calcium from the bones. (you can’t taste vinegar in the finished product).
Then flip the switch on the slow cooker to High, walk away and let it simmer all day.
Instant Pot Simplicity For Making Homemade Broth
You can make homemade broth even faster in an electric pressure cooker such as an Instant Pot.
I use the same procedure when making Homemade Broth In An Instant Pot as with the slow cooker, but the time is shorter:
Place chicken bones, skin and trimmings in Instant Pot liner
Add a splash of vinegar and fill to the fill line with water
Place lid on top, flip lever to ‘sealing’
Cook broth 2 hours on high pressure, then allow to pressure to drop naturally
Removing The Solids From Homemade Broth
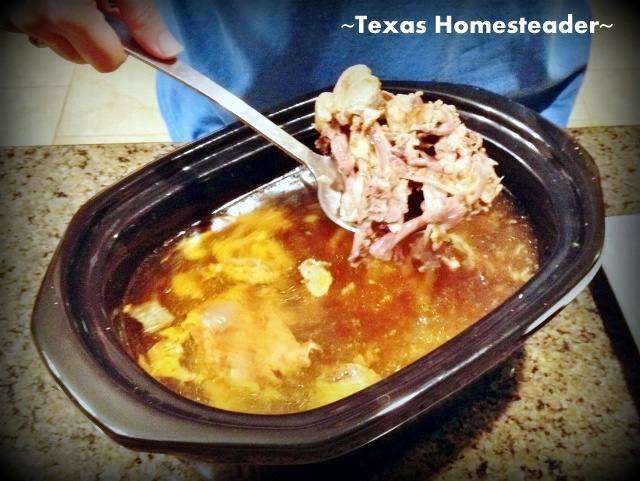
After the contents have simmered into broth I strain all solids and bones from the broth while it’s still warm.
I learned this step is best done while the broth is warm because the broth often thickens when it’s cool making the bone removal more difficult for the smaller bones.
So I first use a large slotted spoon to take the bulk of the bones out. Then I strain the broth into a large bowl using a finer strainer to catch the tiny bones.
Update: I now make a second batch of broth with those same bones.
After their cooking stint the bones are now soft. So I break them as I place them back into the empty slow cooker or Instant Pot liner.
The resulting broth won’t be quite as rich so I only add about half the water when making this second batch.
Cooling The Homemade Broth
The whole container of strained broth goes into the fridge overnight to cool.
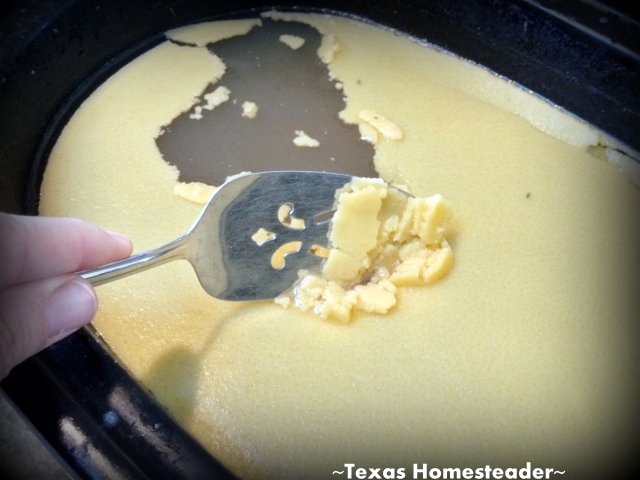
This process causes the fat that’s in the broth to rise to the top & solidify. I like to remove much of the fat to make a healthier lower-calorie broth.
Skimming The Solidified Fat From Cooled Broth
In the morning I’ll pull the chilled broth from the refrigerator and remove the hardened fat that’s risen to the top.
Of course you should never put any fat down your kitchen sink. But we’re on a septic system out here so it’s doubly important for us.
I have a plastic jar in my fridge labeled boldly “FAT” and I use it to hold even tiny amounts of fat from my cooking. When it’s full I’ll tighten the lid and throw it away.
So I add the hardened fat into this jar. But I don’t spend too much time trying to retrieve every single piece of solids from my broth because it adds a little flavor. I typically remove about 99% of the fat.
Then BOOM! Healthy homemade broth.
How To Freeze Homemade Broth
If my broth will be stored in the freezer I just pour the cooled broth into jars that I save for freezer food.
Note About Freezing Food In Glass Jars: Many are comfortable freezing food in glass jars, and it can be done successfully. But because food expands as it freezes there are a few things to remember:
For best results use only jars with straight sides. The curved glass on jars with shoulders can crack more easily as food presses against it as it’s freezing & expanding.
Leave plenty of empty headspace for expanding frozen food.
Initially only tighten the lid slightly. Finish tightening lid once food is solidly frozen.
Be sure to add a label – everything in the freezer seems to look the same!
Freezing Food In Plastic Jars
I’ve never been comfortable freezing my broth in glass. Since we have a chest freezer we’re always moving food around. One wrong “clink” and we’ve got a big, potentially dangerous mess in the freezer.
So I use saved plastic jars for freezing various things such as batch cooking Ranch-Style Beans and of course this broth.
My broth never languishes in the freezer for long since in the winter months I’m constantly using it every week for my endless soup.
Canning For Shelf-Stable Homemade Broth
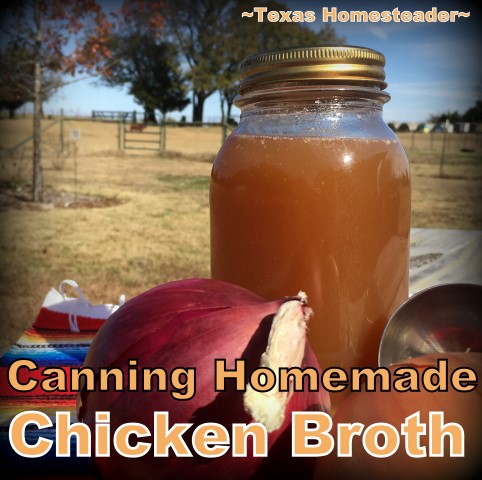
For shelf-stable broth I pressure can it. That way it’s ready & waiting in my pantry.
When the broth is canned in jars I don’t have to worry if I’ve given myself enough lead time to thaw the broth for my recipe, etc.
If you’d like to have shelf-stable broth too you can see the easy directions here –> Pressure Can Broth
Homemade Broth Has Many Uses
I use lots of broth. It’s a healthy ingredient in many of my recipes including:
-
-
Endless Soup, for healthy lunches
-
Homemade Chicken & Dumplings
-
Pinto Beans In An Instant Pot
-
Instant Pot Spaghetti or easier Macaroni & Cheese
-
All Our Favorite Flavors Of Long-Grain Rice
-
A homemade version of Cream-Of-Anything soup!
-
And many more! There’s always a use for healthy homemade broth.
I haven’t purchased commercial broth in years. Plus my homemade broth is obviously lower in sodium and unpronounceable ingredients than the store-bought stuff.
Give it a try, you’ll be amazed at how easy yet delicious it is to make your own broth!
~TxH~
Links in This Post
- Save Time In The Kitchen: Cook-Once, Eat-Twice
- Cheesy Chile Chicken Casserole
- Making Homemade Broth
- Endless Soup For Warm Nutrition
- Homemade Chicken & Dumplings
- Cream Of ‘ANYTHING’ Soup
- Ranch-Style Beans
- Never Put Fat Down The Drain
- Homemade Broth Made In An Instant Pot
- Canning Homemade Broth
See ALL Our Recipes!
Want More Holiday Cooking Tips & Recipes?
SIDE DISHES
DESSERTS
- No-Cook Cherry Dessert
- MYO Cherry Pie Filling Quickly
- Apple Pie With Home-Canned Apples
- Easy Pumpkin Bread (with Cake Mix Shortcut)
- Easy, Healthy Breakfast Muffins
- Honey-Sweetened Whipped Cream
- Double Pie Crust Recipe
BREAD
INGREDIENTS
- MYO Sweetened Condensed Milk
- MYO Broth Easily!
- Easy Cream-Of-ANYTHING Soup Recipe
- Easier Peeling For Boiled Eggs
FOOD SAFETY
- What Do The Dates On The Food Labels Mean?
- Keeping Hot Dishes HOT In Transit
- Keeping Food Safely COLD
C’mon by & sit a spell! Come hang out at our Facebook Page . It’s like sitting in a front porch rocker with a glass of cold iced tea. There are lots of good folks sharing! You can also follow along on Pinterest, Twitter
If you’d like to receive an email when a new blog post goes live,
subscribe to our Blog!






I do the same thing with the chicken bones but after skimming the fat i warm it back up so it is liquid then freeze it in ice cube trays. This way you can make different size meals or just add a cube or 2 to some water for a nice cup of broth
Your own healthy convenience food right there in your freezer. Gotta love it! ~TxH~
I make bone broth in my 6-quart pressure cooker. Not only from a turkey carcass, but also from chicken. I keep a bag in the freezer for the bones and I just accumulate them till the bag is full. I use cottage cheese and yogurt containers instead of those pricy plastic freezer containers. They are shaped so that, with a little hot water from the tap on the bottoms of the container, the frozen contents pop right out, so no having to thaw in advance. I really don’t feel like using these plastic containers in the freezer is harmful as there’s no heat involved. I always cool liquids thoroughly before pouring them into the plastic container. I tried freezing in straight-sided canning jars and had problems with the frozen glass being so brittle that they would be cracked easily. Also there’s the issue of having to thaw in advance. I’ve had jars crack while sitting on the counter thawing. I’ve found that, after I’ve drained my broth from the bones, if I add a little hot water to the drained bones and stir them around a little, that will produce a “second broth” that still has a lot of flavor in it. After being pressured for an hour the bones are very soft and will crush between your fingers. I bury these bones in my garden, along with other kitchen scraps. Now, the fat, I save and use when I fry chicken. I keep it in a container in the freezer and use it several times. I’ve made soap with it, but the end-product is a little softer than soap made with, say, beef tallow. Even if it’s been “washed” it still emits a “chicken-ey” flavor, which decreases after it has cured, especially if essential oil is added to the soap. But it does turn the soap yellow. I’ve also blended it half and half with pork fat, which I save also, and used that to fry potatoes in. I don’t notice a chicken-ey smell then. I don’t like to put fats into the soil. Sometimes I’ll put small amounts in the trash that we burn in a barrel, we’re allowed to burn as we’re outside the city limits. Otherwise, if I have some I need to get rid of, I’ll do like you, put it in a peanut butter jar. Our neighbor has a dumpster at his place of business and lets us put our non-burnable trash into it.
I also deglaze my pan whenever I brown hamburger or fry pork. Lots of flavor there. I freeze the liquid till I’m making soup or beans. Save the fat. Beef fat makes wonderful soap. Pork fat can be used like lard. When I buy pork, it’s almost always a whole loin, which I slice and cook the slices like pork chops. So much more nutrition in that than those bony, fatty chops. I also cube some for use in dishes like sweet and sour pork that call for cubed pork. I have used my meat grinder and ground some of it, along with whatever pork fat is on the loin, and seasoned for sausage but it made sausage that was very, very dry and so really about all I could use it for was in breakfast casseroles and pizza, or mixed half and half with ground beef for meat loaf.
Great tips! I hadn’t heard that about the vinegar. That’s interesting. I do something similar with my chickens and large roasts so I can’t get as many meals as possible out of them. Some homemade chicken broth sounds really tasty right now too.
Ugh, I had a long comment but apparently mistyped the captcha 🙁
Thanks for bringing this post back to our attention – very timely! I hadn’t head of the vinegar trick, but it makes sense. I would also love to can the broth (duh! I hadn’t thought of that before!) but we would need to have ‘excess’ and it hardly lasts that long, lol.
Another trick I read years ago is to roast the bones and whatever’s on them until they are browned, then make the broth. The broth is a beautiful golden brown color and (I think) tastes a little richer. We feed all the skimmings from the broth (bones, skin, etc) to our chickens – they love to pick the bones clean and it’s a nice little treat in the winter months.
Sorry about the captcha thing Patty, dang I sure wish tolls wouldn’t make it necessary, it’s just extra pain for everyone! I love the roasting of the bones idea, I’ll be attempting that this coming week. Sounds amazing! And I didn’t know you could give all the skimmings to the chickens, I’ll certainly be doing that as well. Thanks for the tip! ~TxH~
I make broth like that too! I keep a labeled baggie in the freezer for veggie scraps, so I have some for broth. But you’re missing a last trick with those bones-because they’re soft, you can whizz them up in a blender, & add it to your dog’s food. You’ll likely have to add water, or a little broth to get it to go.
Not everyone makes their dogs wet food (I like knowing what’s in it) but a little bone paste is a healthy addition to their dry food
I make my broth basically the same way but the next time I make it I will add some vinegar. I bought two already cooked chickens because they were so cheap. I took off most of the meat but left some on the bones. I put it in the slow cooker with some celery tops (I would have thrown away) and carrots. When it is done, I strip the meat off and divide it into two piles with the carrots and give them to our dogs. They know it is coming and do not leave my feet. I put the broth in plastic freezer bags and freeze them flat. After they are frozen I stack them like a file and put them in the freezer standing up. Thank you for the hint about the vinegar.
There is good information about the negative effects of freezing in plastic, just as plastic in the microwave is not recommended.
Freezing in canning jars is also not recommended, just like microwaving your mason jars, because it changes the molecular structure, making them more likely to break when using them to can foods. If you want to use them in either freezer or micro buy a case and mark them with a little nail polish to identify them for those uses.
My bone broth is incredible, I lightly smoke the bones before making it. The flavor is incredible. And I don’t skim off the fat. The natural fat isn’t harmful and the flavor you get from ALL the parts is over the top good! The Ball Home Canning and Preserving canning book has the times for pressure canning, I think it’s 75 minutes. Try it smoked, it’s amazing.
I know freezing in plastic isn’t preferable, guess I’m just choosing my less of two evils battles by using the plastic jars. So far it’s working out ok for me. Your idea of smoking the bones before making the broth sounds delish – I think I’m going to have to give it a try Cheryl – thanks for the tip! ~TxH~
Making this tonight! So excited to see how well it turns out. Thanks for sharing how to do this! 🙂
I have been doing the chicken or vegatable bone broth or sometimes called “bone soup” for a while now. And have 6-8 pints stored on the shelf. Last week I had cooked down the bones from a rack of baby ribs and and after straining I put the broth in the frig for a few days until ready to use it. There was not a lot of fat on it so I left what there was in it, heated it up a bit and put it in my small 4 qt crock pot to cook the beans I had soaked for a day, to make what the recipe said was to be white chili(I used northern, some red chili, and garbonzo bean. Then I changed things around a little more and added a dehydrated onion, chili powder, garlic cloves, some tomato w/chillis, some canned tomatoes and even add a pt of thickend tomato puree. And rounded up partial jars of canned onions with juice. Stirred away at it and then added a qt of canned canned, chopped up turkey. Oh, I had to transfer the mixture to a large pot in order to add the turkey. Then let it cook and “meld” the flavors before canning in pressure cooker. Ended up with 11 pints of what I call extra good turkey chili. Who needs a recipe?
I read somewhere that when using glass jars in the freezer you need to use ones that have no shoulders before the lid. The ones that have completely straight sides. The curved glass on the shoulders is weaker and prone to cracking when frozen. I would also say that tightly packing them in a container/crate of some sort would reduce the clink factor and breakage.
What a great idea, thanks for sharing at Good Morning Mondays. I have done the same and then canned the broth and it was great to use in soups especially chicken and corn. Blessings
Love homemade broth! Just did the same thing today in 40 minutes in our pressure cooker. It was heaven to have homemade goodness with cast off parts 🙂
I recently heard a radio report talking about how healthy broth is for you (the home made kind!)
I really want to try making my own some time!
I use a lot of chicken broth. I am going to have to start doing this! We are on a septic system too so I love the tip for keeping the fat in a plastic container until it’s full and can be thrown away. Thanks for linking up again at This Is How We Roll Thursday. Love your posts!
Thank you for sharing your stock secrets! I used to make my own bone stock and would can it to save freezer space, but I have been vegan for the last three years, so I am no longer doing bone stock 🙂 , but I do save all my onion skins, vegetable ends, peels and scraps and put them in a bag in the freezer so that they can be added to the pot when I am making vegetable stock. I periodically go through the bins and bags of root crops and pick out the ones that are getting soft or growing tops and put them in a crock pot with water to cover. I just roughly cut the vegetable culls so that they fit in the pot, but spend very little time doing so. I usually add seasonings and maybe cut a head or two of garlic in half and add it to the stock. I let it cook until all the veggies are putty and then strain and store in reusable plastic storage containers that are stackable. I have a milk crate in my deep freeze that holds a variety of stocks to keep them all in one place for easy access and so I don’t lose them amongst the other goodies in my freezer. I have a basic clear stock made from vegetable scraps like celery ends and tops, onions, garlic, various greens, cabbage cores, broccoli stems etc., I also have a mushroom stock,( This is not a scraps stock.. it is made fresh, but it is de-elish!, recipe and instructions can be found on my blog. I can give you the link if you are interested), and a rich golden stock made from roasted root crops that I make from tired carrot, turnips, potatoes, garlic and sweet potatoes. Like you I keep a perpetual soup pot going so having stock to add to it is very useful and cost effective!
Ok I didn’t read all the comments here, but did you know you could use the extra fat for your garden? One problem would be attracting scavengers, but you could bury it. I don’t have a problem with raccoons and whatever because I have dogs, but my dogs could be a problem for this lol. I sometimes ha e a mess of compost but I’m not too worried as my hubby is a hoarder, so he makes a bigger mess than the dogs, haha!!
Wow Stephanie, I’ve never heard of burying fat in the garden. My veggie garden has a fence around it so many animals would not be able to get inside anyway, although raccoons could certainly amble over the fence if they wanted. What does burying fat in the garden add to the soil? I may have to look into that! ~TxH~
Oh I honestly don’t know what nutrients anything adds to the soil, lol. I just know I compost anything and everything, including paper towel, Kleenex, etc. All I know is if I don’t add stuff, my garden doesn’t do well lol
That’s exactly what I do with the carcass. It has such a wonderful flavor!
I also throw some sea weed into my broth for the extra goodness! Great post. Thanks for the tip on the vinegar.
Our local PTO has one fundraiser each year called Harvest Dinner. It is a traditional Thanksgiving meal, and the whole community chips in. This year I cooked three 22-pound turkeys and boned them out. That left me with the carcasses, which I promptly made into turkey stock the next day. I have two large chest freezers, and they are full (a blessing!). Anything that I can process and have it be shelf stable goes into my canner. I made 17 quarts of yummy stock. I love that I don’t have to plan ahead and thaw the stock. In fact, the cold months are my favorite time to can. The past two days I have cleaned out the soup bones from our last steer that we butchered. I made beef stock. It is wonderful to be able to simmer it all day, and then stick it outside overnight (in our teen temperatures) so I don’t have to worry about it heating up my fridge.
The Ball book says 20 minutes for pints, 25 for quarts for both beef and poultry!
I love making my own chicken broth. Since I make a lot of soups during the winter months, I usually use quite a bit of stock and I find homemade always tastes better. Thanks for sharing your method on Merry Monday. For mine, when I boil chicken to shred, I take that opportunity to flavor the water and make my broth.
I love making my own chicken broth too! I’ve always used a stock pot, but last time, I just used my slow cooker – it was really nice to just turn it on and forget it. I find it hard to keep enough around too – even when I freeze it. We tend to use it up pretty fast, then…time to make more! 🙂
Thank you for sharing with us at Wake Up Wednesday!
I’m not sure why you have trouble freezing in canning jars, but I do know that all canning jars are not created equal. When you buy jars you need to make sure the box says for home canning and freezing. I know that Ball has limited sizes and types that are good for freezing. The largest freezable Ball jar is the 16oz wide mouth jar. I have used the 16 oz wide mouth & 8 oz regular mouth jars in the freezer numerous times ; I have a chest freezer which means things get stacked and jostled around all the time, yet never had breakage.
I don’t really know how to tell the difference. However when you get new ones that are really freezer usable you can mark them some how with letters or different colors of nail polish that may not come off easy. I’ve marked a couple of the measurements on my blender that are hard to read this way seceral months ago and they haven’t wash off yet…
Gasp! You throw away your fat?! I freeze mine and use it in lieu of other fats like oil or butter for extra chicken flavor. I make chicken gravy by melting a tablespoon of chicken fat, adding a tablespoon of flour for a roux then a cup or more of chicken broth (depending on how thick the roux makes it). Just a thought.
found this on Merry Monday Linky
Great idea using empty Peanut butter jars for storage. I’ll have to remember to save mine next time.
Don’t know if you knew about this; but we also recycle all of our old cell phones. We drop them off at an AT&T phone center and they upcycle them and in turn are used by the men and women in the military.
The phones are put to good use and saves from having them in the landfill
Happy Halloween
Yuppers; easy peasy if a person just took the time. I make mine the same way but sure didn’t know about the vinegar thing. Thanks for the tip and will be adding that from now on. I do see some Chicken Noodle Soup in the future.
Also on septic system here which took some getting used to after moving to the country life from the Arlington city life. All my scraps I put in empty potato chip bag or cereal bag and stored in the freezer till trash day. Any throw-away liquids in put in empty butter or cook whip containers, frozen and then emptied into that scrap bag. The bag will break down in the land fill easier than plastic containers. All my plastic, glass, cans, plastic bags etc. is taken to Target and put in their recycling bins that they have inside the store; along with our old ink cartridges. Paper products are taken to the recycling paper/cardboard dumpsters that are located throughout Mansfield. Oops; sorry, kinda got off the chicken broth subject.
Enjoy your day and have a enjoyable and wonderful weekend.
I didn’t know Target stores had a whole recycling center in their stores. We don’t have a Target anywhere near us but we have recycling options in various places. A Brookshire’s grocery store in town has a place for plastic bottles and plastic bags. Almost all of our paper goes into the compost. RancherMan takes our metal to another recycling place in another nearby town when we gather enough of it to make it worth the trip. And our food waste is very small – some waste such as peels, seeds, etc. going into the compost but sometimes bones, etc. will be wrapped like you mentioned and placed in the trash. Thank goodness we don’t actually have much actual trash because we don’t have a trash pickup service – we take our tiny bathroom waste basket sized bag of trash with us when we fill up the car with gas & drop it in the trash receptacles there. ~TxH~
We love bone broth!! It’s one of the healthiest foods you can make and how easy it is and I also use about 3 T of apple cider vinegar. I DON’T remove the bones however. I turn our slow cooker on high the first day for about 4 hours, then I turn it back down and allow it to do it’s “thing” for another 2 days. On the second day I add some ginger or garlic , onions, celery, and carrots. I’ve noticed that my onions rings float to the top and burn in the fat that’s at the top so I’m not sure how to get around that issue unless I put the onions in whole so they sink to the bottom and stay there or just don’t put them in until a few hours prior to removing them. At the end of the 3 days, the bones have broken up and are VERY soft and the wonderful marrow is seeping out -for the bones that are still in one piece, I mash them with a fork and leave them in the broth (or eat them on the spot!) and also give them to my dogs who anxiously wait for them as they love the marrow and it’s great for them too! If anyone is doubting this – read some of the Dr. Weston Price material.