by Texas Homesteader ~
Serve that traditional meal at your family holiday gathering including a tender, juicy roasted turkey. But don’t be shackled to the kitchen jumbling messy greasy turkey-cooking pans instead of enjoying the holiday with your family!
Can you roast turkey beforehand and freeze? How long does it take to thaw a turkey? What temperature do you use to cook it? What seasonings do you use? How do you thaw and reheat?
All of these questions and more are answered here!
(Note: Some links in this post will take you to other related articles for further information. But links preceded with * are affiliate links. If you click and buy something I could receive a tiny commission.)
It’s wonderful to gather together around a festive table and enjoy the delights of the holiday season.
But I hate to spend my holidays shackled to the kitchen. There’s all the cooking as well as the massive cleanup required when roasting a turkey. I’d rather be enjoying the holiday with my family!
There’s a whole list of holiday cooking shortcuts, tips and recipes at the end of this post. I encourage you to check it out.
But now I want to share the most helpful kitchen hack of our holiday:
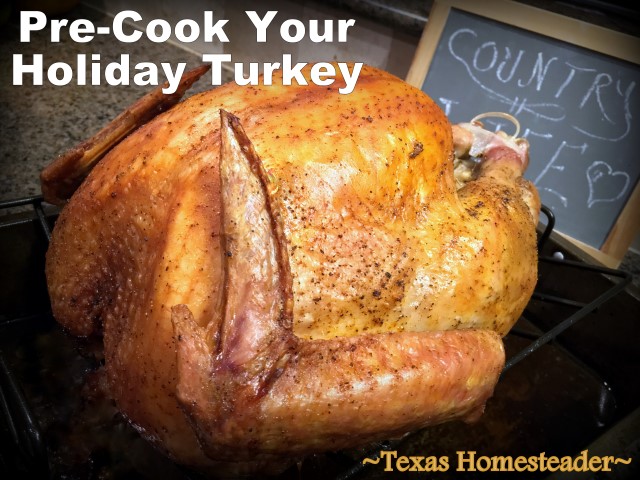
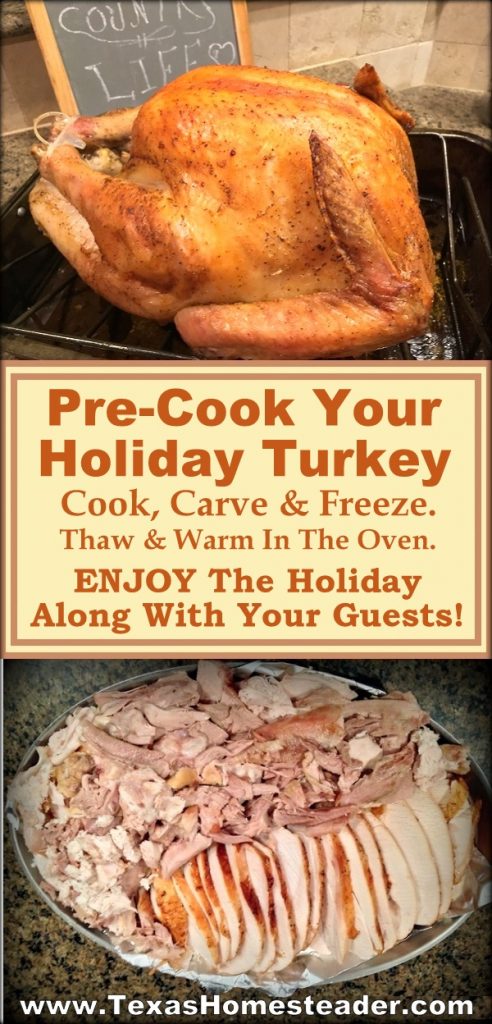
I pre-cook, carve & freeze the turkey in advance of our traditional family holidays.
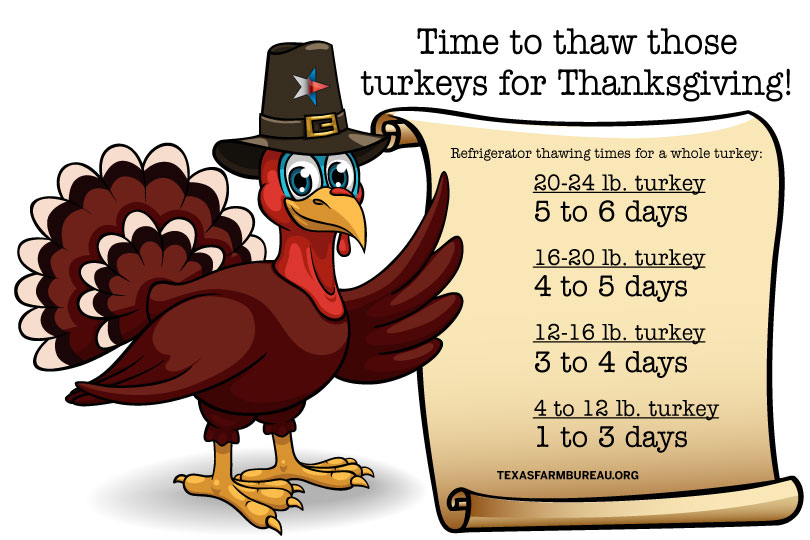
How Long Does It Take For Frozen Turkey To Thaw?
A frozen turkey should be thawed slowly in the refrigerator to keep it at a safe temperature. But it’s important to leave yourself enough time to safely thaw your frozen turkey.
Here’s a helpful graphic to decide how long you’ll need for your turkey to thaw.
My 15-lb turkey is thawed in the refrigerator for four days before it’s ready for cooking.
Preparing A Thawed Turkey For Roasting
After the turkey is thawed, remove the giblets from the inside cavity. I set them aside and use them when I make giblet gravy.
Trim any loose skin, rinse the turkey and allow it to drain. Some people blot the turkey with paper towels to remove excess surface moisture. But I use my roaster pan for this step. A short time air drying removes excess moisture for me paper free.
What Seasoning Do You Use For Turkey?
To season my turkey for roasting I first rub olive oil over the entire bird, both inside & out. Then I season the turkey with a mixture of:
2 Tablespoons garlic powder
2 teaspoons dried basil
1 teaspoon dried sage
1 teaspoon salt
½ teaspoon black pepper
A light dusting of paprika
Sometimes I place onions or celery in the turkey cavity. But more times than not I don’t bother with that and my turkey always turns out delicious.
Do You Really Need Turkey-Roasting Bags?
In past years I purchased roasting bags for my turkey. I thought that was the only way to avoid a dry turkey.
But I was delighted to discover a roasting bag wasn’t needed for a delightfully-roasted turkey that’s both moist & delicious.
Well ok then, buh-bye turkey bags!
Why Does Turkey Meat Turn Out Dry?
We’ve all suffered through dry turkey that needed boatloads of gravy just to choke it down. Why does cooked turkey turn out dry?
In my experience the secret to moist turkey is cooking the meat to a safe temperature without overcooking it.
Overcooking is what usually dries out the meat.
To enjoy a moist turkey make sure it’s cooked to perfection but no longer than absolutely necessary. Any meat thermometer will work.
How To Roast A Turkey
After the turkey is rinsed, drained, oiled & seasoned, place the turkey breast-side up in a *turkey roasting rack. This elevates the turkey for even cooking and holds it out of the resulting grease.
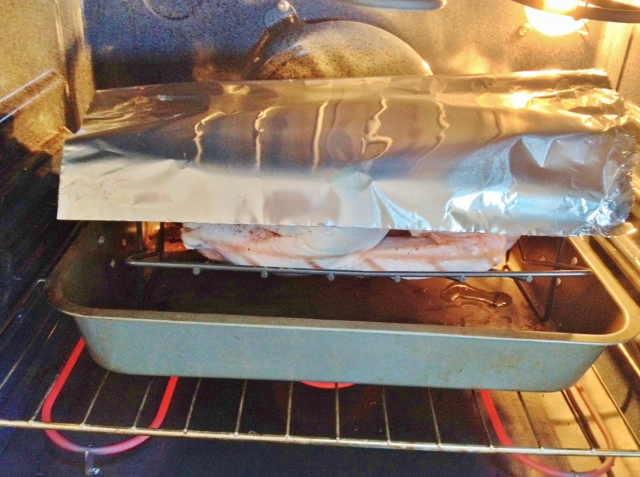
I wrap a bit of foil around the end of the legs since they cook faster. Then I tent foil over the bird and place the pan in the oven.
The general rule of thumb for roasting a turkey is about 15 minutes per lb based on the lowest recommended temperature of a 325ºF oven & fully thawed bird. Use a meat thermometer to test the turkey’s internal cooked temperature.
Using A Two-Step Roasting Method For Turkey:
I don’t roast at the lowest recommended temperature of 325ºF. Instead I use a two-step roasting method; a lower temperature in the beginning, then raising the temperature to finish.
During my roasting time I don’t baste the turkey since keeping the oven door closed helps maintain even roasting temperatures.
For my thawed, oiled, seasoned and foil-tented 15-pound turkey:
Tent with foil & roast @ 350ºF for 2 hours.
Remove foil tent, then roast @ 425ºF for 30-45 minutes, or until internal temperatures reach safe temperatures when checked with meat thermometer.
By roasting to the correct temperature you have a moist turkey that’s safely cooked yet not overcooked and dry. Food safety is important!
NOTE: Allow roasted turkey to rest 15 to 20 minutes BEFORE carving. This helps keep juices inside the turkey meat.
What Is The Safe Cooked Temperature Of Turkey?
It’s important to cook your turkey to a safe internal temperature. But for a juicy bird it’s also important not to overcook it!
Roast turkey until a meat thermometer placed in the thickest part of the thigh (not touching the bone) reaches a temperature of 165ºF.
Some say 170ºF degrees is better. But I’ve found the temps continue to rise a bit after the turkey is removed from the oven. So I strive for 165ºF
Pop Up Thermometers In Turkey, Do They Work?
Many turkeys come with convenient pop-up thermometers. The premise is when it pops up, the turkey is done.
But I’ve found those little pop-up thingies are not an accurate gauge for the internal cooked temps so I don’t rely on them. Instead I use a meat thermometer for safety. There are many options:
-
- *Instant Read Thermometer – Fast & instant results but you need to open the oven door to check.
- *Wired Digital Thermometer – Probe wired to external display – No need to open oven door.
- *Meater Wireless Meat Probe. – Track internal temperatures from app on your phone – no need to open oven door.
Carving And Freezing A Turkey
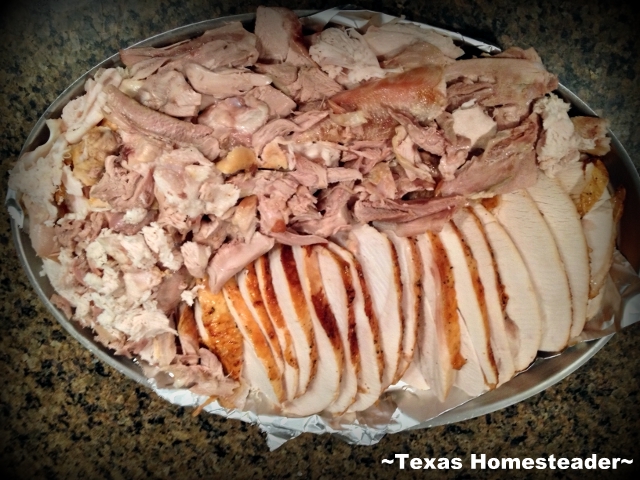
After the turkey has roasted & rested I’ll carve the meat and prepare it for freezing.
I use a large metal broiling pan lined with foil. The carved meat is layered on top of the foil.
When the meat is carved & layered I add a cup of broth, top it all with more foil & seal it tightly. Finally I place the pan in the freezer.
Of course I turn the turkey bones into healthy homemade turkey broth. Nothing on this bird is wasted.
But again, that’s all done BEFORE the holiday! No more cramming a turkey carcass into an already-crammed fridge of leftovers.
How To Thaw Frozen Cooked Turkey
A couple of days before the holiday I pull the pan of cooked & sliced turkey out of the freezer and allow it to thaw slowly in the fridge.
On the big day I just pop the thawed pan of sliced turkey into the oven set to 200ºF to allow it to slowly warm.
(You can bump the temps up a bit if you’re in a hurry. Just make sure you don’t bump them high enough to basically re-cook and therefore dry out your turkey!)
Tips To Make Frozen Turkey Taste Freshly Roasted
My pre-roasted, carved, frozen, thawed and heated turkey has never tasted other than freshly roasted.
There are several ways I make sure my turkey tastes freshly-roasted on the big day.
MOST IMPORTANT – to keep pre-cooked turkey tasting freshly roasted, don’t over-cook!
It’s easy to overcook a turkey. A meat thermometer is pivotal in getting the correct internal temps without overcooking and drying out your turkey.
Other tips for keeping my previously roasted, carved and frozen turkey tasting freshly roasted:
Broth Added To Carved Meat Before Freezing: I add a cup of broth to the platter of carved meat before sealing it up for the freezer. That will add moisture as it’s slowly reheated.
Seal Carved Meat Tightly: – Seal tightly with foil before freezing. Remove as much air as possible to keep freezer-burn away.
Reheat On Low Heat: Only heat the thawed meat covered & on low so as not to basically cook it again (thereby drying it out as you’re heating it up.)
Other Traditional Family Holiday Foods
Among other favorites for our Thanksgiving there are a few family favorites:
-
-
Homemade Green Bean Casserole,
-
Garlic Sage Rice,
-
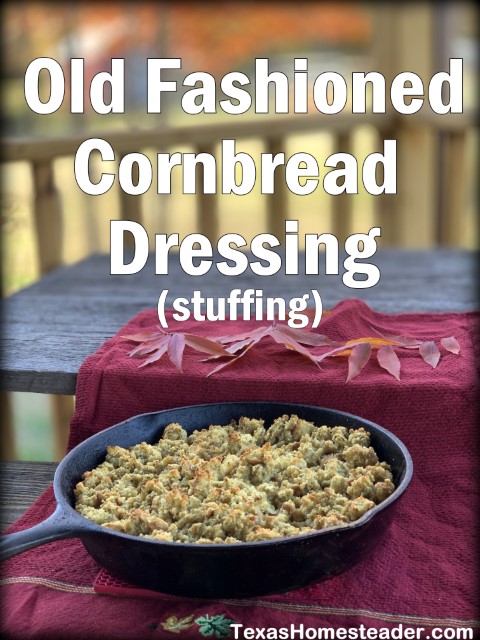
Southern Cornbread Dressing and gravy
-
-
Cherry Shtuff No-Cook Dessert
-
And of Course The Star Of The Show: Roasted Turkey!
~TxH~
Want More Holiday Cooking Tips & Recipes?
MEAT
- Holiday Cooking Shortcuts & Tips
- Enjoy The Holiday – Pre-Cook The Turkey
- How To Spatchcock & Smoke A Whole Turkey With Pecan Wood
- Instant Pot Roast & Brown Gravy
- Homemade Tamales!
SIDE DISHES
- RancherMan’s Green Bean Casserole Recipe
- Old Fashioned Southern Cornbread Dressing
- Quick & Easy Roasted Vegetables
- Zesty Ranch-Style Beans
- Rosemary Rice
- Crispy Southwest Egg Rolls
DESSERTS
- No-Cook Cherry Dessert
- MYO Cherry Pie Filling Quickly
- Apple Pie With Home-Canned Apples
- Easy Instant Pot Cheesecake
- Pumpkin Bread (with Cake Mix Shortcut)
- Honey-Sweetened Whipped Cream
- Double Pie Crust Recipe
BREAD
INGREDIENTS
- MYO Sweetened Condensed Milk
- MYO Broth Easily!
- Easy Cream-Of-ANYTHING Soup Recipe
- Easier Peeling For Boiled Eggs
- How To Tell If Your Baking Powder Is Still Good
FOOD SAFETY
- What Do The Dates On The Food Labels Mean?
- Keeping Hot Dishes HOT In Transit
- Keeping Food Safely COLD
C’mon by & sit a spell! Come hang out at our Facebook Page. It’s like sitting in a front porch rocker with a glass of cold iced tea. There are lots of good folks sharing! And you can also follow along on Pinterest, on Instagram and on Twitter
If you’d like to receive an email when a new blog post goes live, subscribe to our Blog!
References:





It’s fun to read about other folks’ holiday traditions. Gone are the days when we would have the BIGGEST turkey we could buy, roast it whole and stuffed – hence dryish white meat – ick. When I still did the entire turkey “thing” I also had to have a large prime rib roast as well. I did eventually stop doing the prime rib and did begin spatch-cocking the bird. The last few years that I “did” a turkey I cut it up. Legs and thighs went in the oven followed later by breast. They were on top of the “stuffing” mix. Gizzards, neck and tail went into a pan on the evening before the big dinner, to simmer overnight for gravy, some of that juice went on the “stuffing” which was then covered until shortly before time to pop it in the oven to warm up. This year the birdman who lives with me and I had stuffed crust pizza for our TG dinner – So much easier and we even had some left overs!!!
We’ve done this and love having a more relaxed holiday! The other thing we started doing is spatchcocking the turkey (or whole chickens) so it cooks faster and more evenly. That’s been a game changer for us! We also like to brine whole birds and have fun playing with different brining ingredients. I used to buy the expensive Butterball turkeys, but since we started brining, the cheap turkeys taste even better than the expensive ones. No matter how the meal is prepared, I hope everyone has a very happy healthy Thanksgiving and holiday season this year!
No Christmas cooking for me this year as we’re invited out. With 46 years of marriage, this is the first time that I won’t be spending my time in the kitchen :}
Wishing you and your family along with everyone else here a Very Merry Christmas
(will be dealing with roofers starting today.) With all the hammering that will be going on it’s a good thing I have good supply of Advil :}
How long does it take to warm your precooked bird. I ususally do a 20 lb. turkey and am curious about this idea. Thanks.
My bird was smaller than 20 lbs geni, but as long as your previously-frozen, cooked, sliced turkey is completely thawed in the refrigerator, your dish is tightly covered in foil and you warm it slowly your turkey should stay moist. When I froze mine I ladled some of the juices into the foil-lined pan to give it a little extra moisture while reheating too. I’m guessing for your cooked 20-lb turkey that warming around 45 minutes at 200 – 250 degrees might do the trick? Can anyone out there offer any estimated warming time for geni? ~TxH~
What a great idea. We aren’t that keen on turkey, but we pre-smoked our pork the day before and the beef overnight so all we had to do was slice it just before everyone arrived. Everything went so much smoother to be able to just put it out ready to go. Thanks for sharing this at Good Morning Mondays. Blessings
Great instructions. I am pinning this to come back to next week! Thanks!
I totally agree with you. The holidays are meant to be spent with family and friends, not cooking in the kitchen, but I look forward to the good food along with the good company, so I do a lot of prep the day before. I cook the turkey the day before as well as sweet potatoes for a casserole. I prepare bread cubes for stuffing; leaving the cubed bread on the counter overnight adds to the dryness. Celery and onions get chopped and stored in the frig in an airtight container. Eggs are boiled and peeled for deviled eggs.
One day Mom and I were looking through all of her 60 years worth of family photos and the comment was made that most of our happiest memories center around the kitchen table 🙂
I did this one year and was looking forward to some extra time. And them a good friend called & said her oven broke–could she cook at my house? We lived only a few miles away–doable, but it would be very hectic. So, I gave her my precooked and she warmed it in her toaster oven. And she gave me her raw turkey that I cooked. So much for my easy breezy day. These days our daughter-in-law does the main cooking/hosting.
Been there and have done that and makes day of family gathering so much easier; before, during and after and able to enjoy that extra glass of wine with your guests. :}
I do put my sliced meat in a roasting pan and add a little chicken stock in the pan just to keep the meat nice and moist and cover tightly with heavy duty foil.
My mashed potatoes I even do a day or 2 ahead of time. After you boil, drain and mash your potatoes (around 5 lbs.) In a large bowl, mix mashed potatoes, with 2 – (3 oz.) cream cheese, 8 oz.sour cream, 1/2 c. milk, onion salt, and pepper. Transfer to a large casserole dish.
Cover, and bake for 50 minutes in the preheated 325 deg.oven.