by Texas Homesteader ~
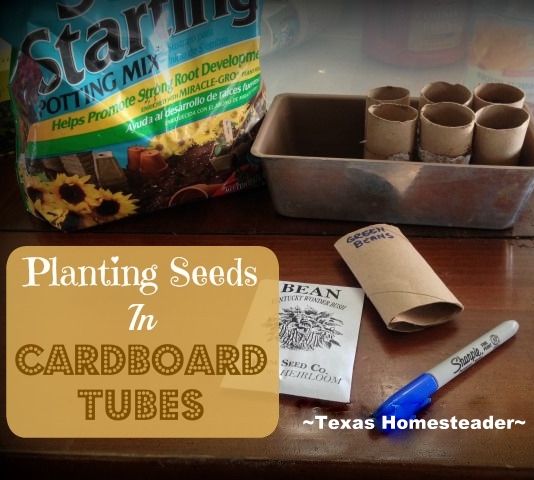
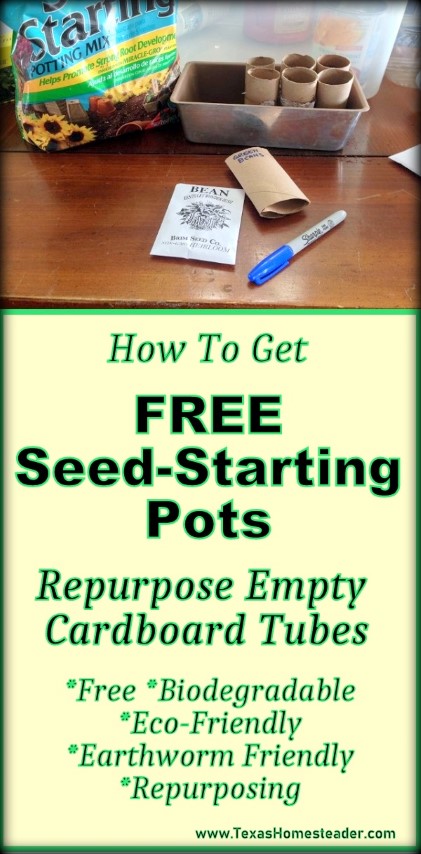
Zero-waste seed starting pots using repurposed cardboard. Just plant seeds in repurposed cardboard tubes and when you’re ready to plant the seedlings you can transfer them – cardboard tube & all – right into the garden! The cardboard will decompose and enrich the soil too.
(Note: Some links in this post will take you to other related articles for further information. But links preceded with * are affiliate links. If you click and buy something I could receive a tiny commission.)
Repurposed Containers For Starting Seeds
Over the years I’ve used various containers for starting seeds, including repurposed plastic yogurt cups & such. I really loved those little biodegradable pots you can drop into the soil – pot, plant and all. How convenient!
But I didn’t want to buy them, I wanted a free version. So I’ve started planting my seeds in repurposed cardboard toilet paper rolls. They’re biodegradable, the earthworms love the paper when it’s in the garden, and they’re absolutely FREE!
When it’s time to put my precious seedlings into the garden that the whole shootin’ match – cardboard tube & all – can be placed in the soil!
The cardboard will simply decompose and further enrich the soil. I like that!
Planning A Spring Vegetable Garden
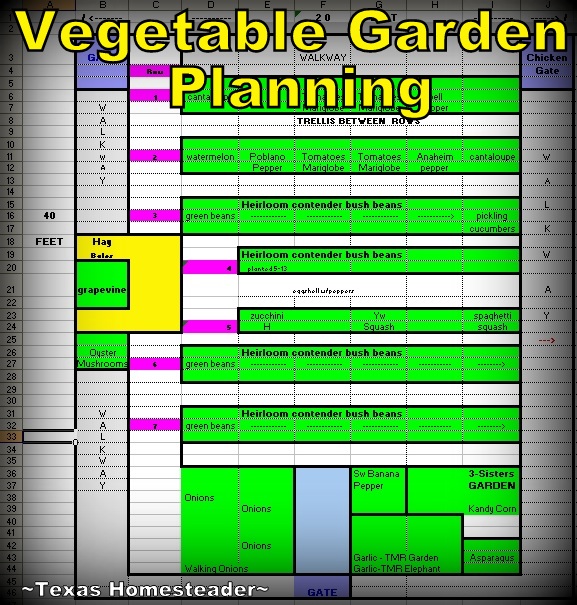
Spring is almost here!! I’d already formatted an excel spreadsheet with my garden’s layout to decide what to plant in the garden each year.
NOTE: The photo above is an example of my own garden’s layout. Your garden layout will be different but this photo shows what mine looks like. For your own garden you can use a *Garden Planner Notebook or maybe some sort of*Downloadable Garden Planner . And I’ve heard good things about Clyde’s Garden Planner too. (I’m not personally familiar with these products, just offering something to get your search started.)
I use my spreadsheet as my annual garden planner and it helps me keep track of what I’ve planted where each year, what grew well and what didn’t – even what seeds I have in my seed stash.
This helps me more easily rotate my plantings, pair beneficial plants together and keep plants that don’t play nicely together far apart.
Starting Vegetable Plants Inside
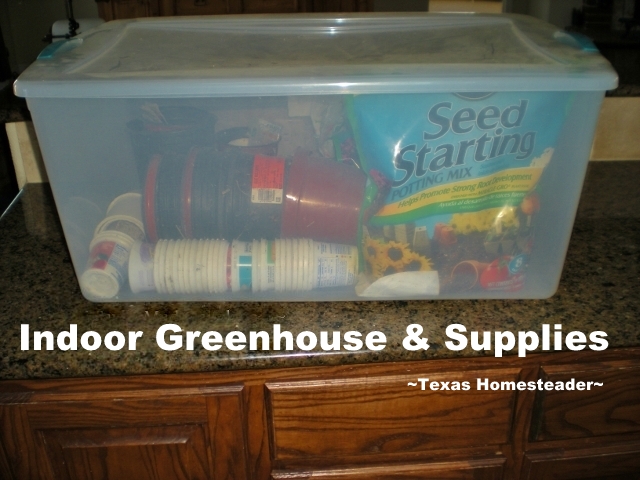
I use an indoor greenhouse system so I’ll have actual heirloom seedlings to drop in the ground around Easter (we’re in planting zone 8 here in NE Texas). It’s simply a clear, lidded tub. And it keeps the environment moist for easier germination.
But now it’s time to plant those seeds!
Saving Cardboard Tubes
These days instead of repurposed yogurt containers I’m planting those seeds in biodegradable pots. (ie: empty cardboard rolls)
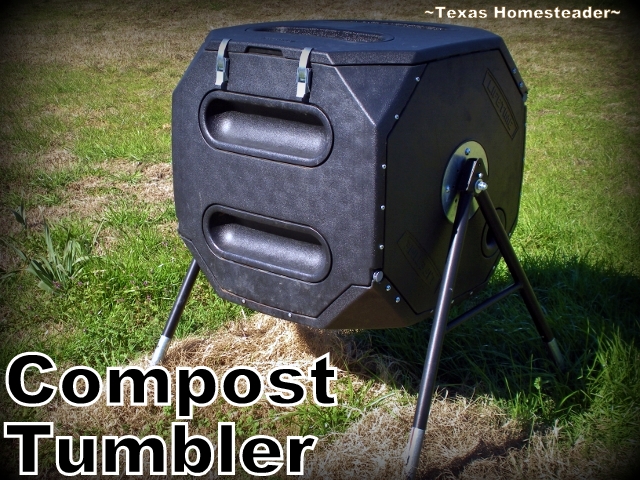
I used to just toss the empty cardboard toilet paper tubes into my *tumbling composter. The cardboard at least helped supply much-needed carbon material for my Homemade Compost. (DANG I love my composter!)
But now I save those empty toilet paper rolls for an even better repurpose – FREE seed-planting pots.
When a toilet paper roll is emptied I simply mash it flat so it doesn’t take up much room as I accumulate them over several months.
Making Cardboard Tubes Into Biodegradable Plant Pots
I’d been saving my toilet paper rolls for a while in preparation for seed planting. At last it’s finally time to put them all to good use.
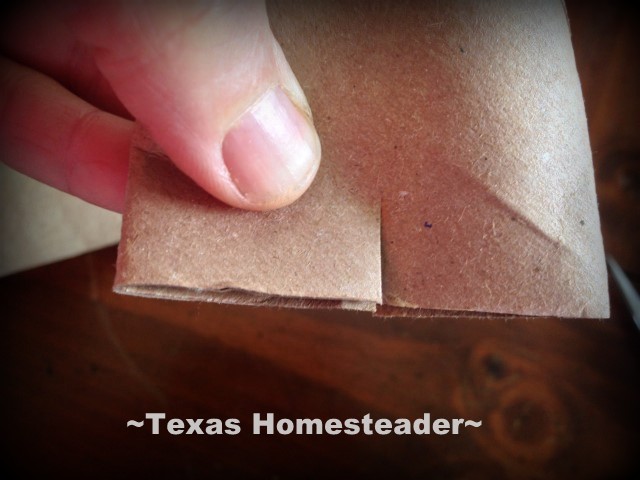
I bring out my saved flattened rolls and a sturdy pair of scissors. Then I cut about a 3/4 inch slit into the bottom of each cardboard roll.
I flattened the tube the other way so that the slits are now on the sides instead of the middle and cut another 3/4 inch in the center of the bottom edge of the tube. This results in four short evenly-spaced slits cut in the bottom edge of each tube.
While the cardboard tubes are flattened out I’ll take a permanent marker and write on each tube what kind of seed I’ll be planting in them.
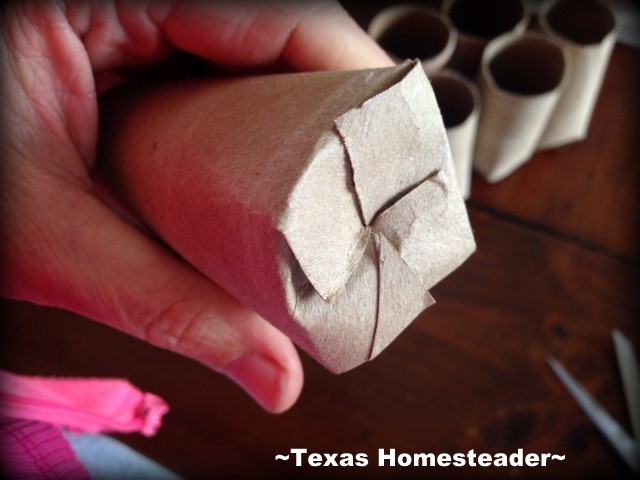
I want a squared-off bottom for my planting pots. So I just went around and folded each quarter section tab down tucking the last section underneath the first.
There, I’ve made a planting pot with a closed, boxed bottom. EASY!
Planting Seeds In Cardboard Tube Biodegradable Pots
Now let’s plant some seeds! I take my seed-starting mix and fill my new planting tube about 3/4 of the way, pressing firmly to pack it in well.
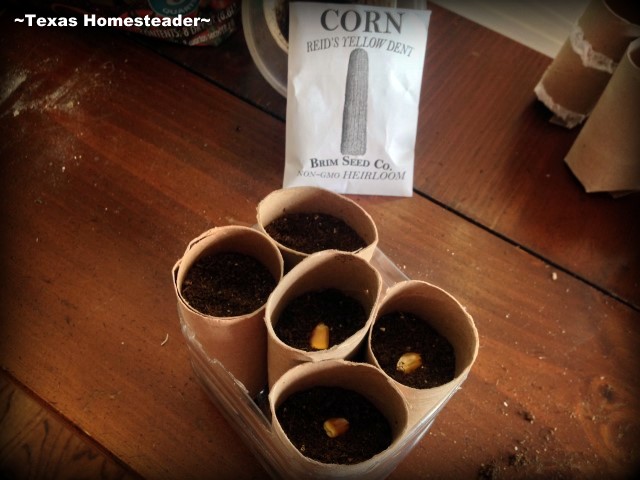
When all is ready, all that’s left to do is to add a seed and top with just enough soil to cover the seed. I use my fingertips to gently press everything snugly.
But I figured once I watered these tubes, the rolled cardboard might start to unravel with the moisture. So before that first watering I packed my planted tubes into various containers such as the bottom cut from a juice bottle, an old metal loaf pan and the like.
This keeps everything nicely contained. PLUS I can basically pour water into the holding container and allow the moisture to be wicked up through the bottom of my little homemade seed pots.
It will help keep the tiny seeds in place as they’re more gently watered through wicking, unlike water splashing down on top of them.
Moist Environment Setup For Seed Sprouting
Now that all those seed pots are planted and watered I placed them inside my Indoor Greenhouse. There they’ll have the moist environment they love to sprout quickly.
The clear tote holding my seeds are placed in front of a southern-facing window so they’ll get the most sunlight.
The waiting is always the hardest part, huh? Am I the only one that checks the newly-planted seeds on the VERY NEXT DAY to see if there’s been any development??
No I’m not impatient, YOU’RE impatient! LOL
But in no time I’m seeing many heirloom veggie seeds sprouting! It won’t be long before I’ll be hardening off seedlings in preparation for their productive season in the vegetable garden outside.
Planting Seedlings In Cardboard Pots In The Garden
When it’s finally time to plant my seedlings in the garden I’ll be able to drop the heirloom seedling – tube and all – into the soil.
By repurposing these cardboard tubes I’ve used something that used to be trash and repurposed it into something that’s very beneficial both to my gardening budget as well as those wonderful earthworms after it’s planted.
Y’all know my battle cry – #UseWhatchaGot. Gotta LOVE IT!
~TxH~
My Favorite Garden Hacks
Garden Planning
Seed Planting
- Planting Seeds In A Milk-Jug Greenhouse
- Planting An Indoor Greenhouse
- Repurposed Cardboard Seed-Starting Pots
Soil Health
- Easy Compost For A Healthy Garden
- How Leaves Benefit Your Garden
- Using Manure In Your Compost & Garden
Garden Styles
- 3-Sister’s Garden – The Original Companion Planting
- Planting A Large Galvanized Trough
- Where I Found The BEST Raised Bed!
- Planting A Blueberry Bush In Rustic Galvanized Tub
Garden Plants/Harvest
- Stevia – Growing Your Own Sweetener!
- My Simple, Zero-Waste Herb Drying Setup
- The Lazy Gardener’s Plant List – Plant Once, Eat For Years!
- How To Tell When Watermelon Is Ripe
- Luffa A Surprising Zucchini Substitute!
- How To Plant & Grow The Best Tomatoes
Water/Irrigation/Drought
- Keeping Potted Plants Watered
- Repurposing A Coffee Can For Deep-Soak Watering
- 3 Rainwater Collection Systems We Use
- Cheap (or FREE) Wood Mulch For The Garden
- Using Vining Plants For Living Mulch
- Surprising Use For Empty Clay Pots In The Garden
Weed Control
Garden Tips
- How To Save Outdoor Plants Even During A Hard Freeze
- Tricking Birds AWAY From Your Strawberry Plants
- Protecting Tender Seedlings From Wind
- Homestead Hack: Remember Where You Planted Seeds
- How I Use EcoBricks In The Garden
MORE Gardening Posts
References:
Find Your 2023 Updated USDA Plant Hardiness Zone
Texas Master Gardener’s Companion Planting – Plant Friend & Foe
C’mon by & sit a spell! Come hang out at our Facebook Page. It’s like sitting in a front porch rocker with a glass of cold iced tea – lots of good folks sharing! You can also follow along on Pinterest, Twitter or Instagram.
If you’d like to receive an email each time a new blog post goes live it’s EASY to
Subscribe to our blog!



I’m glad you’re using toilet paper rolls this year. I think you will love them! We’ve been doing that for about 7 years now, and I’ve always had the best luck with them! I’ve got my garden planned, my seeds and soil ready, and several hundred ‘seed pots’ built and ready to go. That’s on my to-do list for the weekend. I will be using YOUR idea of clear totes for the first time! Do you ever stack them, in front of a sunny window? Our guest bedroom faces south and has a big sunny window.
I’ve used cardboard rolls for a few years now Christine, but noticed last year I had some trouble with damping off disease. Maybe because the cardboard soaks up the moisture & holds on to it? The damping off was rectified by opening up the top of my ‘indoor greenhouse’ when I felt the humidity got a little too high. I’m also hearing sprinkling cinnamon on the tops of your plantings works too, so I may try that as well. Do you have any tips for damping-off disease? In any event, because you may need to dry out the humidity inside the boxes from time to time, make sure you can unstack them & crack the top when you need, but I don’t see any reason you can’t stack 2. ~TxH~
Another great Repurpose Tammy,
Small things like this add up to good things for the future.
Posting this on Discover Repurposing.
Thanks again for your creativity.
Greg
I’m making my seed starters form different materials already and these cardboard tubes are a good idea too. I’m usually using old newspapers or egg cartons and often forget how easy and fast is to turn these tubes into starters. Thank you for sharing this great info and happy gardening!
I love learning of new ways to start seeds. I really like this idea. So inexpensive and you get to reuse what you already have. Great idea!
I know Renee, RIGHT??! I’m so excited to get in the garden & plant my seedling in the soil – tube & all! ~TxH~
Of all the seed-starting ideas, I really like this one. Can’t wait to try it! Keep us updated.
I’ve used portions of cardboard tubes to protect my seed planted directly in the soil from cutworms. Can’t swear it works, but whatever I can do to help my seedlings survive is worth a try. – Margy
That is such a cool idea! I love how you can put the whole tube into the ground! Much better than yogurt containers!
We have done this too and I love that you can place the WHOLE tube into the soil!!! No need to accidentally dismember the plant when you are transplanting it! 🙂
As always, thank you for sharing at the Art of Home-Making Mondays! I love your ideas!
Yea! I can’t wait to drop ’em in the ground JES! ~TxH~
I’m looking forward to your updates on the cardboard tubes. Holy cats- using stale ice cream cones is genius!
So far they’re working great Laurinda – I have lots of sprouting plants going on in my indoor greenhouse. I. Can’t. WAIT! ~TxH~
Cardboard tubes work Great for seed planting. Can also use newspaper if folded just right. I have used those rotisserie chicken containers as a mini greenhouse and believe it or not ice cream cones (the round bottom ones, not the sugar cones) Using the ice cream cones started when I had part of a box that went stale so instead of throwing them out, I saved them till it was seed starting time and planted my little seeds in them cones.
I’ve heard of making little newspaper pots too Colleen, but never thought about other planting containers such as your ice cream cones. You know my battle cry: “Use WhatCha Got!” 🙂 ~TxH~