by Texas Homesteader ~
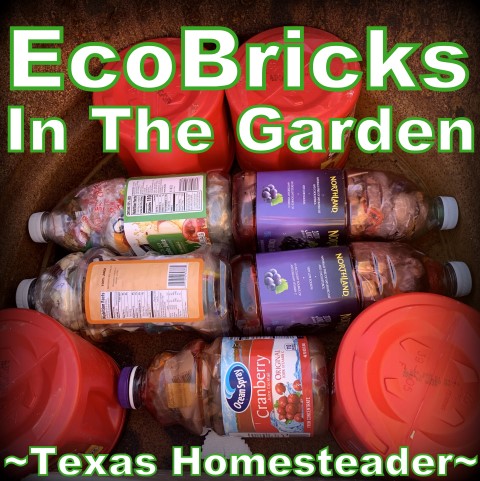
EcoBricks are plastic bottles packed tightly with non-recyclable trash. It’s an easy way to sequester plastic and keep it out of the environment. But come see how I use EcoBricks in my raised beds in the garden.
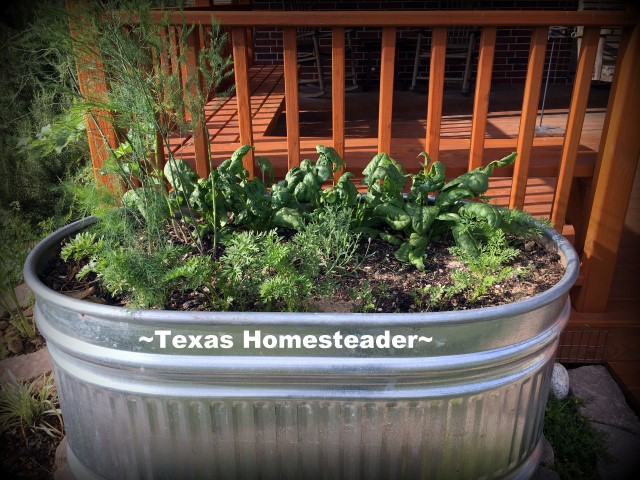
Galvanized Trough For Raised Bed Garden
Several months ago I found a very used 100-gallon galvanized trough at our metal recycling place. It had interior rust, a few small holes & was missing the plug. So it obviously wasn’t being used to water livestock anymore.
But it would be perfect for my vegetable garden. I’d love to fill it with soil and veggie plants. Plus I love the look – seems I’m obsessed with galvanized metal, y’all!
And a raised bed should also certainly ease harvest in this section of my vegetable garden. I’m not getting any younger, ya know! I’m constantly looking for ways to simplify my garden tasks.
So I asked if they’d sell it to me. And for $10 it was all mine! But to plant this huge 100-gallon trough will take lots of soil. Plus I first needed to put something at the bottom to allow for drainage.
In a potted plant you can add broken pieces of pottery and such for drainage. But I needed something much larger & chunkier for this much space. I decided to make up a few ‘ecobricks’.
What Are EcoBricks?
I’d first heard of ecobricks a couple of years ago and I was intrigued. The premise is that you take an empty clean, dry plastic bottle of some sort and start packing non-recyclable, non-biological trash into it.
I’d think any plastic bottle would work – water bottles, juice bottles, etc. You then keep the material compacted by using a small rod of some sort to pack it tightly each time you add more & more non-recyclable trash to it. I’ll tell ya, that bottle actually holds quite a bit!
The benefit of compacting this non-recyclable trash in a bottle is that it captures small pieces of landfill-bound trash and corrals it into a more stable form. If it’s filled correctly & compacted tightly enough, some supposedly even use ecobricks to actually build with!
According to the EcoBrick site:
Ecobricks can also be packed with other non-biological un-recyclables that, uncontained, are toxic to the environment (i.e. styrofoam, wires, small batteries, etc.). Ecobricks are used to make modular furniture, garden spaces, walls and even full-scale buildings.
There are even collection places where you can drop them off, provided they’ve been filled & packed correctly. (I’ve included a link to EcoBricks’ information site at the bottom of this article.)
But as for me, I’ll be using my ecobricks a little closer to home, as is their typical recommendation. I’ll add them to this large 100-gallon trough to both reduce the amount of soil required to fill it as well as supply proper drainage.
Building My EcoBricks
I’ve heard you have to be careful to add only dry matter to your EcoBricks. Moisture of any kind in your sealed ecobricks apparently can cause problems down the road.
And I’ve also read you don’t want to add anything that will deteriorate such as plant material, items soiled with food, etc.
So into my ecobricks I placed things like clean/dry plastic caps from milk jugs, small plastic wrappings from various purchases, cracker sleeves, candy wrappers, thermal-paper receipts, etc.
Every time I found myself about to place trash into our tiny waste basket I’d pause and consider if it was appropriate for my ecobrick instead.
The large juice bottles I was using for my ecobricks were placed right next to my waste basket so it was an easy switch to make at the spur of the moment.
Tight compaction is imperative if these ecobricks are to be used for building. But since I wasn’t using my eco bricks for building materials, I didn’t necessarily need them to be packed tight enough to be load bearing.
So although I packed the ecobricks as tightly as possible, I didn’t worry too much about perfection. I simply pushed everything down as tightly as I could as I added more & more.
When nothing further would fit inside the bottle, I sealed it with its cap and set it aside. Then I got another bottle which had been cleaned & dried and started over to make my next ecobrick.
Using EcoBricks To Add Drainage To Large Planters
RancherMan & I don’t produce much in the way of trash here on the Homestead. So even though I started making ecobricks months ago, I was only able to produce about 5-6 ecobricks before it was time to set up my trough.
But now that I’m filling my trough planter it’s time to finally put them to good use. I placed the ecobricks I’d made in the bottom of the trough. I also filled in some of the trough’s bottom with repurposed coffee canisters which had been packed tightly with net-wrap from bales of hay we’d fed the cattle.
Filling My 100-Gallon Planting Trough
Now that I had my drainage inserted I needed to fill my trough. But I sure can’t afford to buy enough planting dirt to fill an entire 100-gallon trough!
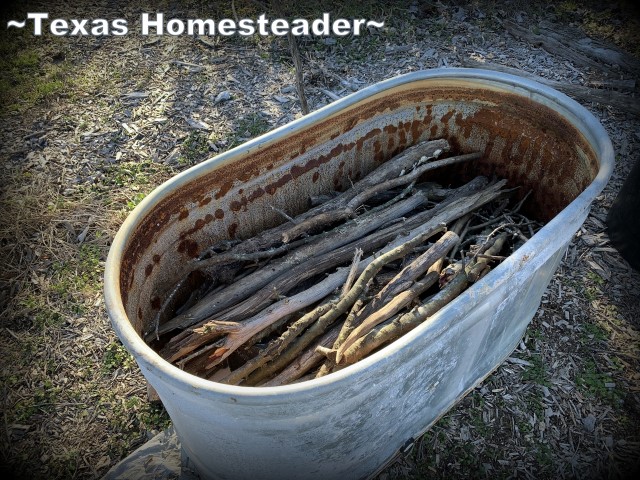
So to help, I took a page from the hugelkultur theory. I placed tree trimmings in the trough on top of my eco bricks. Bulkier, thicker limbs were placed first, then thinner branches on top.
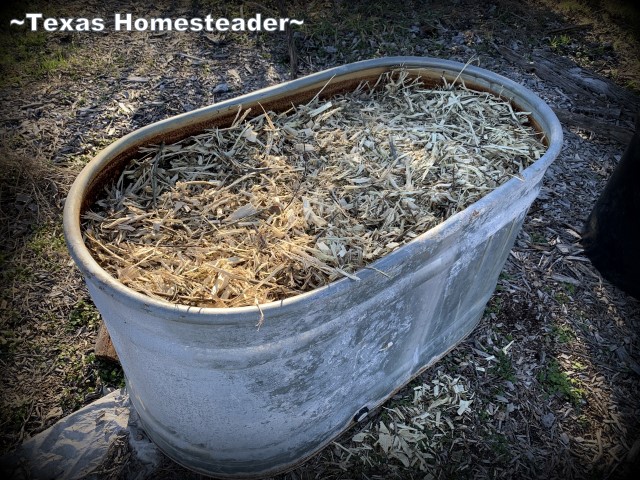
But still I need more material in my trough. So to fill it the rest of the way up, RancherMan & I picked up Free Bark Mulch from our county. I filled the trough to about 2/3 of the way to the top using this free all-natural material.
Of course I’ve read that fresh botanical material can steal nitrogen as it breaks down. This could take that precious nitrogen away from your plants and hamper their vitality. So to combat this, my trough was prepared several months before actual planting.
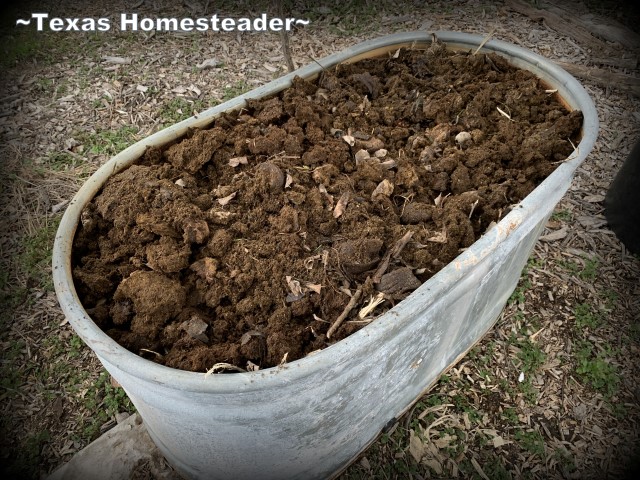
On top of the wood chips I used another natural material I have available to me – manure. I topped all the wood chips with a thick layer of manure.
Although planting in manure that hasn’t had a chance to break down can burn your plants, I won’t be planting for a while yet. It should be aged well enough by the time I actually plant this trough. The rain will settle all of this material in over time.
Finally I top everything with topsoil. I added compost & worm casting and mixed everything as well as I could.
Now I assume this first year of planting might not produce the most abundant harvest. But each subsequent year will just improve the soil in this trough.
Planting My Large Trough
When it’s finally time to plant I’ll simply dig a furrow on top and mix more finished compost and planting soil into the furrow before planting my veggies.
I know that over the years I’ll probably need to top the soil level in this trough as the branches below the surface continue to break down. But I’m excited to see how this all plays out!
~TxH~
My Favorite Garden Hacks
- Easy Garden Planning Spreadsheet
- Getting A Jump: Planting An Indoor Greenhouse
- Repurposed Cardboard Seed-Starting Pots
- 3-Sister’s Garden – The Original Companion Planting
- Planting A Large Galvanized Trough
- Tricking Birds AWAY From Your Strawberry Plants
- Easy Compost For A Healthy Garden
- Propping Tender Seedlings
- Cheap (or FREE) Wood Mulch For The Garden
- Using Vining Plants For Living Mulch
- Homestead Hack: Remember Where You Planted Seeds
- Keeping Potted Plants Watered
- Planting A Blueberry Bush In Galvanized Tub
- Stevia – Growing Your Own Sweetener!
- How I Use EcoBricks In The Garden
- Repurposing A Coffee Can For Deep-Soak Watering
- How Leaves Benefit Your Garden
- My Simple, Zero-Waste Herb Drying Setup
- The Lazy Gardener’s Plant List – Plant Once, Eat For Years!
- How To Tell When Watermelon Is Ripe
- Luffa A Surprising Zucchini Substitute!
- How To Make Your Own Garden Soil
- Easy Homemade Seed Tape
MORE Gardening Posts
C’mon by & sit a spell! Come hang out at our Facebook Page. It’s like sitting in a front porch rocker with a glass of cold iced tea – lots of good folks sharing! You can also follow along on Pinterest, Twitter or Instagram.
If you’d like to receive an email each time a new blog post goes live it’s EASY to
Subscribe to our blog!
References:



Very interesting never heard of Ecobricks. We were talking this morning out at 8NA about me putting a trough in front of the tiny house for my herbs once we move out there full time. Love this as I agree it would cost a fortune to fill it with soil. As we are out and about we’ll keep an eye out for another trough to re-purpose. 🙂
Angela
The ecobricks certainly took up some of the filling room in the trough, I just wish I’d been able to make more before it was time to fill it. If you have a place to store them, I’d recommend starting your ecobricks sooner than I did. It’s surprising how much they actually hold so it can take longer than you think to build each of your ecobricks. Be sure to fill them as tightly as you can so they hold up under the weight of all that soil. ~TxH~