
by Texas Homesteader ~
I like to use heirloom seeds for my veggie garden. But I still want to have seedling plants to actually place in the soil in the spring. What’s an enterprising country gal to do?
I bring out my “indoor greenhouse kit“. This kit is contains everything I need to get a jump start on the growing season… INSIDE!

(Note: Some links in this post will take you to other related articles for further information. But links preceded with * are affiliate links. If you click and buy something I could receive a tiny commission.)
Materials Needed To Make An Indoor Greenhouse Kit
The materials needed to make my own little indoor greenhouse setup are simple:
A large lidded clear plastic tote
Planting pots, whether biodegradable cardboard tubes or repurposed yogurt cups with holes punched in them for proper drainage.
Plant markers
Seed-starting potting mix
Everything I need! And of course I already have my heirloom seeds stored safely in the fridge.
The tote itself is magically transformed into my indoor greenhouse. When it’s time to plant my seeds the entire greenhouse-in-a-box comes down from the attic.

How convenient that it’s all self contained inside this one large tote!
Using Repurposed Cardboard Tubes
Sometimes I’m reusing small yogurt pots over & over again for planting. But oftentimes nowadays I’ll turn empty cardboard tubes into biodegradable planting pots.

I can even write the seed type right on the cardboard. That way when it’s time to plant I can just make a little cut in the earth with my garden spade and slide the whole cardboard pot into the soil.
EASY! Plus, it’s less trauma on the tender little roots when placing them in the garden. And the earthworms will love the cardboard. Bringing in earthworms to your garden is a good thing, no??
Lighting For My Seeds
When my seeds have been planted in their little pots I give them a sprinkle of water. I place the pots inside the clear tote, sealing the lid.
Then I place the tote close to a sunny south-facing window and wait. The lidded tote will give a nice, moist atmosphere for my seedlings to grow.
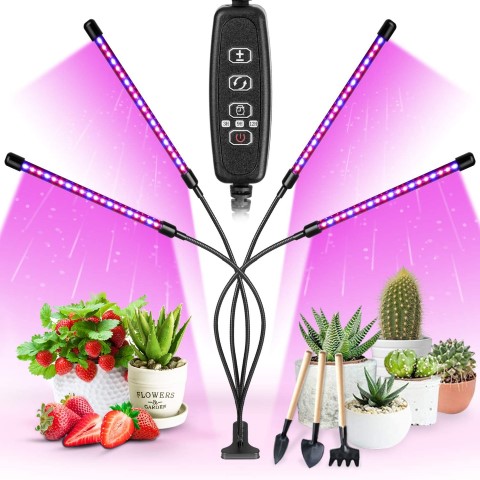
NOTE: Even though this window gets lots of sunshine during winter months, my little seedlings sometimes become ‘leggy’. So I’ve purchased a small clip-on *grow light from Amazon.
Heirloom Seeds Into Seedlings
In only a few days in this moist and humid greenhouse environment my seeds will sprout.
Since I’ve planted a few seeds in each pot I’ll let them grow a bit into small seedlings then transfer each seedling to its own pot. That gives them a little more room to take off and grow.

Planting My Seedlings
Inside my little inside greenhouse those seedlings will finish growing until they’re ready to transplant into the garden after the danger of the last frost has passed.
NOTE: When it’s time to plant them in the garden I harden the seedlings off for several days.

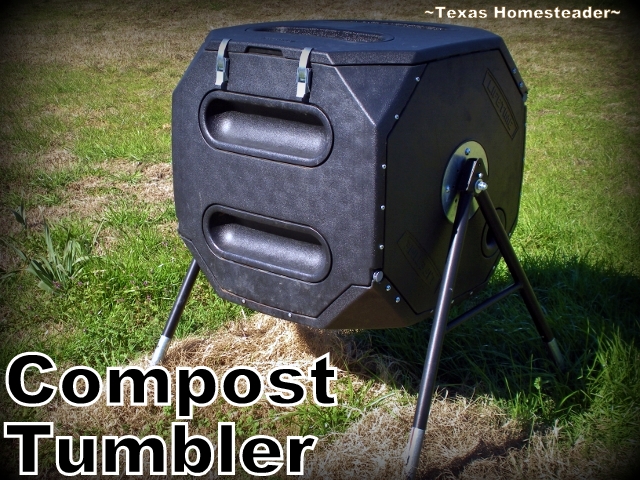
Compost Is A Gardener’s Black GOLD!
I’ve already been preparing the compost for weeks in my *compost tumbler. The final-stage compost was separated into large tubs weeks ago to finish its activity.
That valuable compost will be ready to add directly into the planting holes this spring. So my newly-planted little sproutlings will get a healthy start!
 I love my indoor greenhouse setup. What a handy way to start your spring garden by reusing your supplies every year. When the transplants finally go to the garden I simply wipe out my pots and place all supplies back inside the tote.
Then up into the attic the whole thing goes until it’s needed next year. Everything I’ll need again next year (except for the actual seeds that are kept in the refrigerator) is bundled up inside this box.
So it’s easy for RancherMan to bring everything back down from the attic next year all at one time when I once again plant my heirloom seeds for the garden.
This setup is Inexpensive and environmentally friendly. And that makes me happy.
Planting Seeds In Milk Jugs
This indoor greenhouse setup works great for planting several different vegetable seeds all in one place.
But if I’m only planting a few seeds for something like peppers or Luffa there’s another way I can make a smaller even more portable greenhouse: Planting seeds in milk jugs.

The premise is the same – the milk jug provides a warm moist environment for the seeds to grow. But with this method I plant directly inside the milk jug instead of pots.
You can see my Milk Jug Planting Directions Here if you want more information on planting that way.
Now it’s time to let the little seedlings do their thing as I dream of the productive garden to come.
Come on spring!
~TxH~
This post categorized in 
Tagged in ![]()
![]()
![]()
![]()
My Favorite Garden Hacks
Garden Planning
- Easy Garden Planting Plan Spreadsheet
- Prepare Now! Late-Winter Garden Checklist
- How To Make Your Own Garden Soil
Seed Planting
- Planting Seeds In A Milk Jug Mini-Greenhouse
- Planting A Clear Tote As An Indoor Greenhouse
- Repurposed Cardboard Seed-Starting Pots
Soil Health
- Easy Compost For A Healthy Garden
- How Leaves Benefit Your Garden
- Using Manure In Your Compost & Garden
Garden Styles
- 3-Sister’s Garden – The Original Companion Planting
- Planting A Large Galvanized Trough
- Where I Found The BEST Raised Bed!
- Planting A Blueberry Bush In Rustic Galvanized Tub
Garden Plants/Harvest
- Stevia – Growing Your Own Sweetener!
- My Simple, Zero-Waste Herb Drying Setup
- The Lazy Gardener’s Plant List – Plant Once, Eat For Years!
- How To Tell When Watermelon Is Ripe
- Luffa A Surprising Zucchini Substitute!
- How To Plant & Grow The Best Tomatoes
Water/Irrigation/Drought
- Keeping Potted Plants Watered
- Repurposing A Coffee Can For Deep-Soak Watering
- 3 Rainwater Collection Systems We Use
- Cheap (or FREE) Wood Mulch For The Garden
- Using Vining Plants For Living Mulch
- Surprising Use For Empty Clay Pots In The Garden
Weed Control
Garden Tips
- How To Save Outdoor Plants Even During A Hard Freeze
- Tricking Birds AWAY From Your Strawberry Plants
- Protecting Tender Seedlings From Wind
- Homestead Hack: Remember Where You Planted Seeds
- How I Use EcoBricks In The Garden
MORE Gardening Posts
Garden References:
Find Your 2023 Updated USDA Plant Hardiness Zone
Texas Master Gardener’s Companion Planting – Plant Friend & Foe

C’mon by & sit a spell! Come hang out at our Facebook Page. It’s like sitting in a front porch rocker with a glass of cold iced tea. Lots of good folks sharing! You can also follow along on Pinterest, on Twitter or on Instagram.
I love the idea of having a tote that can store all of the items, but also doubles as the green house! I’ll have to search out something similar for my place. Thanks for sharing on the Waste Less Wednesday Blog Hop!
You are amazing, what else don’t you do. This is such a great idea and I am going to try it once spring is on its way again. Thank you for sharing your fabulous ideas at Good Morning Mondays. Blessings
The tote is a great idea. I could put it up in the shed and not worry about the mice making a mess of my gardening supplies. I do find that plants in my garden do better being seeded directly in the soil though. – Margy
I’ve had some issues Margy with properly hardening the seedlings off before planting them in the garden. I’m hoping to get a better running start this year. ~TxH~
Oohh what a great idea! I think I might have to try this.. I really want to start a garden this year and it’d be nice to have the seeds started before I can actually plant outside.. which is May around here. Thanks for sharing!
That’s a great idea! I love that it’s self-contained. I saved all of my salad containers to use as little miniature seed starting greenhouses, but I don’t really garden! With all the subzero temps lately, it’s hard to believe that gardening time is ever going to come. Good Luck with your seedlings!!!! And have a great week.
Do you use more than one bucket? It doesn’t look like there are enough plants there to fill the garden pictured in your garden planning post. This would be a good idea for me as I ruined a table one year too. 🙂 Thanks for the idea!
I only use the one “indoor greenhouse” but not everything that goes in the garden is started in there (onions, garlic, asparagus, green beans, carrots, etc) The indoor greenhouse is just so that I will be able to plant seedlings in the garden for peppers, tomatoes, squash, cantaloupe, etc. So far it’s worked great. ~TxH~
Neat idea to use a plastic bin for greenhouse. I was just contemplating doing this for our seedlings this year. Bonus of it keeping the cats out of the plants 🙂
Wow! You are so organized! I need to try this next year. I was so happy to finally get back into starting seeds this year. Some are up already.
Brilliant!! I am so ready to get seeds going and it will not stop snowing around here! i usually start some seeds inside. Last year we used empty k cups for our seed starters.
You make it sound so easy! 🙂
Ha Christine! I simply cannot wait until warmer weather to get my hands in the soil so this pacifies me until spring when I can plant outside. I do love that my indoor greenhouse is all self contained. ~TxH~
Your seed starting supplies are so organized! Everything in one tote – I’m inspired.
What a great “greenhouse”. We had some of our tomato starts get beat up in the 40mph wind we had last week. I think I’ll get some tubs and restart some.
Thanks for visiting my blog and leaving a comment. I love hearing about how others are getting ready for spring.
Karen – We got the tumbler at Sam’s a couple of years ago. The stir-by-hand method works great but I wasn’t very good at actually doing it so the tumbler helps me a lot. LOVE the Ole Saturday Homestead Trading Post! Thanks for stopping by! ~TxH~
Thanks for stopping by Abbi. I really enjoy this method of starting seeds too. Especially since I don’t have to be as diligent with watering, the closed container keeps a moist greenhouse environment and the seeds really seem to take off. And like you mentioned, the all-in-one containment makes it easy to just put it all away until next year. 🙂 ~TxH~
What a nice organized planting kit I only wish I was as organized as you and oh my goodness your compost tumbler has made me green with envy ha ha LOL! No it’s very nice we do the old fashioned traditional stir by hand way but it works…….Where did you get it by the way? Thank you so much for linking this post up to “The Ole’ Saturday Homesteading Trading Post” blog hop this week!
I grow my own starter plants too and I really like this orderly idea! How nice to have everything together and to have a place that can get wet in which to keep them. I usually put them on a table but have basically ruined one table because it was so hard not to get the tabletop wet. I start quite a few more seeds so I am afraid I would need about 3 totes but this idea certainly has merit, I am going to be thinking about how I might be able to do something similar using things I already have on hand.
Thanks for sharing this idea!