
by Texas Homesteader ~
Homemade Peach Ice Cream is a sweet, creamy taste of summer. This gluten-free ice cream recipe is simple and doesn’t require making a custard first. Simple, peachy, delicious!

(Note: Some links in this post will take you to other related articles for further information. But links preceded with * are affiliate links. If you click and buy something I could receive a tiny commission.)
Jump to RecipeI had some fresh peaches that needed to be used up before they went bad and I wanted to make homemade peach ice cream with them.
RancherMan’s a huge ice cream fan. He would eat it every day if he could. So I decided to make his favorite cold sweet treat for him.
Many Ice Cream Recipes Are Too Complicated
I wanted a recipe that didn’t involve me spending copious amounts of time in the kitchen with many steps. If you’re a regular reader you know – I don’t enjoy cooking! Simple & fast in the kitchen is the way I rock.
Most of the recipes that I found required you to make (and cool) a custard base before continuing on with the ice-cream-making procedures. Too many steps for me – no thanks!
Easier Homemade Ice Cream Recipe
I’m looking for an easier recipe. One where you just chunk everything in & go. I can get on board with a recipe like that!
I found this recipe over at My Fearless Kitchen and decided to give it a try. It didn’t require all those steps of first making a custard base.
Easy, Fast AND Delicious?
YES PLEASE!
Soft-serve texture is achieved right out of the ice cream machine, a little firmer texture with an hour or so stint in the freezer. And even firmer with more freezer time.
Simple, Wholesome Homemade Ice Cream Ingredients
But I love a recipe that has only simple wholesome ingredients. This peach ice cream recipe includes only
-
-
-
Fresh peaches
-
Sugar
-
Cream
-
Milk
-
Vanilla extract
-
-

Gotta love it – I’m a big fan of simplicity, aren’t you??
Making Ice Cream Was Complicated In My Childhood
When I was a kid, homemade ice cream involved a huge ice-cream-making contraption with a small metal insert to hold the ice cream mixture. Crushed ice and rock salt were added between the insert and the outside container.
If you were lucky, you had an electric ice cream maker. You could just plug it in and wait. But the ice cream makers of my childhood were all manual crank.
We’d take turns sitting on the hot porch turning that crank, waiting for what felt like way too long to finally enjoy that homemade ice cream!
Because it was so tedious we didn’t make homemade ice cream often. But when we did it was a treat indeed!
Faster, Less Hands-On Homemade Ice Cream Option
But (for me at least) times have changed. And I think for the better! There are only 2 of us at our home now. RancherMan & I are empty nesters.
So I only need to make about 4 servings of ice cream at a time. Two for us, and two for any guests who may be visiting.
But let’s be honest, there have been many times it’s just all 4 servings for RancherMan and me! LOL
Instead of those old-style ice cream makers of my past, I now have a *Cuisinart 2-Qt Ice Cream Maker. I’m not gonna lie, this surely makes homemade ice cream easy.
The abbreviated instructions for those who like to see the steps before undertaking the recipe:
Peel, chop and/or mash fruit.
Add sugar, salt & milk, stir.
Add cream & stir.
Pour into frozen Ice Cream Maker Insert,
Push button and walk away for about 15 minutes.
Yep, that’s right. Simple, fast and easy in the kitchen is my wheelhouse, y’all.
How To Prepare Fruit For Ice Cream
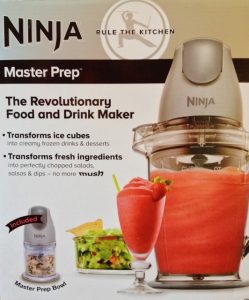
First I peeled the peaches and then used my *Ninja Chopper to chop them pretty finely.
I reserved a couple of slices of fruit to chop coarsely so I could have small bits of peaches in my ice cream. But for the most part I wanted almost a puree.
That’s because I enjoy small pieces of peach in my ice cream but chunks of fruit will freeze harder than a puree does. But chunky or smooth, it’s totally your choice!
Homemade Ice Cream Using An Ice Cream Maker
To make my ice cream I’ll use a *Cuisinart Ice Cream Maker. The inner bowl was placed in the freezer a couple of days ago. So it’s all ready to go.
The beauty of this ice cream maker is that since the bowl is already frozen, homemade ice cream is only 15-20 easy hands-off minutes away!
Using A Cuisinart Ice Cream Maker
So now I bring the frozen Cuisinart insert from the deep freeze and place it into the machine. I added the stirring attachment and lid.

Then before adding the ice cream mixture I flipped on the machine and the insert began to turn. Then the ice cream mixture was poured through the hole in the lid.
As it turns, the stirring attachment scrapes the colder mixture from the sides of the bowl and blends it back into the less-frozen mixture in the middle. In about 15-20 minutes we had soft serve. It’s delicious!
Soft Serve Or Firm Ice Cream?
If desired I can transfer the ice cream to a freezer-safe container and place it in the freezer for an hour or two to allow it to freeze a little more solidly. But much after a couple of hours in the freezer & your ice cream may freeze a little too solidly to scoop easily.
So if you’re enjoying your leftover ice cream the next day you might want to bring it out of the freezer and set it on the counter for a few minutes for easier scooping.
Personally we love the texture of the soft-serve homemade ice cream. It’s thick enough to scoop easily & hold its form. The ice cream was delicious – and homemade! So, so easy.
Heck it’s so easy that I can start the ice cream maker when we sit down for supper and it will be ready for me to serve this homemade ice cream dessert by the time we’re through eating! How’s that for in-your-face easy?
Different Homemade Ice Cream Flavor Options
You can also make this ice cream using different fresh fruits.
Strawberry flavor is a delicious way to use up those fresh strawberries of spring. And I’ve made this ice cream with nectarines too when they needed to be used before becoming too ripe. All good.
Soon I’ll be making this ice cream with blueberries – they’re my favorite berry.
Some people use frozen packaged (and thawed) fruit instead of fresh. As long as you have 2 cups worth, you’re golden.
But here’s the recipe I use for my homemade Peach Ice Cream. It was delicious, sweet and creamy. A wonderful cold dessert on a hot Texas summer day. Feel free to substitute another fruit for the peaches if you wish.
Did you make this ice cream? Please rate the recipe in your comment below!

Homemade Peach Ice Cream
This Homemade Peach Ice Cream recipe doesn't require the extra step of making a custard. You can prepare the mixture in 10 minutes and your ice cream mixture is ready to make into that delicious homemade ice cream you crave. Simple, fast, easy. #TexasHomesteader
Ingredients
INGREDIENTS
- 3 medium peaches pitted and peeled (approx 2 cups)
- 1¼ cups whole milk
- ⅔ cup granulated sugar
- 1 teaspoon vanilla extract
- Pinch salt
- 1 cup heavy whipping cream
Instructions
INSTRUCTIONS
-
Peel, remove the pits and chop up 3 fresh peaches. Smaller pieces are easier to eat when frozen than larger pieces. (f needed place peach chunks into a food chopper & pulse until the desired consistency is reached.) Set aside.
-
In a medium bowl or using KitchenAid, whisk 1¼ cup whole milk, ⅔ cup sugar, 1 teaspoon vanilla extract & apinch of salt, until the sugar is dissolved.
-
Add the 1 cup heavy cream and whisk again.
-
Carefully add the chopped fruit to the milk mixture and stir to blend completely.
-
Set up your ice cream maker and add the ice cream mix according to the manufacturer's directions.
(For my Cuisinart counter top model, I add frozen ice cream insert and stirring attachment and lid. I turn on the ice cream maker to begin it turning, then pour my ice cream mix through the hole in the lid.)
-
Allow mixture to churn until the ice cream freezes and thickens to the desired consistency
(for my Cuisinart it's about 15-20 minutes).
-
Enjoy immediately. Transfer remainder of your homemade ice cream to a freezer-safe container and store in the freezer.
Recipe Notes
NOTE: This results in a soft-serve consistency ice cream. But if you desire a more firm consistency the ice cream will freeze harder with 1-2 hours in the freezer.
Overnight freezing may make ice cream freeze even harder. In that case it's sometimes helpful to bring it from the freezer and set on the counter for a few minutes for easiest scooping.
~TxH~
This post categorized in 
Tagged in ![]()
![]()
![]()
![]()
![]()
Frozen Treats
- Easy Homemade Peach Ice Cream
- Fat-Free Ice Cream Substitute: Frozen Bananas & Pudding Mix
- Sugar-Free Frozen Treat Using Berries
- Healthier Mint Chocolate Chip Ice Cream Using Bananas
- Easiest Cookies-n-Cream Ice-Cream Cake
- Healthy Chocolate Fudgesicles
- Frozen Applesauce Makes Healthy Treat
- Easy Frozen Watermelon Smoothie (or Daiquiri)
Other Easy Desserts
Cakes, Pies, Cobblers
- Depression-Era CRAZY CAKE – No Butter, Eggs or Milk
- Homemade Peach Cobbler
- Easy Instant Pot Cheesecake
- Mason-Jar Cheesecakes
- Homemade 3-Ingredient Graham Cracker Crust
- Apple Crumble QUICK With Pie Filling
- Strawberry Shortcake Dessert
- No-Bake Lemon Icebox Pie
- Fresh Pear Cake
- Easy Cookies-n-Cream Ice Cream Cake
Muffins, Breads
- Chunky Apple Cinnamon Muffins Or Bread Loaf
- Cantaloupe Bread w/Pecan Praline Glaze
- Easy Blueberry Muffins
- Fast Dessert: Spiced Rum Fried Apples
- Pumpkin Bread (with Cake-Mix Shortcut)
- Healthier Banana Bread Recipe
- Rich, Chocolaty Homemade Brownies
- Healthier Sweet Potato Chocolate Brownies
Cookies
- Cake-Mix Cookies – Only 3 Ingredients!
- 3-Ingredient Peanut Butter Cookies
- Double Chocolate Banana Chunk Cookies
- Light & Airy Cotton Candy Meringue Cookies
Puddings
- Homemade Chocolate Pudding Recipe
- Banana Pudding – A Hug From The South
- (make your own homemade Vanilla Wafers too!)
- Making Instant Chocolate Pudding Mix
- Delicious Banana Pudding Made With Squash Puree!
Ice Cream & Other Desserts
- Easy Homemade Peach Ice Cream
- Healthier ‘Ice Cream’ Using Bananas & Fruit
- Cherry-Pie Tortilla Rolls
- Triple Chocolate Truffles
Dessert Toppings
- No-Cook Chocolate Frosting
- Stir-n-Pour Drizzle Chocolate
- Quick Homemade Whipped Cream
- Easy Honey Glaze
- Homemade Whipped Cream (Sweetened With Honey)
- Cherry Pie Filling From Frozen Cherries
- Peach Pie Filling From Canned Peaches
See All Recipe Posts

C’mon by & sit a spell! Come hang out at our Facebook Page . It’s like sitting in a front porch rocker with a glass of cold iced tea. There are lots of good folks sharing! And you can also follow along on Pinterest, Twitter or Instagram
If you’d like to receive an email when a new blog post goes live,
subscribe to our Blog!