by Texas Homesteader ~
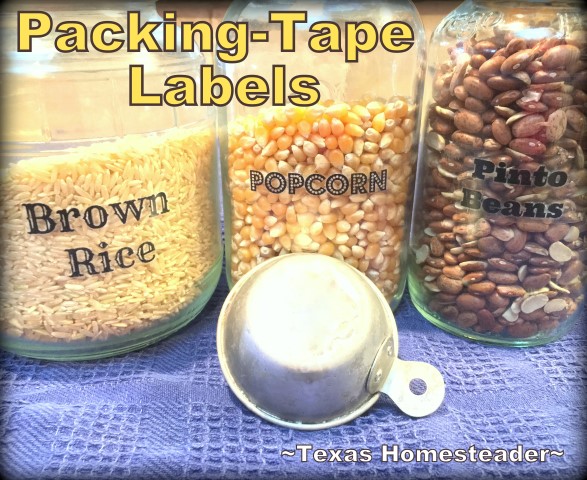
Use a laser printer & regular packing tape to make a custom label at home. I made labels for repurposed jars in my pantry, and even for customizing our Christmas gifts. It worked perfectly!
Repurposing Glass Jars In The Pantry
I’m always looking for easy ways to label repurposed glass storage jars in my kitchen or pantry. And I especially like the jars to look nice when they remain out on our counter top, such as our popcorn jar.
I initially saw this idea over at It’s Always Autumn. They were using an image label to personalize a candle. The instructions indicate a laser printer is needed so I can’t say whether or not this works on an ink-jet printer.
Since we have a laser printer I figured I could use this same procedure to make inexpensive custom labels for my glass jars. Thankfully it was easy!
I made these labels for several repurposed glass jars in my pantry. I have one for beans, one for rice and many others too. Cute! Here’s how we did it.
Making Homemade Customized Labels
I first printed the words for my labels in fun fonts using our laser printer – Pinto Beans – Brown Rice – Popcorn. Then I stuck a piece of shipping tape over each word that was printed and smoothed it down where there were no wrinkles in the tape.
I pressed my thumbnail over the printing to make sure everything was completely attached.
Then I cut the tape into a rectangle around each word printed. As each label was cut out I sat them aside until I had them all done.
Soaking The Homemade Tape Labels
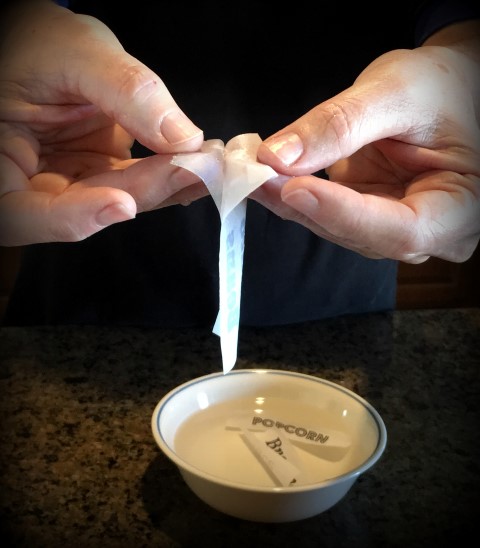
The squares of tape were then placed in a bowl of water and allowed to soak for about 15 minutes. This step softens the paper and helps release it from the tape.
Wow, putting tape in water? Is this really gonna work??
When the soaking period was up I took those wet, curled pieces of tape out of the water. I first pulled away most of the paper by just separating the paper side from the tape side. Well color me surprised!
Then using my thumb I rubbed the paper side until all the residual paper fibers were dislodged from around the actual printing. Finally I gave each label a good rinse.
Wow, it really worked. The paper was now gone but the black print of the image remained on the clear tape. How cool!
I sat the tape squares with the sticky side up on a baker’s rack to dry. As they dried the stickiness of the tape returned. I allowed them to dry for a couple of hours to make sure there was no residual dampness.
Attach Homemade Labels To Jars
After they were completely dry, I stuck my new labels onto our jars. Voila!
It worked beautifully!
Since this is only tape, I’m able to quickly & easily (and CHEAPLY) change out the labels if need be.
Just packing tape and a printed word? You really don’t get custom labels any cheaper than that, y’all!
Homemade Labels To The Rescue At Christmas
Last year we even used this same method for personalizing our Christmas gifts. And that’s where making our own labels REALLY came in handy.
You see, RancherMan & I always present Homemade Gifts for Christmas. It’s one of the ways we live by our values.
So we wanted to gift each of our kids a large jar of pure, raw honey from our apiary. But we wanted a cute way to present our gifts too. Mama always says ‘Presentation Is Half The Gift‘.
So a couple of months in advance we ordered cute bee-themed labels from etsy. We were going to decorate each jar with these cute labels.
But as Christmas neared we became anxious that they had not been received. As a matter of fact they never arrived… Wow, what will we do now??!
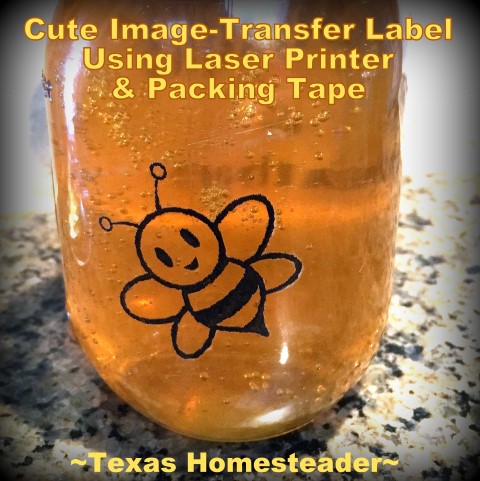
So we searched and found a royalty-free clip art of a cute bee and printed it out. We then printed each of the kids’ family names in cute font to further personalize each jar of honey.
Then we followed the same procedure above to make personalized labels for each jar.
So each jar had a cute honeybee on one side, their family name on the other.
It turned out really cute and the kids all loved it. Whew! Gift-decorating disaster avoided.
Give it a try, personalizing jars is really easy using this simple and surprisingly-effective hack.
~TxH~
Other Christmas Posts You Might Like:
- Is It ‘Merry Christmas’ or ‘Happy Holidays’?
- How Will I Be Able To ‘Provide’ Christmas This Year?
- Holiday Cooking Shortcuts, Tips & Recipes
- A Small Christmas Tree Can Be BEAUTIFUL!
- Keeping The JOY In The Christmas Season
- Want To Keep Christ In Christmas?
- Thinking Of Adding A Pup To Your Home This Christmas?
- The Truth Behind Perfect Facebook Posts
- Don’t Judge The Need Of Others
Gift Ideas
- Homemade Gifts We’ve Given
- Gift Ideas For Mom
- Gift Ideas For Dad
- Must-Haves For Any Home Cook
- Easy Last-Minute Gifts For A Group
- Christmas Gift-Idea Roundup
- Repurposed Denim Hand Warmers
- 8 Eco-Friendly Gifts Your Friends Will LOVE!
- Low-Waste Christmas Gifts We’ve Received
- Cute Santa Sleigh Made With Candy
- MYO Snowman Treat Jar Gift
- Keeping Track Of Gift-Card Balances
- Experience Gift Ideas
- Easy Homemade Jerky
- Candy Snowman With Gloves (optional CASH!)
Eco-Friendly Gift Ideas:
- Gift Ideas For The Eco-Friendly Mom
- Homemade Gift Ideas
- Homemade Chai Tea Mix
- Gardener’s Hand Scrub
- 3-Ingredient Beeswax Lip Balm
- Repurposed Denim Pocket-Sized Hand Warmers
- Rustic Repurposed-Denim Baskets
- Cedar Solar-Light Garden Feature
- Rustic Bois d’Arc Solar Light
- Photo Wall Hanging Using Reclaimed Barn Wood
- Making A Small Gift Box With A Greeting Card
- Make a Customized Label With Plain Ole Shipping Tape
- 8 Environmentally Friendly Gifts For Your Friends
- Low-Waste Gifts We’ve Rec’d & Loved
- Environmentally-Friendly Gifts Can Be Fun
See All Our Eco-Friendly Posts
Low-Waste Gift Wrapping & Presentation
- Reusable Gift Wrap Ideas
- Low-Waste Gift Baskets
- Make A Cute Gift Box Using A Christmas Card!
- No Wrapping Needed: Experience Gifts!
- Fastest Zero-Waste Gift Wrapping – Using Cloth
All Posts Tagged ‘Christmas’
C’mon by & sit a spell! Come hang out at our Facebook Page . It’s like sitting in a front porch rocker with a glass of cold iced tea. There are lots of good folks sharing! And you can also follow along on Pinterest, Instagram & Twitter
If you’d like to receive an email when a new blog post goes live,
subscribe to our Blog!


I didn’t know a laser printer could be good for customized labels. I’m glad you mentioned that you soaked the tape labels in a bowl of water. I’m interested to learn if all is needed is water and if the temperature of the water needs to be at a certain degree.
Neat idea! I will have to try this. Thanks for sharing.
It works great Cindy. And for personalization of gifts – the sky’s the limit! ~TxH~
This is so cool!! It’s a little bit of work but the end result would be worth it!
It was actually pretty easy Pam – I printed my design, put tape over it, cut it out, soaked it in water then rubbed the paper off the tape with my thumbs. I think it looks really cute on the jars in my pantry but WHEW – it was a big help last Christmas when our cute labels never came. No problem, we made our own! ~TxH~