by Texas Homesteader ~
I’d always been intimidated by homemade cheesecake. That is, until I found out how simple it is to make cheesecake in an Instant Pot electric pressure cooker. Now I whip up homemade cheesecake as a decadent dessert anytime I want!
(Note: Some links in this post will take you to other related articles for further information. But links preceded with * are affiliate links. If you click and buy something I could receive a tiny commission.)
Homemade Cheesecake Oven vs. Pressure Cooker
Are you too intimidated to try to bake homemade cheesecake? I was too.
I mean – water bath in the oven? The top cracking if you didn’t cook it just right? Springform pan leaking in the water? It just sounded so… finicky.
A water bath is required to bake cheesecake in the oven is because without moisture you’re doomed to have a dry, cracked cheesecake.
But pressure cooking is the perfect way to make cheesecake. There’s naturally lots of moisture!
Equipment Needed For Pressure Cooker Cheesecake
For my Instant Pot cheesecake recipe I use the following equipment:
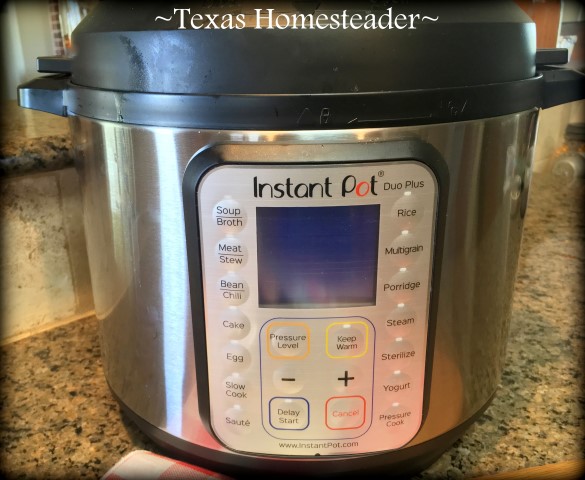
*6-Quart Instant Pot electric pressure cooker.
*trivet with silicone handles (this one fit my springform pan)
(My Instant Pot came with a long-handled trivet but it was too small to work with my 7″ springform pan.)
Come see how easy it is to make your very own homemade cheesecake.
Homemade Cheesecake Instructions
These are the simple instructions to making homemade cheesecake;
Make graham cracker crust (EASY!)
Make Filling: Mix room-temperature cream cheese until smooth.
Add yogurt – mix. Add sugar – mix. Add eggs – mix. Add vanilla – mix.
Pour into crust & cook in Instant Pot for 38-40 minutes & let pressure release naturally.
Remove from the pan, chill, top with your favorite topping and BAM!
Making A Graham Cracker Crust
Make a homemade Graham Cracker Crust using only 3 ingredients.
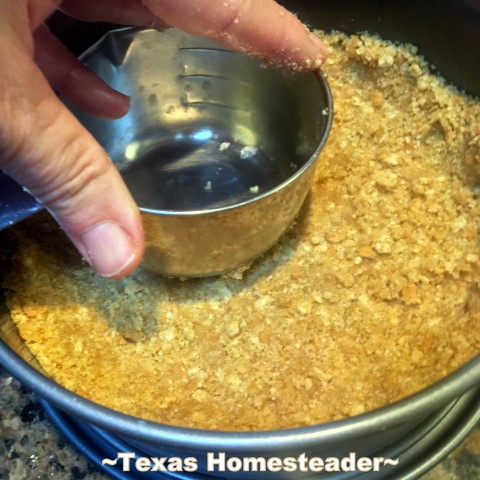
Just mix crushed graham crackers, sugar & melted butter together & press crust firmly into the bottom & halfway up the sides of a buttered springform pan.
My recipe makes a nice thick crust because that’s how RancherMan & I prefer it.
Baker’s Note: If you’d like a more delicate crust feel free to cut the crust ingredients in half.
Mixing The Cheesecake Filling
In a *KitchenAid mixer place the room-temperature cream cheese and mix it thoroughly but slowly with the paddle attachment until no lumps remained.
Baker’s Note: Mixing slowly keeps you from whipping air into the cream cheese. Too much air makes the cheesecake fluffy & spongy (in my opinion) I like a nice, solid-textured cheesecake!
Add Homemade Yogurt, (or sour cream), sugar, a couple of eggs and vanilla extract. When all ingredients are mixed it’s time to cook the cheesecake!
Cooking Cheesecake In A Springform Pan
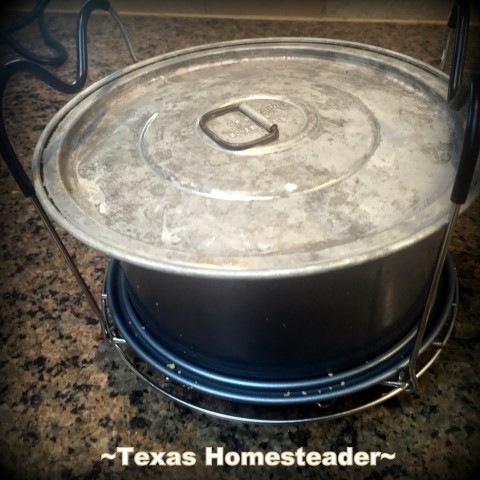
Pour the filling on top of the graham cracker crust in a springform pan. Tap the pan on the counter a few times to release any air bubbles and place springform pan on long-handled trivet.
Many people cover the cheesecake with foil but to eliminate single-use waste I use a metal lid instead.
Add 1½ cups of water to the Instant Pot insert and lower the trivet holding covered cheesecake into the pan.
Pressure Cooking An Instant Pot Cheesecake
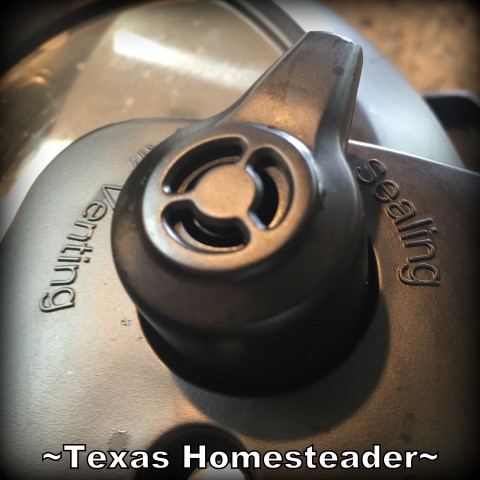
With the Instant Pot lid on ‘SEALING‘ you’re ready to cook your cheesecake!
Press ‘PRESSURE COOK‘ and the ‘ -/+ ‘ button until it shows between 38-40 minutes.
BAKER’S NOTE: I opt for 40 minutes, it makes my cheesecake firm enough for me.
When cooking time is done, hit ‘CANCEL’ and allow the pressure to release naturally.
How To Tell If Cheesecake Is Done?
Bring cheesecake out of the Instant Pot and remove the cover from the springform pan.
At this point the cheesecake might look thin & slightly jiggly, but it will firm as it cools.
You want only the very center to jiggle slightly, like jello. If your cheesecake seems a little too jiggly pop it back into the Instant Pot and pressure cook on ‘high’ for 5 more minutes.
How long To Cool Homemade Cheesecake?
Allow the cheesecake to rest on the counter for an hour to cool, then place covered springform pan of cheesecake in the refrigerator to chill overnight.
Baker’s Note: You could shorten cooling time to 4 hours if you’re in a hurry. But you really want it completely chilled before removing it from the pan. Overnight is best.
Removing The Cheesecake From The Pan
To remove chilled cheesecake from the pan place a cup of very hot water into an empty pie pan and set the springform pan in the hot water for about 2 minutes.
Then remove it from the water, flip the springform pan’s latch, spread open the pan and lift the removable ring away from the cheesecake.
With a plate at the ready use a flat spatula to get beneath the cheesecake and transfer it to a plate.
Homemade Cheesecake Topping Choices
You can eat this delicious dessert just as is – New York Style cheesecake. YUM!
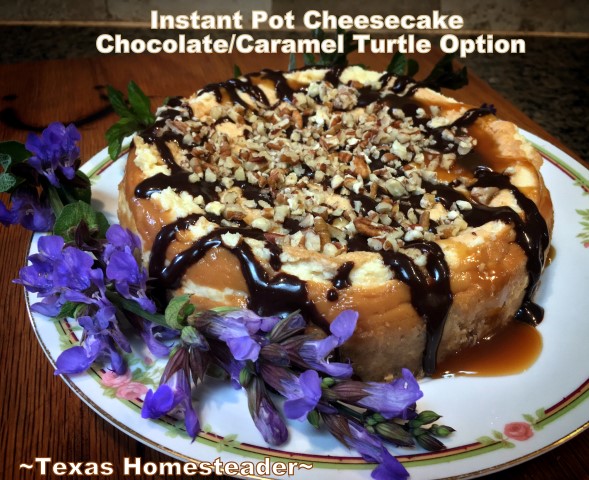
Or you can add even more decadence. I’ve drizzled caramel and Homemade Chocolate Drizzle and sprinkled chopped pecans for a turtle-flavored cheesecake.
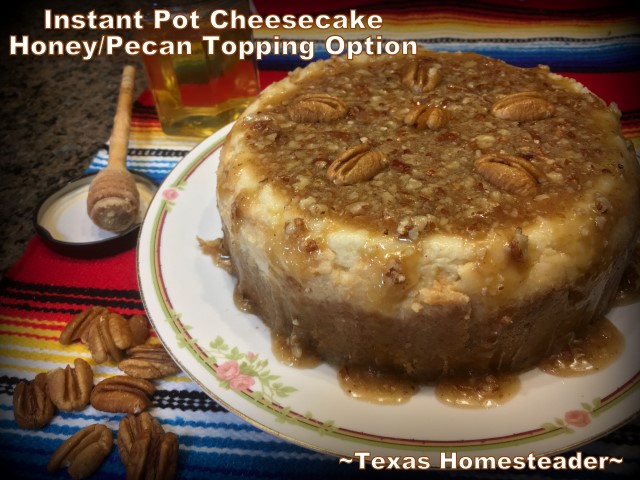
I’ve also made a honey-pecan glaze by mixing honey, melted butter and brown sugar.
Then I tossed in chopped pecans – no measuring, just enough for my taste. It was really good as well.
And of course who doesn’t love strawberry?? I used strawberries in syrup here, but it would be good with fruit pie filling too.
The world’s your oyster for toppings!
Let me tell ya, this Instant Pot cheesecake is not a finicky recipe.
Do it, do it, DO IT!!
Did you make this Pressure-Cooker Cheesecake? Please rate the recipe in your comment below!

Pressure Cooker New York Style Cheesecake
Homemade cheesecake doesn't have to be intimidating. An electric pressure cooker makes this homemade cheesecake a snap. And there are so many flavor options too. Don't pass this one up! #TexasHomesteader
Ingredients
Ingredients:
Thicker Graham-Cracker Crust (cut ingredients in half for more delicate crust)
- 1½ cups graham cracker crumbs, or 8 whole graham crackers, crushed
- 4 Tablespoons butter, melted
- 1 Tablespoon sugar
Cheesecake
- 2 8-oz packages Regular Cream Cheese, softened (room temp for 1 hr to soften)
- ¼ Cup Plain Unflavored Greek Yogurt (can substitute with sour cream)
- 1 Cup Sugar
- 2 Large Eggs, room temperature
- 1 teaspoon Vanilla Extract
Optional Toppings
- Fruit Pie Filling, chocolate drizzle, caramel drizzle, chopped nuts
Instructions
Instructions
-
Make Graham Cracker Crust: Butter the pan.
Mix 1½ cups graham cracker crumbs, 1 Tablespoon sugar and 4 Tablespoons melted butter.
Then spread crust evenly across the bottom and halfway up the sides of a springform pan, pressing firmly.
-
Make the cheesecake filling: Soften the cream cheese by leaving it out at room temperature for at least 1 hour.
-
With a paddle attachment, blend the 2 8-oz packages of cream cheese in an electric mixer on low to medium speed until smooth, about 1 minute.
Stop the mixer, stir, then continue beating on low to medium speed for 1 minute. (do not over mix, but make sure the cream cheese has no lumps before moving to the next step)
-
Add ¼ cup Greek yogurt. Continue beating on low speed until blended, about 30 seconds. Do not over mix.
-
Slowly add 1 cup sugar and beat on low speed until the sugar is completely blended, about 3 minutes. Do not over mix
-
On low speed stir in 1 teaspoon vanilla, then add 2 eggs one at a time, continuing on low speed just until blended.
-
Pour filling on top of the crust in the springform pan, then tap the pan gently on the countertop for about 30 seconds to get rid of air bubbles.
Cover top of cheesecake with aluminum foil and crimp to seal to eliminate condensation drips.
-
Pressure cook the cheesecake: Put 1½ cups of water in the electric pressure cooker's inner liner pot.
Place filled & covered springform pan onto a handled cooking rack. Lower the cheesecake into the pot.
Lock the pressure cooker, put vent on 'SEALING' and cook on high pressure for 38 - 40 minutes in the Instant Pot. I typically cook for the longer time of 40 minutes.
Then allow the pressure come down naturally until no pressure remains.
-
Cool the cheesecake, then serve: Lift the cheesecake out of the pressure cooker & remove cover.
-
Cool the cheesecake in the uncovered pan at room temperature for an hour. Then refrigerate for at least 4 hours, preferably overnight.
-
If desired, top with pie filling, drizzle with chocolate, sprinkle with nuts, etc.
Recipe Notes
Notes:
1) Make sure all your ingredients (except the melted butter) are at room temperature.
2) To keep your cheesecake from being too air-filled & fluffy, beat on low speed. It's important not to over mix.
3) When cooking time is up, only the very center should jiggle slightly like jello. If it looks like it needs more time, return covered cheesecake to the pressure cooker and cook at high pressure 5 minutes more.
(Note: Although I've never cooked this cheesecake using a stovetop pressure cooker, I've read it takes 30-35 minutes using stove top pressure cooker).
~TxH~
Other Easy Desserts
Cakes, Pies, Cobblers
- Depression-Era CRAZY CAKE – No Butter, Eggs or Milk
- Homemade Peach Cobbler
- Easy Instant Pot Cheesecake
- Mason-Jar Cheesecakes
- Homemade 3-Ingredient Graham Cracker Crust
- Apple Crumble QUICK With Pie Filling
- Strawberry Shortcake Dessert
- No-Bake Lemon Icebox Pie
- Fresh Pear Cake
- Easy Cookies-n-Cream Ice Cream Cake
Muffins, Breads
- Chunky Apple Cinnamon Muffins Or Bread Loaf
- Cantaloupe Bread w/Pecan Praline Glaze
- Easy Blueberry Muffins
- Fast Dessert: Spiced Rum Fried Apples
- Pumpkin Bread (with Cake-Mix Shortcut)
- Healthier Banana Bread Recipe
- Rich, Chocolaty Homemade Brownies
- Healthier Sweet Potato Chocolate Brownies
Cookies
- Cake-Mix Cookies – Only 3 Ingredients!
- 3-Ingredient Peanut Butter Cookies
- Double Chocolate Banana Chunk Cookies
Puddings
Ice Cream & Other Desserts
- Easy Homemade Peach Ice Cream
- Healthier Strawberry ‘Ice Cream’ Using Bananas & Fruit
- Cherry-Pie Tortilla Rolls
- Triple Chocolate Truffles
Dessert Toppings
- No-Cook Chocolate Frosting
- Stir-n-Pour Drizzle Chocolate
- Easy Honey/Brown Sugar Glaze
- Homemade Whipped Cream (Sweetened With Honey)
- Cherry Pie Filling From Frozen Cherries
- Peach Pie Filling From Canned Peaches
See All Recipe Posts
C’mon by & sit a spell! Come hang out at our Facebook Page. It’s like sitting in a front porch rocker with a glass of cold iced tea. There are lots of good folks sharing! And you can also follow along on Pinterest, on Twitter or on Instagram.
If you’d like to receive an email when a new blog post goes live,
subscribe to our Blog!






I’ve made pressure cooker cheesecake several times now using this recipe. I can’t believe it’s so easy. And whether I leave it plain or add fun toppings, it’s always delicious. I get lots of compliments on it. 5-star all the way!
So easy, the insta-pot does most of the work. And yes it’s good!!
Very important to chill at least overnight to let the flavors develop and 24 hours is even better. A world of difference!
This is good to know Mary. I typically make it the day before & chill it overnight, but it’s been more for convenience than for taste. Now that I know it’s important for taste as well I’ll for sure be chilling it 24 hours. Thanks for the tip! ~TxH~