by Texas Homesteader ~
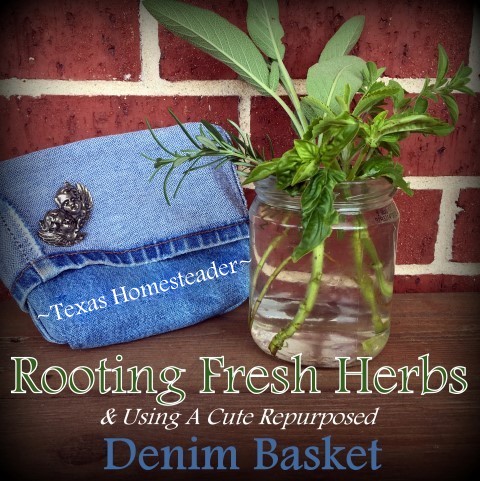
The herbs are going well in my Edible Landscape so I thought I’d take a few cuttings & try to root them in my kitchen window. I have a repurposed short, squatty, wide-mouth glass jar that I can use.
But I’ve always heard that when you’re rooting cuttings, a see-through jar can cause problems. It’s said that inside the jar should be dark. A dark jar keeps algae from growing in the water and also helps the roots do their thaaaang.
Some suggestions are to paint the jar or to wrap it in scrapbooking paper or something similar. Hummm…
So what did I decide to do? Say it with me kids: “Use Whatcha Got!” That’s right. 🙂 Check out this Homestead Hack.
Beautiful Yet Edible Plants
I use an Edible Landscape plan for my ‘flower beds’. My line of thinking is that just because a plant is edible doesn’t mean it can’t be beautiful as well.
I have a decorative bed planted that includes edging of the lacy fern-like foliage of carrots. Included in that bed is the bold, interestingly-textured leaves of spinach and some delicate flowering creeping thyme.
And the edible landscape bed is anchored by a large gorgeous blooming sage bush. See what I mean? Edible, yet beautiful.
So to get my herb cuttings that I’ll use to root herbs in my windowsill jar, first I went to the edible landscaped ‘flower bed’ and trimmed a bit of Stevia, Sage, Oregano, Basil and Rosemary. These are the herbs I’ve chosen to root this time around.
I brought those herb cuttings inside. I don’t want leaves underwater so I removed the bottom leaves from each of the stems. I don’t want to waste even those few herb leaves, so I sat them aside so I could use them in my cooking.
Decorative Container For Rooting Herbs
After I got the herb cuttings and water in the jar looked around for something more decorative to hold the jar. Although there’s nothing ugly about a jar of herbs rooting on a kitchen windowsill, I still wanted more.
Then I got an idea… Maybe I can darken that jar to help the herbs as well as cover the jar with something a little prettier. So I fetched one of my extra Repurposed Denim Baskets. Y’all know I love everything denim.
I love that these cute baskets use RancherMan’s worn-out denim jeans. I’m a repurposing fool, y’all! I even decided to decorate this denim basket with an angel pin that I love.
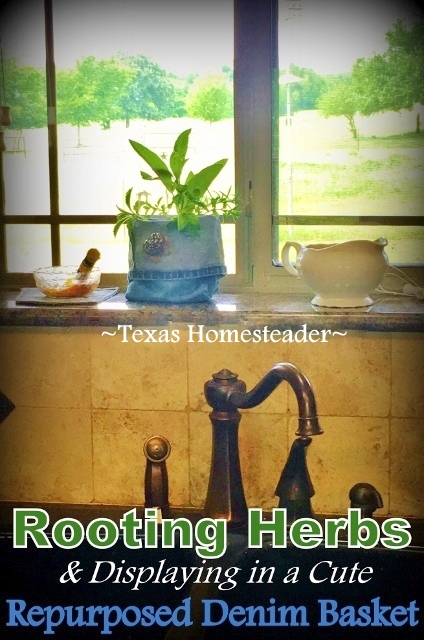
When I got the herb cuttings arranged like I wanted them I slipped the jar of herbs to be rooted into the denim basket, careful not to spill any of the water. Then I sat the herbs on my kitchen windowsill.
Now let’s step back & see what I think…Oh yeah, I like it! Instead of just a jar of herbs, I have a decorative jar of herbs. And denim is just my decorating style. How perfect!
When the herbs root I’ll probably re-pot them individually and line my kitchen window sill with them. Or on second thought I may just leave it like this, I think it looks super cute!
Using Herb Leaves Trimmed Away
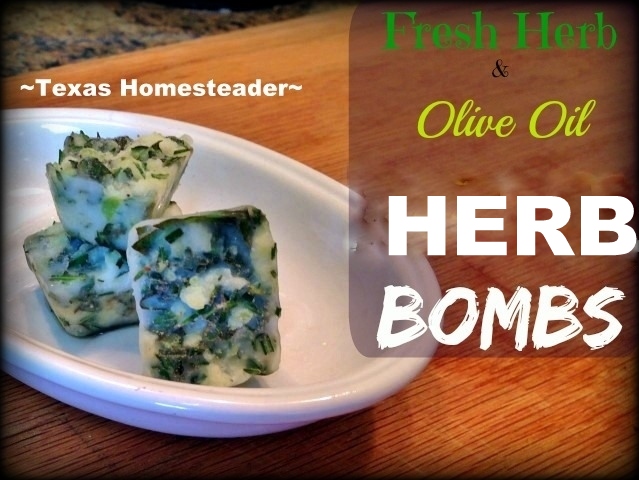
What about those leaves I’d trimmed away? Well I’ll wash those herb leaves up & chop all but the Stevia into small pieces & mix them into a bit of olive oil.
Then I’ll freeze the mixture in an ice cube tray to make my favorite Herb Bombs.
Then they’ll be ready & waiting to use – my own freezer convenience food. I especially love them in quick pasta dishes.
These frozen herb bombs so easy to use – pop a cube out and drop it in my cooked and drained pasta. The olive oil melts and spreads the herby deliciousness throughout my pasta. Delicious!
Using Stevia Leaves
As for the stevia leaves, I’ll pop those leaves into my sun tea jar so they can sweeten RancherMan’s Sun Tea as it brews. It’s a zero-calorie way to sweeten his tea so I use that Stevia often that way.
Otherwise I can chop and dry the stevia and then Grind Stevia Into Powder. If I have the powder I’ll sprinkle it into my unsweetened yogurt for zero-calorie sweetening. Whichever way those trimmed leaves get used – nothing gets wasted!
~TxH~
Other Kitchen Hacks
- Paper Napkins In A Paperless Kitchen
- Easy Reminder For Kitchen Stove
- Make Your Slow Cooker More Efficient
- No Cooking Fat Down The Drain
- Labeling A Glass Jar
- Cleaning A Narrow-Neck Jar
- Keep That Broccoli Fresh
- Sneaking Healthy Vegetables Into Their Diet
- Don’t Waste Onion Trimmings
- What Do The Dates On Food Packages Actually Mean?
- Heat-Free Way to Peel Tomatoes
- Peel A Whole Head Of Garlic Cloves In Seconds
- Cleaner Vegetable Chopping
- Quick Baking Measurement Reminder System
- Don’t Waste It – Free Vegetable Broth
- Easier Deviled Eggs – No Mess!
- MYO Crispy Taco Shells CHEAP
- Tame Kitchen Appliance Cords
- Expand Your Muffin Tin Capacity With Canning-Jar Rings
- Use ALL Of Your Spray Cleaner
- How To Tell If Your Baking Powder Is Still Good
- Easily Opening Those Stubborn Jars
- Saute & Freeze Onions For Kitchen Convenience
- Roasting Peppers Quickly On Gas Stove Top
- Our Endless Soap Dispenser Setup
- …and many MORE!
See All Homestead Hacks
C’mon by & sit a spell! Come hang out at our Facebook Page. It’s like sitting in a front porch rocker with a glass of cold iced tea. There are lots of good folks sharing!
And you can also follow along on Pinterest, Twitter, Instagram
If you’d like to receive an email when a new blog post goes live,
subscribe to our Blog!


Love this idea!!! You”re so talented! This would make a great end of the school year gift for a teacher, you could put fresh flowers or a plant in there.
I agree Patti, a great gift for teachers! ~TxH~