by Texas Homesteader ~
As anyone who’s battled (and LOST) the war with Bermuda grass in their flower beds knows, it’s almost impossible to eliminate.
The underground rhizomes break easily, leaving the next generation of Bermuda-grass-misery ready to thwart your best efforts again and again. But I’ve found a solution!
Protecting A Landscape Planting From Bermuda Grass
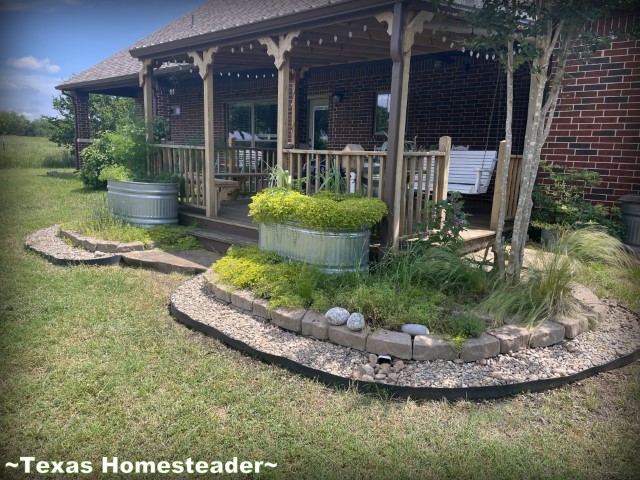
RancherMan & I had a beautiful porch extension built last year. And we landscaped it with pretty raised beds.
But wait. WHAT’S THIS??? Even though we took precautions to keep the Bermuda grass out, it tried to march into our beautiful raised beds anyway!
In researching ways to tame the Bermuda-grass, RancherMan stumbled upon a grass barrier that looked promising. It stops the underground rhizomes as well as the above-ground runners. How exciting!
I contacted the company to see if they’d be interested in sending me a sample of their product to try & review. They agreed and the barrier was sent to me promptly.
As usual, remember that just because an item is offered at no cost in exchange for my review, I owe it to my readers to be honest and open about the pros and cons of the product I’m reviewing. I always disclose to the manufacturers that I will not offer a false positive review in exchange for free product!
About The Grass Barrier
From the parent company Lewis Bamboo:
Our long lasting barrier is made in the USA from 100% recycled HDPE. Grass Barrier is not brittle like injection molded material and does not splinter like fiber and composites. Our barrier has a smooth surface for a clean appearance and doesn’t hold dirt. We use 100% HDPE plastic so our product will never rust like metal edging. Grass Shield can last over 100 years & has an ASTM D 4833 puncture resistance of 200 pound-force.
Well that sounds good to me! Let’s give it a try.
1st Grass Barrier Installation Attempt & Fail
As instructed we unrolled it in that hot Texas sun and let it relax & become more pliable. Then we easily cut it to length with an ordinary pair of tin snips.
We were instructed to use a trenching shovel to bury the barrier 6″ below the ground, leaving a 4″ lip above ground.
It was recommended to dig a 6″ deep trench to install the grass barrier. But we were going through a drought so the ground was dry and hard.
So instead we used a flat-head trenching shovel to cut the soil 6-8 inches down, pushing & pulling the shovel to make a narrow opening in the soil.
When the area was ready to accept the barrier we slid it into place, chunking up the hard dry soil best we could on either side to snug it in. Then we stood back & looked at our handiwork.
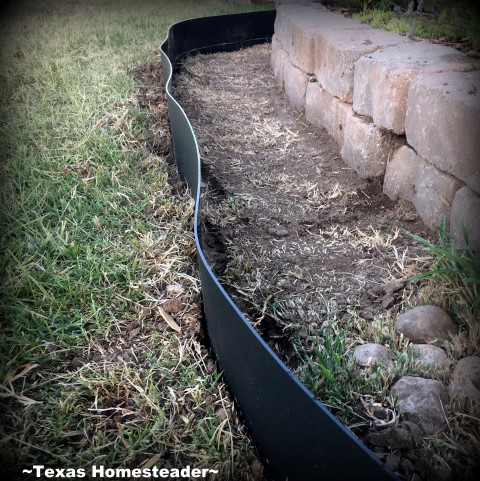
Hummm, those waves… RancherMan was not a fan of that.
Maybe there wasn’t enough room for the barrier to settle smoothly since we cut only a narrow slit in the ground. Perhaps the hard soil is forcing the barrier into awkward angles?
So we pulled it all out and started over.
2nd Installation Of Grass Barrier
This time RancherMan used a sharp-shooter shovel. Instead of cutting an opening in the soil we instead actually dug a flat-bottom trench 3″ to 4″ wide.
We felt that would allow the barrier to bend more gently & hopefully keep the barrier from rippling.
Bury Grass Barrier 6″, Leave 4″ On Top
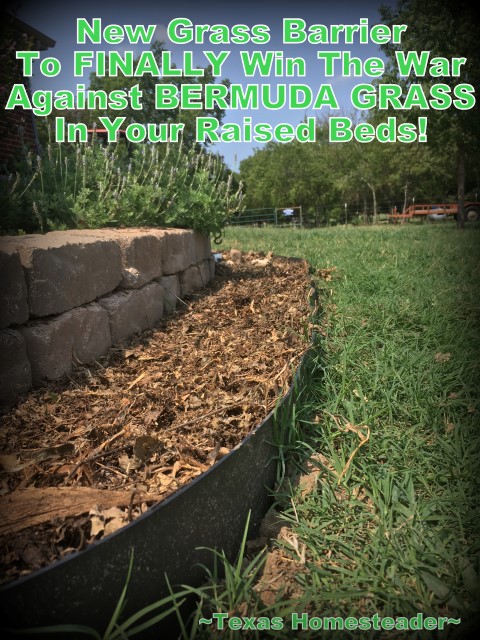
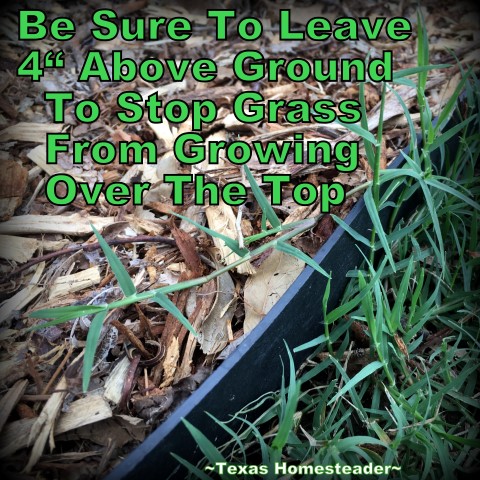
To keep Bermuda rhizomes from going under the barrier it’s recommended to bury it 6 inches deep. This gives a 4″ lip remaining above the ground to keep the runners from growing over the barrier & into your beds.
But RancherMan didn’t care for the look of that much barrier above ground. So we contacted the folks at Lewis Bamboo and asked them if we could install ours a little deeper.
They responded that we could, but with less than 4″ above ground we’d need to maintain the grass more often to make sure it didn’t grow over the barrier.
So RancherMan only left about 3″ above ground instead of the recommended 4″.
But be aware there’s a reason they recommend the ratio of barrier beneath vs. above ground.
For the best effectiveness and as instructed, bury 6″ underground, leave 4″ above ground.
Grass Barrier Ripples Remain
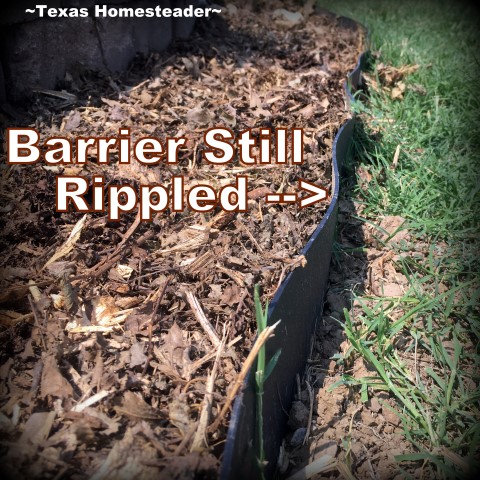
After installation we replaced the soil evenly on both sides as instructed on their website. The rippling was better but still very noticeable.
I asked Lewis Bamboo about this and the reply was:
I think what is causing the ripples is the soil compression during thermocycling. This should be lessened once the soil has properly settled from being excavated.
In all fairness we’ve been dealing with drought so I’m not sure how much the soil has actually settled. So I waited for several months.
Although the rippling improved, it’s still noticeable even now. I’m more interested in stopping the Bermuda grass so this small aesthetic difference is minor in our experience.
Killing The Bermuda Grass Inside The Barrier
After the grass barrier installation I used an herbicide to kill the Bermuda Grass within the barrier area.
It’s important to assure Bermuda grass is actually dead before attempting to plant your area within the grass barrier.
A one-time application will almost never actually kill Bermuda.
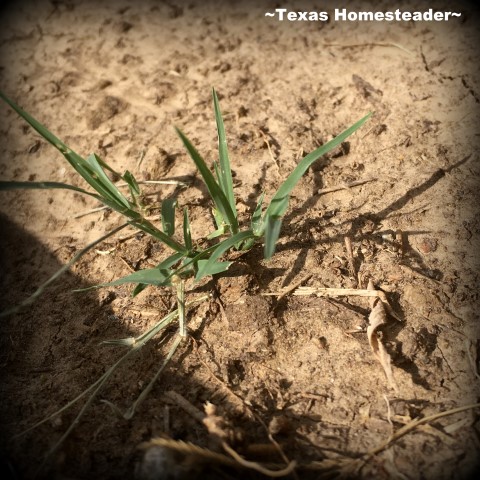
So I waited until I saw sprouts from underground rhizomes and sprayed again.
I felt the effects of the drought kept the grass from taking in the herbicide completely. I really needed to assure the grass was dead before testing.
I actually had to spray herbicide 4 separate times to finally kill the Bermuda grass. So stay diligent to kill those sprouts for good before planting!
After waiting a week following the final spot spray I saw no indication of sprouting grass. So I finally moved on to the testing phase.
Testing Grass Shield For Effectiveness
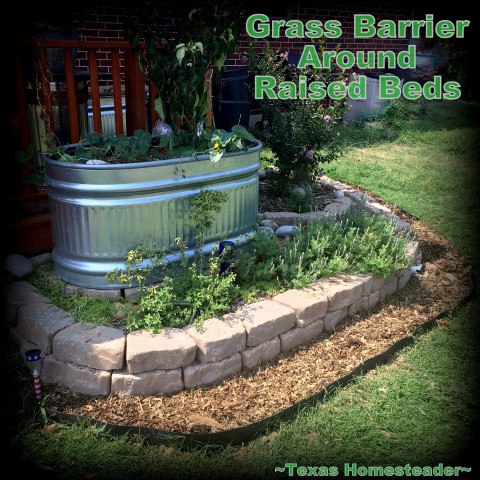
We didn’t want bare ground between the barrier & the raised beds so we added shredded wood mulch in this area.
It softened the look and I was hoping that filling in this area would help round out those ripples. But it doesn’t seem to have made a difference.
RancherMan suggested crushed rock or pea gravel might be better. But we used wood mulch because we can obtain it for free in our county.
Plus I think it looks nice too.
2023 Bermuda Grass Barrier Update
Even after 5 years (and counting) I see no further resurgence of Bermuda grass sprouts inside the barrier. Nor is Bermuda grass sneaking in from beneath the barrier.
But as the wood mulch deteriorated and gradually turned into soil, many other airborne weed seeds (NOT Bermuda grass) floated in and took root. I found myself on my hands & knees pulling weeds way too often.
So I raked away the mulch, laid flat some plastic cattle-feed sacks and poured concrete, topping it off with pea gravel to keep any seeds from taking hold.
I’m hopeful this significantly reduces weeding now and maintenance down the road.
It appears I finally won the war against that blasted Bermuda grass in my raised beds. Hip-Hip, HOORAY!!
(Note: Some links in this post will take you to other related articles for further information. But links preceded with * are affiliate links. If you click and buy something I could receive a tiny commission.)
If you don’t already have it, you can totally *Try Amazon Prime For FREE for 30 days. Then place your order & get your free shipping, etc. Keep prime for 30 days FOR FREE & try it out – streaming movies, music, free shipping – the whole 9 yards! If you don’t want to continue you can cancel within 30 days and pay nothing for the Amazon Prime membership trial run.
Grass Barrier Installation Tips From Our Experience
- Roll grass barrier out in the sun for a while to soften it somewhat & make it easier to manipulate.
- Don’t just dig a deep notch & slide the barrier in. Go head & dig a 4″ wide trench. Trust me, installation will be easier.
- When they say leave a 4″ section above ground, take their word for it. Your future maintenance will be lessened.
- In installing the grass barrier we used a paint pen line to mark the above-vs-below ground section. This made it easier for us to see when we had the barrier level.
- We installed this barrier during the heat of summer and during a wicked drought. Even watering the ground to try to soften it, we struggled. It’s much easier to install when the ground is soft, and much more pleasant to install when it’s not 100 degrees outside!
- Back-fill the excavation dirt quickly while it’s still loose to keep the dirt from drying out & becoming hard clods.
Bermuda Grass Barrier Pros & Cons
Pros
- Seems to have effectively stopped Bermuda grass from infiltrating our planting areas and raised beds even after several years.
- Low-tech and poison-free method of keeping grass out of raised beds
- Sold in assorted lengths so less need to combine lengths & make joints
- Easy to cut to the required length with ordinary cutters or razor knife
- Appears to be durable with RancherMan’s use of the weed-eater around the barrier
Cons
- To date, the barrier continues to have a ripple in its appearance.
- RancherMan’s not fond of the look of the required 4″ of barrier above ground.
All in all I’m pretty happy with this grass barrier. I’m planning to purchase more this spring to line my veggie garden where Bermuda is also a constant battle. I found this *Grass Barrier at Amazon too.
Do you face the same Bermuda grass battles? Now there’s HOPE! Feel free to contact the Grass Barrier folks (various links below). Tell ’em the Texas Homesteader sent ya!
~TxH~
More About Our Outdoor Living Area
- Adding An Outdoor Living Space
- Landscaping On The Cheap
- No Waste (and Less Expensive) Fill Dirt For Gardens
- Cheap (or FREE) Wood Mulch For Your Garden
- Stopping BERMUDA GRASS From Your Plantings!
- How To Keep Birds Off Your Porch Railings
NE Texas Native Trees & Plants
- Honey Locust Tree – Useless yet Useful
- Identifying A Western Soapberry Tree
- Bois d’Arc – Beautiful & Functional Tree
- Jujube Tree Produces Sweet Fruits
- Wild Plum Tree Offers Plums For Delicious Jelly
- Keeping Bermuda Grass Out Of Garden Beds
See All Posts About Native NE Texas Plants & Animals
My Favorite Garden Hacks
Garden Planning
Seed Planting
- Planting Seeds In A Milk-Jug Greenhouse
- Planting An Indoor Greenhouse
- Repurposed Cardboard Seed-Starting Pots
Soil Health
- Easy Compost For A Healthy Garden
- How Leaves Benefit Your Garden
- Using Manure In Your Compost & Garden
Garden Styles
- 3-Sister’s Garden – The Original Companion Planting
- Planting A Large Galvanized Trough
- Where I Found The BEST Raised Bed!
- Planting A Blueberry Bush In Rustic Galvanized Tub
Garden Plants/Harvest
- Stevia – Growing Your Own Sweetener!
- My Simple, Zero-Waste Herb Drying Setup
- The Lazy Gardener’s Plant List – Plant Once, Eat For Years!
- How To Tell When Watermelon Is Ripe
- Luffa A Surprising Zucchini Substitute!
- How To Plant & Grow The Best Tomatoes
Water/Irrigation/Drought
- Keeping Potted Plants Watered
- Repurposing A Coffee Can For Deep-Soak Watering
- 3 Rainwater Collection Systems We Use
- Cheap (or FREE) Wood Mulch For The Garden
- Using Vining Plants For Living Mulch
Weed Control
Garden Tips
- Tricking Birds AWAY From Your Strawberry Plants
- Propping Tender Seedlings
- Homestead Hack: Remember Where You Planted Seeds
- How I Use EcoBricks In The Garden
MORE Gardening Posts
C’mon by & sit a spell! Come hang out at our Facebook Page. It’s like sitting in a front porch rocker with a glass of cold iced tea – lots of good folks sharing! You can also follow along on Pinterest, Twitter or Instagram.
If you’d like to receive an email each time a new blog post goes live it’s EASY to
Subscribe to our blog!
Lewis Bamboo & Grass Barrier
- Grass Barrier Website
- Grass Barrier FB Page
- Parent Company Lewis Bamboo



Hello, just to clarify, you poured a layer of concrete under the gravel? Why do you attribute the success to the barrier, not to the concrete? I am dealing with out of control bermuda in AZ so I’m looking for something new to try!
Good question Jon, I probably should clarify my concrete update from this year (2023). The Bermuda barrier was installed in 2018. No bermuda grass has infiltrated this area since then. The weeds I spoke of that popped up when the mulch deteriorated into soil was not bermuda grass, but typical weeds that might spread from light-weight seeds floating in the air. I got tired of digging through the pebbles to try to get to the roots of those weeds so I pulled as much gravel as I could, added cement and spread the pebbles on top for the same look without soil beneath the rocks to facilitate those airborne seeds. But since this barrier was installed in 2018, no bermuda has sprouted nor infiltrated this area – it’s been 100% effective against that dang invasive bermuda grass! ~TxH~
Hi! Now that it’s been several years, how has the Grass Barrier held up? Any new advice about it, or controlling bermuda?
The grass barrier has held up beautifully and continues to stop the march of Bermuda grass into our planting areas. The ripples that were present when it was installed the barrier never went away. We decided to grow a short sedum in that space between the weed barrier and the raised planting area so it grows up & over the barrier, hiding any ripples. (we still mow the grass right up to the barrier including any sedum that grows on the other side of it to make sure bermuda doesn’t sneak in unnoticed) The biggest thing I can suggest is to follow the 4″ above, 6″ below ground instructions and do so with a single piece of grass barrier if possible. If you buy shorter lengths and have to put two together to stretch along the distance you’re installing it, well any breaks/splices is a ripe opportunity for underground rhizomes to sneak by. But I feel the grass barrier has been a screaming success for us – still no Bermuda grass in our plantings! ~TxH~
Hello! I can’t tell how old this entry is and I was wondering if it has been in use long enough for you to tell if you would recommend it and how effective it is at keeping out bermuda grass? I have that stuff slowly taking over my yard and it is the devil! I want to establish some new flower beds but I’m intimidated by the war I’m about to start.
We installed the Barrier in 2018 and it’s been successful in keeping Bermuda grass out of the planted areas. BUT – it’s super important to make sure all of the Bermuda grass is actually dead in the intended area or the underground rhizomes will simply sprout again. As you’ve probably read in this post, I installed the barrier and then killed the Bermuda grass and waited. Sure enough sprouts came up. So I killed those too and waited again and repeated until no additional sprouts were found. Then and only then did I proceed with planting. Another thing to watch, weak areas are where you have barrier joints that come together – even if you overlap them. So a single length of the barrier (instead of patching two lengths together) is preferred. And lastly, the recommended height to leave exposed above-ground is to stop the Bermuda runners from growing up & over the barrier. You can fudge some on the height of the barrier showing as we did, but only a little. And by doing so you’ll also have more maintenance to do to assure the grass doesn’t grow high enough to breach your no-bermuda-grass barrier by keeping the grass cut short more frequently and watching grass pieces that may fly over from a weedeater are important. But truly, this barrier has been wonderful for us. Don’t rush it – take your time & follow the directions carefully and I think you’ll be pleased with the results as well. ~TxH~
Thank you for this detailed reply! One more question, I saw one person mention using it on the inside wall of the raised bed against the pavers, but since you were using it on established beds you used it the way you did. Have you since created any new beds and used it on the inside wall?
No, and I’ll tell ya why. Bermuda grass attacks from below first sending rhizomes beneath the pavers, then sprouts and attacks from above. (shakes fist in air: “WHYYYYYYY BERMUDA GRASS???!!!”. HA) So if you had pavers in front of the barrier, the grass would simply creep beneath them (because pavers are not deep enough to stop rhizomes like the barrier is) and the Bermuda would sprout in the cracks between the pavers. Then it would make its move and try to grow up & over the barrier without you being able to keep it maintained with the lawn mower. Now you’d have to either use poison (which I’m not keen on) or the weedeater which would be only temporary until it started growing again or pull it by hand. But now you have to actually remove the pavers and dig out the rhizomes first or they’ll just sprout over & over again ad infinitum. I do hate pulling weeds… ~TxH~
HA!! I know the exact fist shake!! Thanks again for the detailed answers.
What if you put the plastic barrier on the inside of your pavers?
That would absolutely work and is what I’d recommend if you’re just setting up your flowerbeds and don’t yet have the pavers installed. Or heck, even if you do and don’t mind moving them to install and then replacing them. It’s sure the way we’d done it with hindsight being 2020. That way the barrier wouldn’t be visible at all, and if any slight amount of rippling remained on the barrier it wouldn’t even be seen. ~TxH~
I live in Florida and have used a similar product to what you have used here. I never got mine straight either. We have definitely had enough rain this year to pack the dirt and the ripples are still there. We ended up ripping it all out and guess what…I weed constantly. I hope this works for you better than us. I guess we just couldn’t get past the sloppy look in my beds.
I’m hoping the pea gravel helps form a smoother line AnnMarie. I just don’t have the time (nor the energy) for constant hands-n-knees weeding and this barrier shows real promise in keeping the Bermuda grass in check. I’ll be sure to share my results with the gravel. ~TxH~
It looks like you have a section of mulch between grass and the stone wall of the garden. What I use on stuff I don’t want and that isn’t too close to things I do want is white vinegar – cider vinegar works well too. I don’t think we have B. grass, but we have other stuff ranunculus/butter cup is the main annoyance and I hate to get too aggressive with that because of the decline of pollinators who like it. But the grasses we do have are a pain in the neck too. I have a couple of areas of perennial garden out here that I work sporadically trying to keep them pretty. I put down thick layers of newspaper (cardboard in a pinch but it doesn’t last as long as thick newspaper) and cover them with bark nuggets and along the edges I often put down a stream of vinegar. Aaah, the fight against what nature wants to do VS what we want.
I use a mixture of vinegar, Epsom salt & dish-washing soap to kill unwanted grass & weeds around my veggie garden.But the problem with Bermuda grass is that it spreads underground where the vinegar doesn’t touch. I’ve hurt Bermuda grass with this mixture for sure, but it needs to be sprayed again & again because the rhizomes aren’t hurt at all with the spray. All I can hope for is to make the grass spend all its energy & give up before one of those underground rhizomes pops up inside the planting area where it’d be hard to spray without killing my good plants. It’s a great forage for the cows, but DANG I hate it everywhere else! ~TxH~
Nice! It still looks so much better than the cheap stuff you see with the big round top and a bonus that it won’t rust after a couple of years like the metal edging.
This grass barrier does seem to be well-made, Joe. And I’ve done plenty of heavy-duty weeding of Bermuda grass in my past, digging on my hands & knees in the hot Texas sun. I’m so hopeful that those days are finally OVER for me now!! ~TxH~
Please keep us updated on this product! We battle the horrible Bermuda grass too and I want to simplify our landscaping work since my labor force is entering the paid market over the next few years (kids growing up!). This looks more promising than many other options.
I will Kathleen. Ya know, I’ve been to gardening seminars when someone sheepishly raised their hand and asked about controlling Bermuda grass. The presenter said it was near impossible to control Bermuda in plantings, that diligence with herbicides and digging up the rhizomes that sneak through look to be the only way to keep it out of your planting. This barrier is so promising to me – I don’t have time to struggle (and lose the war) with Bermuda! That’s why I’m thinking of surrounding my veggie garden with it next! ~TxH~
2023 UPDATE: 5 years later and this barrier is successfully keeping all Bermuda grass from my landscape beds! The ripple is still slightly noticeable but not bad. Although I wish I could figure out the ripple thing (could have very well been our fault at installation) this Bermuda grass barrier is a WINNER! ~TxH~