by Texas Homesteader ~
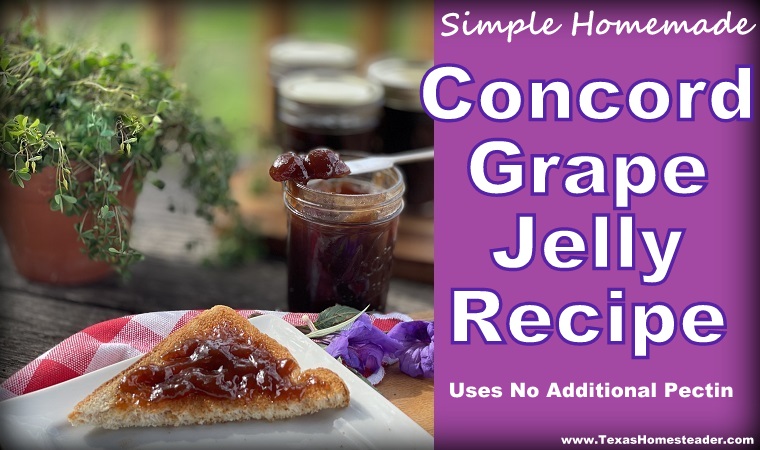
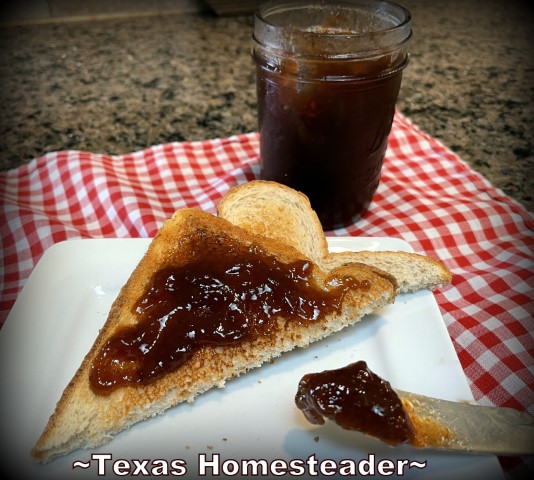
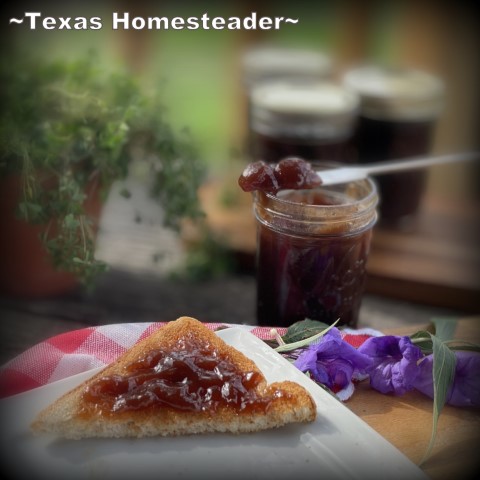
Deep purple Concord grapes make a very flavorful homemade grape jelly. I’m sharing the lazy-cook’s way to make simple grape jelly without adding pectin. I’m even including the easiest way to preserve it longer-term by simple water-bath canning. Delicious, homemade and makes a great gift idea too.
(Note: Some links in this post will take you to other related articles for further information. But links preceded with * are affiliate links. If you click and buy something I could receive a tiny commission.)
What’s The Difference In Jelly and Jam?
Did you ever wonder what the difference was between jelly & jam? According to the National Center For Home Food Preservation,
“Jellies are usually made by cooking fruit juice with sugar.
Jams are thick, sweet spreads made by cooking crushed or chopped fruits with sugar. “
Since I extract both the grape’s juice AND crush the fruit for pulp, my Concord grape jam is somewhere between jelly & jam. But for simplicity I’ll refer to it as grape jelly in this post.
Growing & Harvesting Concord Grapes
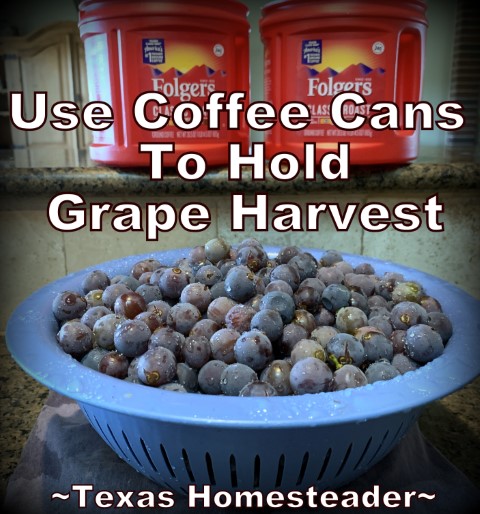
You can buy or grow your own grapes for this jelly. But my Concord grapevine grows vigorously and produces heavily in my garden. So I grow and harvest them for my homemade grape jam.
Here in growing zone 8a my Concord grapes are typically ready to harvest in late July / early August. But the entire bunch of grapes is never ripe all at the same time.
So I harvest ripe grapes much like I harvest blueberries – one at a time.
Those grapes are harvested each morning as I pass through the garden on my way to the chicken coop.
Do Grapes Ripen Off The Vine?
No, grapes do not continue to ripen once they’re harvested from the vine.
So by picking only the ripe grapes each day I’m able to harvest and enjoy them in their fullest sweet robust flavor.
After harvesting the grapes each day I’ll bring them inside, wash them and allow them to air dry. Then I’ll place them in repurposed bags in the freezer.
By freezing them I can wait until after the heat of summer to make my homemade jelly when it’s more convenient for me.
Freezing & Thawing Grapes For Jelly
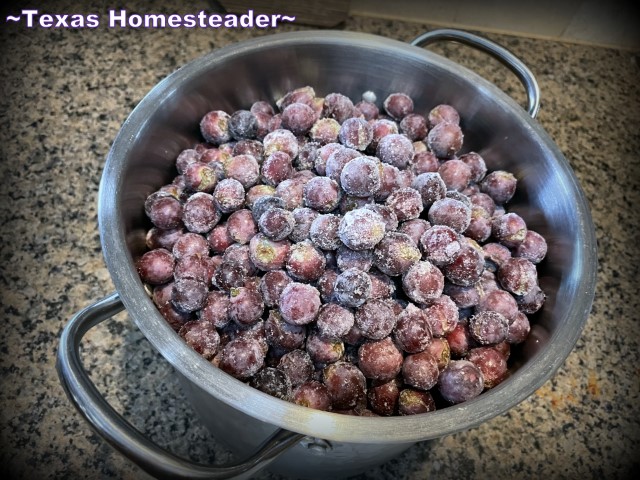
Since my grapes have been frozen I bring them out of the freezer the day before I’m ready to make my homemade grape jelly. I dump the frozen grapes into a large stockpot.
Then I place the pot in the refrigerator to allow the grapes to thaw overnight.
A simple shortcut: By freezing then thawing the grapes, they’ve released enough of their own juice that I don’t need to add any water when simmering them down.
How Do You Get Juice & Pulp From Grapes?
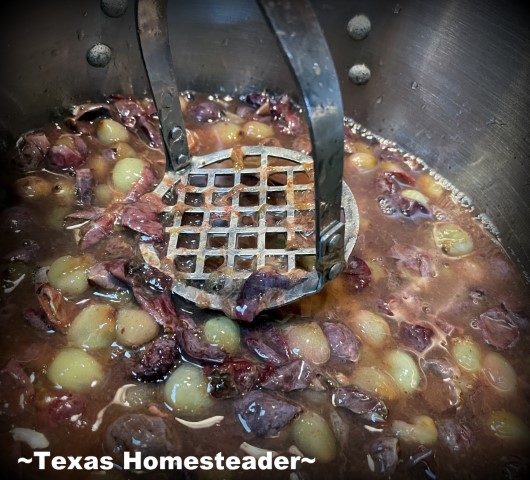
Grapes are simmered and mashed to extract the juice and pulp. When it’s time to simmer the grapes I’ll bring out my large pot of thawed grapes and put them on the stove with the heat set to medium-high.
If you’re using fresh grapes you’ll want to add a cup or so of water when simmering them – just enough to keep things from burning until the grapes release their own juice.
As they heat up the grapes will soften and more & more of their juice will be released. I’ll use a potato masher to crush those grapes as they simmer.
I want as much juice and pulp as I can get.
After the fruit is soft & crushed and have released their juice I need the juice & pulp.
How Do You Separate Grape Juice & Pulp From Seeds & Skins?
My Concord grapes are a seeded variety. But it’s easy to separate the grape juice & pulp for your jelly from the seeds & skins you don’t want.
The easiest way is to dump the whole thing in a cheesecloth-lined colander and allow the juice to drip through. The resulting strained juice is what you’ll use to make your jelly.
But remember, I like to have a little pulp in my jelly as well.
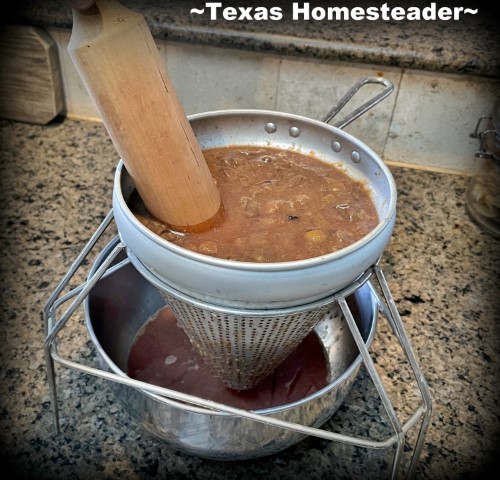
So I dump it all into my vintage *Metal Jelly Strainer and the juice runs out of the holes into a large bowl placed beneath.
To extract the pulp I use the wooden plunger to press it all down.
The pulp is then pushed through the holes of the metal sieve and is collected in the large bowl along with the juice.
How Much Sugar for homemade jelly?
I never know from one year to the next how many grapes I’ll be able to harvest. But this Concord grape jelly recipe is easy to adjust – it’s based on the number of cups of juice/pulp you get!
When it’s time to make my jelly/jam I’ll measure the juice and pulp to find out how much I have.
For each cup of grape juice/pulp I’ll add 3/4 cup of sugar to make jelly.
So to begin making my grape jelly I’ll measure out my juice and add the appropriate measure of sugar into a large stock pot.
JELLY-MAKING TIP: You’ll want to use a much larger pot than you think you’ll need when making jelly since simmering juice/sugar will really bubble up. You don’t want to clean up that mess, trust me…
I’ll place the large stockpot holding my grape juice/pulp on the stove with the heat set to medium-high and stir as the jelly starts to heat up. Keep in mind you want to stir often as sugar syrup will burn pretty easily.
I bring the mixture to a hard boil which cannot be stirred down and until I reach the jellying point temperature. (for me, that’s 220 degrees F. but your gel temperature could be different based on you altitude)
JELLY-MAKING TIP: Make sure your jelly reaches the gelling stage temperature. I once removed the pot from the heat just 1 degree shy of the gel point and my jelly didn’t thicken as well.
Stirring constantly I hold the jelly at the gelling point for about a minute and I’m done! Your gelling point will vary based on your altitude. See the chart below:
Now that the jelly is finished you can pour that hot jelly into hot jars. (NOTE: pouring hot jelly into hot jars helps avoid glass thermal shock and cracked jars).
Allow the jars to cool & store your grape jelly in a lidded glass jar in the refrigerator.
How Long Does Homemade Jelly Last In The Refrigerator?
There are lots of variables that determine how long your jelly will last in the refrigerator. Circumstances such as how often you have it out of the refrigerator with the jar open, etc. Some say 6 months or more.
But the National Center For Home Food Preservation suggests that to be on the safe side you should enjoy your refrigerated jelly within the next month or so.
So if you’ve made more Concord grape jelly than you can eat that quickly, you might want to consider canning it. Plus homemade grape jelly makes a great gift idea too!
Reasons Why Jelly Fails to Set
We’ve all been there. You thought you did everything right but… Your jelly just didn’t set. Don’t worry, it happens to most of us at one time or the other.
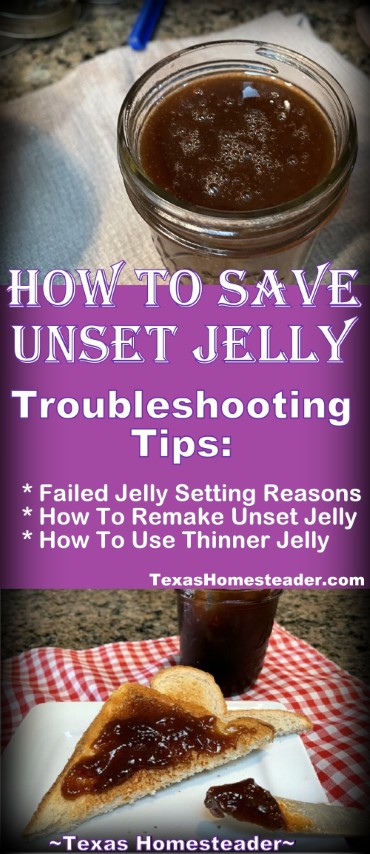
If you’re looking for possible reasons, solutions or what to do with unset jelly I urge you to read Why Didn’t My Jelly Set.
In that post I list solutions to try to remake the jelly and suggestions on how to use thin jelly too.
How To Preserve Homemade Jelly By Canning
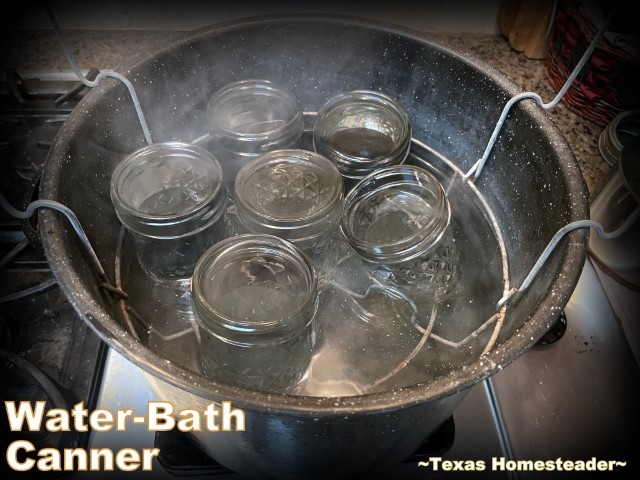
Canning your grape jelly/jam is easy and can be done using a simple water-bath canner. And I use the boiling water to heat and sanitize my canning jars while I’m making my jelly. Two-fer win!
I keep the jars submerged in the simmering water while I’m cooking the jelly. Then I use the water-bath canner rack to pull the jars up so I can carefully dump the hot water out of the jars, fill them with jelly, top with the lids and return them to the canner rack until they’re ready to be canned.
(If you’re not already familiar with water-bath canning, see reference links at the bottom of the page for more specific home water bath canning information)
Place your hot jelly into hot sanitized hot jars, top with prepared canning lids & process in a water-bath canner.
Here in NE Texas I process my homemade jelly in water-bath for 5 minutes after the water returns to a boil. (your time may be different based on your altitude – see references at the end of this post)
When the canning time is up I remove the jars carefully and place them in a draft-free location for 24 hours.
After that time I’ll check the seal, remove the rings & wipe down the jars before labeling them and storing them in my pantry.
How Long Do Home-Canned Jars of Jelly Last?
Again, there are many schools of thought regarding how long jars of home-canned jelly will last. To be on the safe side, the National Center for Home Food Preservation recommends enjoying your sealed jars of homemade jelly within about 12 months.
The most important thing is that the jar remains properly sealed.
So before storing home-canned food in the pantry it’s important to remove the ring from your jars.
With the rings on the jars pressing the lids down, the jar could appear to still be sealed when the seal is actually failing. A false seal can be dangerous. Food safety is important.
Homemade Grape Jelly Recipe
This Homemade Grape Jelly recipe is super easy. So if you’re ready to make your own homemade grape jelly, here’s the recipe!
Did you make this Homemade Grape Jelly? Please rate the recipe in your comment below!

Easiest Homemade Grape Jelly Recipe – No Added Pectin
Ingredients
Multiply For Each Cup Grape Pulp/Juice Extracted:
- 1 cup Grape Juice/Pulp
- ¾ cup Sugar
Instructions
Extract Juice / Pulp
-
If needed, add 1 cup water to grapes in a large stockpot. Bring grapes to a boil, crushing the fruit with a potato masher to release juice & pulp until the fruit is very soft.
-
Remove the pot from heat, top with a lid & allow mixture to cool slowly.
-
When the grape mixture is cool, strain the juice, separating juice/pulp from seeds and skins.
Making Grape Jelly From Juice/Pulp
-
Measure the juice/pulp and add 3/4 cups of sugar for each cup of grape juice measured. Bring juice to a hard boil that can't be stirred down and reaching jellying point - about 10-15 minutes
(Jellying point is 8 degrees above boiling point of water, or 220 degrees here in NE Texas, but your gel point could be slightly different based on your altitude.
-
Place hot jelly into hot sanitized jars and add a lid. Allow jelly to cool, then place jars in the refrigerator. Consume within about 30 days.
Optional Water-Bath Canning Grape Jelly
-
If desired this grape jelly can be water-bath canned. Sanitize canning jars and heat lids. Pour hot jelly into sanitized 1/2-pint canning jar leaving 1/4" headspace.
-
Wipe any drips from rim of jar and top with 2-part canning lids.
-
Lower hot lidded jars into water-bath canner, making sure hot water covers the jars by 1 to 2 inches.
-
Once water returns to a boil, process jelly in a boiling water bath for 5 minutes for altitudes up to 1000. (processing time may vary based on your altitude. Be sure to follow your canner's directions.)
-
Then remove sealed jars from canner and allow jars to stand in a draft-free place undisturbed for 24 hours before removing the bands.
-
After 24 hours remove bands, test for seal, label and store jars. Any unsealed jars should be stored in the refrigerator and consumed within 30 days or reprocessed and water-bath canned again
Recipe Notes
NOTE: Quantity of finished jars of Grape Jelly depends upon the amount of grapes you harvest & juice you extract. Just add 3/4 cup of sugar for each cup of pulp/juice extracted.
NOTE: It’s best to add as little extra water as possible. If necessary add 1 cup water when simmering grapes to give enough moisture until the grapes begin releasing their own juice. But if you start with previously-frozen grapes you can just thaw them in the refrigerator overnight and they’ve already given up enough juice to simmer the whole grapes with no added water necessary.
NOTE: Jelly point is 8 degrees above the boiling point of water, or 220 degrees here in NE Texas - but may be different for you based on your altitude.
NOTE: When processing time is less than 10 minutes it’s necessary to sanitize the jars beforehand. I put them in the water bath and sanitize them in the simmering water while I’m making the jam.
If this is your first time canning, it is recommended that you read Principles of Home Canning link at the bottom of this post. For more information on water-bath canning, please read the link at the bottom of this post Using Boiling Water Canners before beginning.
Our Delicious Jelly & Preserves Recipes:
- Clover Blossom Jelly
- Our Favorite Jelly Recipes
- Honeysuckle Jelly – Childhood Memories In A Jar
- Wild Plum Jelly – No Added Pectin!
- RancherMan’s Favorite – Pear Preserves
- Blueberry/Lemon Jam – No Added Pectin
- Concord Grape Jelly – No Added Pectin
- Why Didn’t My Jelly Set? Tips To Save Unset Jelly
All Jelly, Jam & Preserves Recipes
Our Favorite Breakfast Posts
Egg-Based Breakfasts
- Biscuit Sandwich Breakfast
- Breakfast Quesadillas
- Farmer’s Breakfast-Bake Casserole
- All-In-One Ham/Egg/Cheese Breakfast Muffin
Breakfast Breads
- Homemade Country-Style Buttermilk Biscuits
- Leftover Biscuit Dough To Cinnamon Rolls
- Blueberry Muffin Recipe
- Sugar-Free Oatmeal & Berry Muffins
- Fluffy Homemade Pancakes
- Blueberry Cream Cheese Stuffed French Toast
Other
- MYO Chai Tea Mix
- Homemade Hash Browns
- Homemade Maple-Flavored Pancake Syrup
- Honey-Sweetened Pumpkin Granola
- MYO Instant Microwavable Oatmeal
- Favorite Homemade Jelly Recipes
- Simple Cottage Cheese Recipe
- Homemade Yogurt: Stovetop Method
- Homemade Yogurt: Instant Pot Method
- Easy Homemade Breakfast Sausage Seasoning
- Cooking Breakfast Should Include HAZARDOUS DUTY PAY!
See All Our Recipes
C’mon by & sit a spell! Come hang out at our Facebook Page. It’s like sitting in a front porch rocker with a glass of cold iced tea. Lots of good folks sharing! You can also follow along on Pinterest, on Twitter or on Instagram.
If you’d like to receive an email each time a new blog post goes live it’s EASY to subscribe to our blog
References:
Nat’l Center For Home Food Preservation –






I was looking for a recipe that didn’t use pectin because I didn’t have any on hand and didn’t want to go to the store. I had bought some home grown grapes at the farmers market but had never made grape jelly before. Found your recipe and it sounded simple enough, so thought I would go with it. So glad I did because it turned out delicious! My daughter doesn’t care for jelly too much, but this is her go to before any other kind in the house. Thank you very much!
So glad you love it as much as we do! It’s a simple jelly recipe and always turns out perfectly for me. Enjoy! ~TxH~
A co-worker gave me some wild grapes a few weeks ago.I rinsed them off and froze them in zip Iock bags until I had time to make jelly .I had never heard of doing it that way but I Googled it and came across this recipe. Boy did I luck out. I haven’t made jelly in many years
and it was not a success then. I took the grapes out of the freezer, removed the stems and put the pot of grapes in the fridge for a few days. (Life kept me from getting to them right away and they were still frozen!) Then I cooked them just as the Texas Homesteader… to my delight the jam came out perfectly and was so easy! Thank you for a great recipe. I know my co-worker is very eager to get his share!
That’s awesome Judy. This recipe has always been a 5-star for me as well. So simple and jelly making in the cooler months instead of standing over a steaming pot in the hot & humid Texas summer months. Score! Glad you love it as much as we do. ~TxH~
Thank you so very much for sharing this recipe! I was a little in doubt at first because Certo says thickening failures come from not using enough sugar and your recipe says 3/4 cup of sugar to one cup of juice. I followed your directions and Wow. Everything turned out perfect using half the sugar. You made a believer our of me! My husband tasted and said your recipe was much better than the batch!
Well Dottie, aren’t you sweet as peaches? I’m so glad you love this homemade grape jelly as much as we do. For the longest time I just didn’t know what to do with all those gorgeous Concord grapes growing in my garden because I didn’t want to be bothered with the seeds they contained. But now I make this grape jelly recipe every year. Homemade jelly makes a great gift idea too. Everyone loves homemade jelly. Enjoy! ~TxH~
I made this grape jelly with fresh purple grapes I grew in my garden, but if I needed to I could just buy grapes at the store. the jelly turned out perfectly and my husband loves it so much! I even decided to set some jars back for homemade Christmas gifts too.
I always enjoy reading your blog posts and the jelly post brought back memories of my canning years. Friends who come here to share the bounty of our ancient blueberries bring us some of their preserving efforts as a thanks. I know I’ve told you the story behind these bushes and their connection to my childhood all of which makes being able to share them with friends very special to me. In addition to that when friends come to pick I usually pick some for my freezer and we visit and enjoy the time together. We also have blackberries here – “wild” Himalayan – very thorny but delicious and then the bird man planted some thornless blackberries that are quite good and very nice to pick. Being able to share the bounty with friends and neighbors is such a plus. Take good care, Candace in western Oregon
I love your story so much Candace. And I’m so jealous of your blueberries. I’ve planted them time & time again without success until… I planted a miniature blueberry bush in an old galvanized tub next to our back porch that’s thriving. But it’s gotten hit with one the or the other for the last several years – late severe freezing weather two years in a row, drought and hordes of grasshoppers the likes as we’ve never seen. Here’s hoping next year I’ll get a harvest! ~TxH~