
by Texas Homesteader
*contains affiliate link
I love my morning yogurt, y’all. But several years ago I thought to myself “I wonder if I can MAKE yogurt?”
A quick search of the internet showed that I could indeed, and there were several recipes. I’ve never looked back!
I’ve made 1/2 gallon of yogurt about every other week for decades now & it’s shamefully easy!
Plus I make my yogurt in single-serving 1/2 pint glass canning jars so other than the milk jug itself there’s NO TRASH, recycling or otherwise.
I’m happy to share my method with you – the recipe will be included at the bottom.
(Note: Some links in this post are for further information from earlier posts I’ve written. But links preceded with * are affiliate links. If you click them and buy something (almost anything, not just the item noted) I could receive a tiny commission. But the price you pay will NOT change. It’s an easy way to support this blog without anything coming out of your pocket. So click often! Thank you!)
It all started several years ago when I first became aware of my eco-friendly side. I became very interested in both recycling and conservation.
My suburban city had just started a recycling program and I was all over it! As a result I began to also look for ways to reduce the volume of my family’s trash that was sent to the landfill.
I started being very mindful of what I purchased, shunning it if I felt it was overly packaged.
One place I felt I didn’t have control was with yogurt. My city’s recycling program didn’t accept the kind of plastic that these yogurt containers were sold in.
Although I was all fired up over recycling, I’d sigh and throw these containers in the trash feeling I had failed in my environmental quest.
And so it was then that I began making my own yogurt.
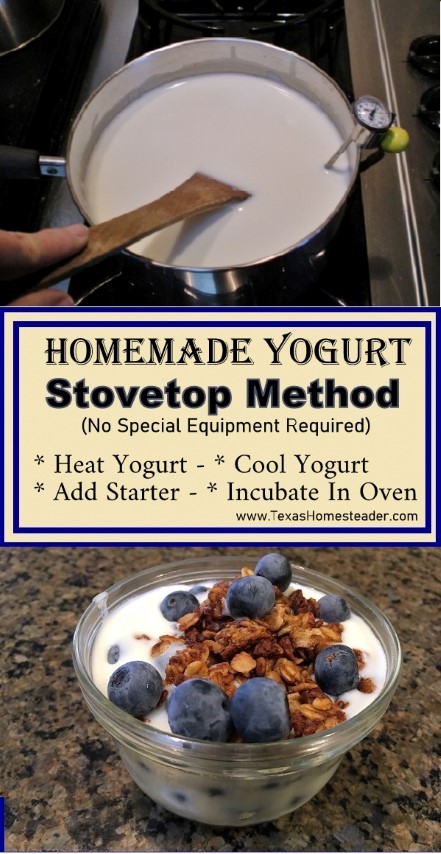
Homemade Yogurt Is EASY!
The abbreviated instructions are as easy as this:
Heat milk & powdered milk to 180 degrees, cool to 105 degrees, stir in yogurt starter & incubate in warm place undisturbed until thick.
Whaaaaat? Can it really be this easy? YES, Really!
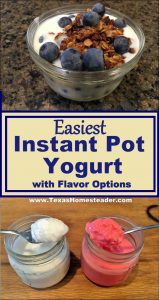
Update: I recently purchased an Instant Pot. If you’d rather make your yogurt in an Instant Pot instead of stove top, you can see my step-by-step instructions to
Instant Pot Yogurt Here.
Getting Started With Stovetop Yogurt
I start with 1/2 gallon of 2% milk and stir in 2 cups instant powdered milk. This makes the yogurt a little thicker and I believe it also adds protein.
I’ve tried this recipe with skim milk but wasn’t happy with the texture of the yogurt. RancherMan loves the texture of whole milk.
But the 2% milk is a happy balance. It results in a nice silky-thick yogurt with less fat. But feel free to use whole milk if you like.

Gently Heat The Milk
Then I heat the milk to 180 degrees stirring often. I often abbreviate this step by pouring my milk & adding the powdered milk in my pan, then covering it and setting it aside while I enjoy my morning coffee.
Since that short period on the counter means it’s closer to room temp when I start heating it, that also means less time standing at the stove stirring and less propane is used too.
Y’all know I’m a big fan of Shortcuts In The Kitchen. So this easy shortcut is certainly something that works for me.
Cool The Milk
After the milk has reached 180 degrees it’s time to cool it down to a safe temperature for the yogurt cultures. That’s about 105-110 degrees.
You could leave the pan on the stove with the heat turned off. But I found a milk skin always formed on top of the milk when I cooled it that way.
I’d try to remove it or stir it back into the yogurt. But I could never remove or dissolve it all. And I just wasn’t fond of that texture in my yogurt.
So instead I fill a bowl with ice and water and set the pan down into the ice bath.
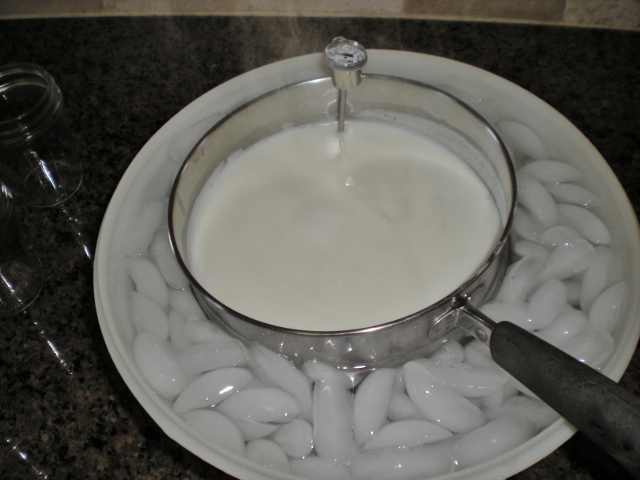
The temperature is monitored until it reaches about 105-110 degrees.
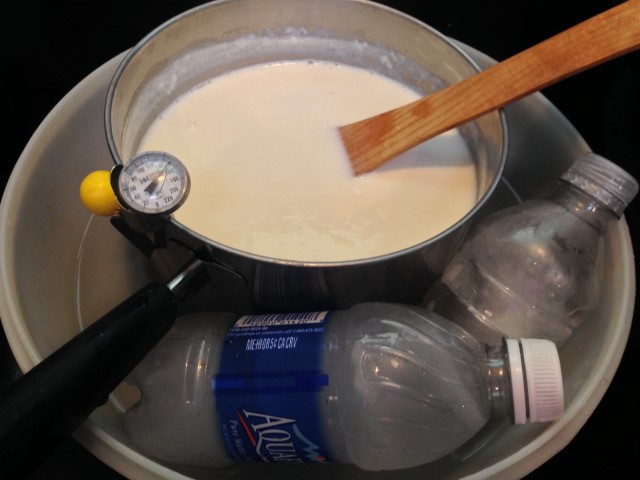
During the heat of summer when our crappy ice maker can’t keep enough ice to keep RancherMan & me in cold beverages after a hot day in the pastures, I started using this Homestead Hack so I can reserve ice for RancherMan & me.
I’ll use frozen water bottles to cool the milk instead of ice.
Adding The Active Culture Starter
When my milk is cooled to a safe temperature I stir in about 1/3 to 1/2 cup of my own homemade yogurt to act as a starter. These are the active cultures needed to make your milk into yogurt.
I use my own homemade yogurt for starter but for your first batch you can purchase plain unflavored yogurt. Just make sure it contains active yogurt cultures – not all yogurts do.
Two good ones to use are Braum’s and Dannon yogurt. But be sure to check your labels and buy only yogurt with live active cultures.
I stir my starter into the milk, making sure everything is fully incorporated.
Reusable Single-Serve Containers
When my starter is fully incorporated I pour my yogurt/milk mixture into 1/2 pint canning jars and place a repurposed metal lid on the jar.
By using those small jars and repurposed lids I’m getting convenient single-serving yogurt with no waste. Some people make their yogurt in larger sized jars up to about quart sized and just spoon the yogurt into bowls whenever they want. Either way – no waste!
But if you’re making your yogurt into single-serving jars like me be sure to leave enough space to stir in something sweet when you’re ready to eat it.
I like to sweeten mine with honey & fruit or homemade Blueberry Jam or a chunky Pear Preserves.
If desired you can plop about a tablespoon of jam into the bottom of these jars before you fill it up with the warmed milk for a fruit-on-the-bottom style.

Just remember to leave at least one of your jars unsweetened so you can use it for starter next time,
And also perhaps for a lower-fat substitution for a dollop of sour cream from time to time. 😉
Time To Incubate The Yogurt

My yogurt is now ready to incubate for about 6 hours. The longer it incubates, the thicker and more tart it will be.
To give my yogurt a warm environment to do it’s yogurt thaaaaang, I heat my oven for about 60 seconds then turn it back off.
This brings the temp inside my oven to a low-heat warm environment – perfect for yogurt cultures to multiply!
I place my jars into the oven and turn on the oven light to maintain a little heat.
With my oven I often turn the heat back on about after 3 hrs incubation time for ONLY 1 minute, then turn it back off. This seems to keep the temps perfect for my yogurt to incubate.
My previous oven didn’t require that since I guess the bulb itself burned hotter than the bulb in my new oven. Gently bumping the heat like that seems to keep the temps where my yogurt cultures are happy. But be sure you don’t allow it to get too hot & kill your cultures!
Of course you can buy an automatic * yogurt maker that keeps the proper temperature for you throughout the duration of your yogurt incubation. Just set the timer and walk away.
The yogurt is usually ready after 4 hours incubation, but RancherMan likes me to leave it 6-8 hours.
When the time is up I simply remove the yogurt from the oven, allow to cool a bit and place the jars in the fridge.
Enjoy Homemade Yogurt
I often make plain yogurt and leave the sugar and vanilla out until I’m ready to eat it. That way I can use the non-sweetened yogurt for other things as well such as low-fat sour cream substitution in both cooking and on baked potatoes.
And I use our homemade yogurt in many different homemade recipes here on the Homestead. It’s an important ingredient in RancherMan’s favorite Country-Style Biscuits and my favorite one-minute Creamy Salad Dressing. Heck I even use it for my Chocolate Fudgesicles.
But when I want to eat sweetened yogurt I’ll either stir a spoon of my favorite jelly to sweeten or a squeeze of local honey with a spoonful of fruit or berries.

And I love to sprinkle some Homemade Pumpkin Granola on top for a little crunch too.
All that’s left to do is enjoy!
Are you ready to make your own homemade yogurt. Yea! It’s easy! Here’s the recipe:

1/2-Gallon Homemade Yogurt - Stove Top Method
Commercial yogurt often has added gelatin & thickeners (often along with some chemical nasties I'm afraid.) The taste of the homemade yogurt can't be beat, is significantly cheaper and healthier for you. And no more plastic yogurt containers go to the landfill!
Ingredients
- 1/2 gallon milk (Whole or 2%)
- 2 cups instant dry milk powder (optional for thicker yogurt)
- 1 8-oz container unflavored yogurt with active cultures (such as Braum's or Dannon) After this first batch, save some of your own yogurt to use as starter
(If making sweetened yogurt you also need)
- 1 cup sugar or your choice of sweetener
- 1 Tablespoon vanilla
Instructions
Directions
-
Place milk in pot and add dry milk powder. Stir well to dissolve. Place candy or milk thermometer in milk & heat to 180 degrees, stirring often so the bottom doesn't burn. When 180 degrees has been reached, fill sink or large bowl with ice cold water. Then place the pot with milk in the ice water. (If making sweet yogurt, add sugar now and stir well.)
-
Cool milk down to about 105 to 110 degrees. Add yogurt starter and stir well to incorporate smoothness. (if making sweet yogurt, add vanilla now).
Fill glass containers of your choice and place lids on jars. Place jars on cookie sheet. Heat oven to 110-115 and turn off oven temp. Turn on oven light. Place yogurt in oven on rack and leave for about 4-6 hrs.
Yogurt will be "done" in 4-6 hours but you can let it incubate for up to 12 depending on how tart you like it and how much beneficial cultures you wish it to have.
-
Don't disturb the jars for at least 4 hrs. Then you can check to see if the yogurt is done by gently tilting one of the jars. If it's no longer liquid, it's ok to pull it and place in the refrigerator.
It will firm a little more upon cooling, although it's a more silky yogurt than the ones in the store since they add gelatin & thickeners to the commercial stuff (often along with some chemical nasties I'm afraid.)
Recipe Notes
NOTE: You might want to keep some of your yogurt unsweetened to use in recipes, as a low-fat sour cream substitute or as your yogurt starter for your next batch of yogurt.

There ya go – 1/2 gallon of homemade yogurt! I share lots of fun stories & recipes on our facebook page, so c’mon by & follow us on Facebook.
~TxH~
Related Links Contained In This Post
- Homemade Yogurt: Instant Pot Method
- How We Reduced Our Landfill Contributions
- Using Frozen Water Bottles In The Kitchen
- Homemade Meals Everyday The EASY Way
- Where To Find FREE Canning Jar Lids
- Homemade Blueberry Jam
- Pear Preserves From Scratch
- *Electric Yogurt Maker
- Homemade Country-Style Biscuits
- Creamy Salad Dressing In 1 Minute
- Chocolate Fudgesicle Recipe
- Pumpkin Granola Recipe
Our Favorite Breakfast Posts
- Biscuit Sandwich Breakfast
- Farmer’s Breakfast-Bake Casserole
- All-In-One Ham/Egg/Cheese Breakfast Muffin
- Homemade Country-Style Buttermilk Biscuits
- Leftover Biscuit Dough To Cinnamon Rolls
- Fluffy Homemade Pancakes
- Homemade Maple-Flavored Pancake Syrup
- Honey-Sweetened Pumpkin Granola
- Blueberry Cream Cheese Stuffed French Toast
- MYO Instant Microwavable Oatmeal
- Blueberry Muffin Recipe
- Sugar-Free Oatmeal & Berry Muffins
- MYO Chai Tea Mix
- Favorite Homemade Jelly Recipes
- Simple Cottage Cheese Recipe
- Homemade Yogurt: Stovetop Method
- Homemade Yogurt: Instant Pot Method
- Cooking Breakfast Should Include HAZARDOUS DUTY PAY!
…and MANY MORE!
See All Our Recipes

C’mon by & sit a spell! Come hang out at our Facebook Page. It’s like sitting in a front porch rocker with a glass of cold iced tea – lots of good folks sharing! And you can also follow along on Pinterest, Twitter or Instagram.
If you’d like to receive an email each time a new blog post goes live it’s EASY to
Subscribe to our blog!
Save
Hello! Do you know if I can use Lactose Free 2% milk instead of regular milk? I’m not completely allergic to milk, but milk and yogurt make me itchy (causes a flare up of eczema on my hands) and phlegmy, but I don’t have that response w/Lactose Free milk.
I’ve never used lactose-free milk. RancherMan prefers yogurt made with whole milk for the texture and creaminess so that’s what we always use. If you decide to give it a go with lactose-free milk, let us know how you like it. ~TxH~
Since I’m making my own granola now, I thought the next step is to make my own yogurt. Thank you for this awesome tutorial!
Dawn I will say this: Out of all the self-sufficiency tasks I’ve undertaken since beginning my simple-living journey, making yogurt has by far been the biggest surprise for me. I was so floored to find out how easy it was. How effortless. Really??!! Heat milk, cool milk, add starter, pour into jars, place into warm oven & walk away. I make 1/2-gallon of yogurt every week or so. At first I was making sweetened vanilla yogurt but these days I always make it unsweetened so I can use it for sour cream substitute or in my biscuits if needed. But for half the jars I’ll plop some homemade jelly & a sprinkle of homemade granola in the bottom of the jars and leave the others plain. I can always stir in honey & fruit for the plain ones if I need to. ~TxH~
Homemade yogurt is the best. I use my dehydrator to incubate my yogurt at a constant temperature and never had to add powdered milk to get it almost Greek Yogurt thick. Mind you, I use whole milk so that might be helping with the thickness. 🙂
We’re just returning from living in Japan for the last oh-so-many years and I brought my culture back with me. Once I’m settled, I’ll have to overnight you some, for fun. It’s a mesophilic combination of two strains that gives you a thick and creamy yoghurt with almost no whey bleeding out and no need for powdered milk or heating/setting at temperature. I take milk from the fridge, stir in some of my last batch, set it on the counter for 12hrs and then pop it in the fridge to enjoy. I used to do it as you describe, but as with most things in my life, I learned that the Japanese do it more efficiently and with less waste.
Thanks for posting – you’ve inspired me to try it!
If I can’t do it all in one day, can I cook on the stove in one day, refrigerate, and into the oven the next day to set?
Thank you!
Ya know Jaimn, I’m not sure but I think you could… I believe the heating of the milk is done to remove any wild (harmless) bacteria before introducing your beneficial yogurt bacteria with your yogurt starter. So by heating the milk one day you’ve accomplished that task, I don’t think cooling it overnight would reintroduce any wild bacteria back in but I just don’t know. I’d think that putting chilled milk/yogurt mixture in your oven the next day would add a little time to your incubation time for sure so you’d want to allow for that, but I don’t see any reason why you couldn’t heat your milk, cool, add your yogurt starter and then refrigerate overnight to be able to place your mixture in the warmed oven to incubate the next day. If you give it a go, let us know how it turns out! ~TxH~
Heating the milk to 180 causes the protein strands to uncurl. Then they can culture into yogurt.
I want to try making yogurt soon. I made homemade soap, foaming hand soap, and laundry soap this week. I’m going to try homemade deoderant today.
I love to read stories about the things that people make to cut ties with the grocery stores. I use a yogurt recipe from the Tightwad Gazette books and have had great success. Plus, I use a heating pad instead of my oven. It runs on 110v instead of 220v, so it saves money on the electric as well. I wrap my milk/yogurt mixture in a towel and cover the whole thing with a big stock pot and let it work on the heat pad overnight. Works every time!
I LOVE the Tightwad Gazette! Man that Amy was ahead of her time, eh Lucy? I don’t mind using the oven to incubate my yogurt because it’s only on for 1 minute to warm it for the yogurt. Sometimes I have to turn it back on during the incubation time but again only for 1 minute. I love to make yogurt and make it about every week and a half. Delicious and so good for you! I’ve started making 1/2 of my jars with a tablespoon of jam in the bottom of them so they’re ready to stir & eat right out of the fridge while still leaving several jars unflavored for other uses.
Hi Tammy. Question – will frozen yogurt work as a starter for the next batch and if so how long can it be frozen and still retain the “startert” capabilities? I’ve not been having the best luck recently and I think it has been the purchased yogurt I have been using. Just wondering if you have any good news about the frozen. Will need to do another batch in a couple of weeks. Stay dry for a little while…
John, I often buy a single serving size of plain unsweetened yogurt, use 1/2 of it for my yogurt starter and then freeze the rest of the container for a future batch. Then I can use a couple of tablespoons of my own homemade yogurt for several subsequent batches as my yogurt starter until the cultures start becoming weak, then I pull out & use the rest of the container of commercial yogurt for a fresh starter. Now I can repeat subsequent batches using my own homemade yogurt for starter until the culture again becomes weak (usually about 7-8 batches). The important things to remember when buying commercial yogurt for a starter is: 1) buy only unflavored unsweetened yogurt & 2) be sure to only buy yogurt with live cultures. Dannon usually has live cultures and Braum’s does as well – I always buy Braum’s. It will tell you on the label. You need those live cultures to successfully incubate your own yogurt. Good luck! ~TxH~
Well, since the first batch tasted so good, I froze as cubes the Dannon that I purchased and used up the homemade. Second batch today was done with re-hydrated powdered milk (I had whole mild on the first) and “starter” from the first batch. Came out great in about 4 hrs. I did not mention previously that I used a heating pad wrapped around a qt jar for heat. Today’s batch worked better that the first. I tape the digital thermometer probe to the outside of jar. I’m sure glad that I found your F B page and of course will contiue to mointor. I grew up on a small farm in N Illinois and helped with all the chores and garden. It seems that some of that experience is still in me. Even though I live in an apartment and garden in containers. Thanks for all you and the rancher-man do…
I found when I make yogurt, if you strain off some whey and freeze it until needed, you never have to buy anything but milk. Straining off whey makes it thicker and then you have your “Lil dudes” cultures to make more. I always take new Lil dudes from the last batch and use for the next. I let them thaw completely before adding.
Excellent idea Violet. Thanks for sharing your tip. Nothing goes to waste! ~TxH~
I found that the longer the batch cooked that the temp kept going higher so at 1 AM I checked and it was good and solid. It went in the frig for the rest of the night. This morning I did a taste test. It was as good as the Dannon that I used for a starter. Plans are to mix some blueberries in it and then freeze in cubes until the fresh/outdated Dannon is used up. I will reserve a couple of “cubes” of plain to use as a starter for the next batch.
Well Goodie, there’s certainly nothing wrong with using a yogurt maker – it’s so much less epxensive than buying yogurt and OMGoodness have you ever looked at the ingredient list on a carton of yogurt?? Mine has yogurt starter & milk, nothing else. What else needs to be in there?? Kudos to you for providing a healthier product very inexpensively! I love that you’ve tried the homemade granola recipe from my site, it’s my fave too! ~TxH~
I do confess I use a yogurt maker.I use whole fat milk because I like the texture better.I sweeten it with honey and top it with the home made granola recepie from TMR,when I’m ready to eat it.
Thanks! we are just starting out being more self sufficient, this will definitely by on my TO DO LIST very soon. With 4 teens who all eat yogurt plus me and the hubby this will be awesome! can you use this recipe and make fruit yogurt where it is already mixed in? when would you do this and when do you add the stuff to make the sweetened yogurt?
jill
I used to make the yogurt sweetened, Jill and I thought I may get those questions from readers so I included the instructions for that option in the actual recipe at the bottom. Add your sweetener when you pull your milk from the heat. I’ve added preserves/fruit to the top of the jars when I refrigerated the finished yogurt. I make my yogurt in single-serve 1/2-pint canning jars for grab-n-go convenience but you could make it in larger quantities and transfer to single-serve jars when it’s mixed the way you want or to make ‘fruit on the bottom’ type yogurt. Lots of options. 🙂 ~TxH~
I’ve been making yogurt for about a year but never thought about putting it in a smaller jar – great idea!
I have another question…….. Can this be made with nonfat milk?
Jamie, I’ve made it with nonfat milk and although technically it *did* make into yogurt I was not pleased with the texture, the look or the taste. Full-fat milk makes absolutely delicious yogurt but to lower the fat content I usually use 2% which gives a delicious and full-bodied yogurt while reducing some of the fat. I’ve never tried with 1% milk, 2% is as low as I’ll go. ~TxH~
Hey Girl!, this is my go to method. I started about a year or so ago with an Easiyo thingy, but then changed to the heating pad method. When I found this I knew it was the method for me. I use either pint jars or small Weck jars and I leave my yogurt in the over over night. I love it when I can tip the jar sideways and the yogurt is so thick that it doesn’t even move! When I give someone a jar of my yogurt at work people think they are someone special. I’m off to check out some of the linky places.
It looks like you have cows on your ranch, so I’m wondering why you have to buy milk. And why in the world would you use 2% milk and powdered milk?
We have a herd of registered Hereford cattle (a beef breed) We don’t raise dairy cattle nor do we have a house cow as I have no desire to milk twice each day every day ad infinitum so we’ve always bought our milk. The reason I use 2% milk coupled with powdered milk is 2% is lower fat than whole milk, and adding fat-free powdered milk adds a little more protein and also causes the yogurt to be thicker, which I love! ~TxH~
How long will this keep and does 1/2 gallon milk generally make a half gallon of yogurt?
Jane, there is a small amount of evaporation while you bring it up to 180 degrees, but it’s minimal. So it makes pretty close to 1/2 gallon of yogurt. I’ve never had any of my prepared yogurt go bad, I guess I’ve kept it a couple of weeks or so before needing to make more so it should be good that long, depending upon the freshness of your milk I guess. ~TxH~
Can’t wait to try this! I didn’t think I could make it because I didn’t have one of those special yogurt warmer things.
I have a question for you. How do you get the hashtag of your blog name to automatically show on your pinterest pins when people pin it?
I have been making yogurt like this for a while now, and I am wondering why we heat it up to 180 degrees and then let it cool to 110 or so to add the culture? why not just heat it up to 110-115 and go from there. does anybody know?
Thanks.
Dori, I’ve read that it makes the yogurt thicker but I’ve always followed those directions & never stopped the heating process at 110 to see if it was true. I’ve never had a failed batch of yogurt though so it works for me. ~TxH~
Heating it to 180 changes the structure of the milk a bit and makes the final product thicker. Some folks just heat to the 115.
My trick: I wrap the pot of yogurt in a thick towel & then place in the oven; this keeps the yogurt nice & warm. I do pre-heat the oven on the lowest setting for about 5 min, but the oven if OFF when the towel wrapped pot is placed inside. I leave there undisturbed for 5 hrs. That’s it. We sweeten on demand. I transfer to jars after–but I you got me thinking. If I placed them in jars I could leave some unsweetened. I’ll probably cover the jars with a thick towel for good measure.
Also: I make a cream cheese aka yochee by placing coffee filters in my colander and straining off the whey. I keep a pan under the colander & place the whole thing in the refrigerator to strain for a day or two. I use the yochee just like cream cheese–even for cheesecake! I use the whey in smoothies or mix into the dog food (our dogs love it).
I love making my own yogurt, but sometimes it is kind of runny. Thank you for the tip about adding powdered milk! I’m so glad you share great tips like this at Tuesdays with a Twist! -Marci @ Stone Cottage Adventures
This makes making yogurt clear. For some time I wished I could do this. Do you need (is it a must ) to use powdered milk? I am motivated to try this again! Thank you, TMR!!
Loved your post! I bought a yogurt maker to do mine. I linked my name to my yogurt post from a couple of months ago if you want to check it out. I make greek yogurt by straining, and I thicken my yogurt by using powdered milk.
Jennifer I picked up a yogurt maker at a thrift store several years ago but I guess due to my method of making the yogurt it really didn’t save any time for me – I gifted it to a family member. I make yogurt about once every week and a half or so, and I use powdered milk as well to thicken it. (great minds thinking alike, eh?) ~TxH~
Thanks so much for sharing your recipe for making yogurt!!!!!!!!!
Oh wow!
I have not used this method before. How’s the taste?
hugs x
Crystelle
The taste is the same as any other yogurt, of course reliant upon the quality of your ingredients. I use Braums’ milk (which I LOVE) and it’s very rich and delicious. I keep it unflavored so I can use it for a low-fat sour cream substitute as well as being able to cook with it, but for years I made it sweetened and even fruit on the bottom for grab-n-go breakfast options on the way to the office. The only difference I can tell in homemade and the commercial stuff is that homemade tends to be more silky, not quite as “rubbery” as the commercial product. Give it a try – you’ll love it! ~TxH~
The actual recipe is at the bottom of the post and describes the times to add both the sugar and vanilla if using. If making sweetened yogurt, you’ll add your sweetener when you pull the milk from the heat source, before you cool it to 115 degrees. Give it a try! ~TxH~
I’ve been making yogurt for several years, and I just place a crockpot liner on top of a heating pad overnight to keep it the right temperature. I’ve never made sweetened yogurt so I came online looking for tips, since stirring the yogurt after it sets tends to make it runny. You say you add your vanilla after the milk cools, is that when you add the sugar as well?
It’s just one fun thing after another on here! Thank you! So delightful!
I make my own yogurt, too, using the crockpot method. I love the taste compared to storebought.
Thanks for linking up to Fabulously Frugal Thursday!
I’ve heard of the crockpot method as well Barb, and I think that’s the method our daughter uses for her yogurt. When you make your own, it’s so versatile too. I eat it every morning sweetened with jam or honey with fresh fruit, but I also use it quite frequently as low-fat sour cream substitute on many dishes and in baking! ~TxH~
Great recipe – we usually use a cooler to keep the milk warm – but I’ve heard good things about using the oven – may need to try it.
Gretchen, I’ve heard of the cooler method as well. The recipe above was the first one I tried and since it never failed me and it’s easy, I’ve never even tried any other method. I might need to try the cooler method one day as a point of comparison. ~TxH~
I am so glad you shared this. I read it the other day and am sitting here making my trader joes list so I think it was a sign that I saw it and re-read it. I am going to attempt to make it with Soy….an luck with that? Wish me luck!
Heather, I always use Braum’s 2% milk, never tried it with soy. Please share how it comes out! ~TxH~
WHATEVER YOU DO, DON’T USE ALMOND MILK OR ALMOND YOGURT(AS A STARTER)! It creates a really nasty smelling cloud of fumes that made me gag and it doesn’t produce yogurt. If you have an intolerance to dairy and can drink the Lactaid milk, I use the Lactaid whole milk with no powdered milk and depending on the person either vegan cultures from amazon or 1/4 cup chobani per 4 cups milk as my starter depending on the intolerance level. Someone who cannot tolerate dairy period would be better off with the vegan cultures. With the vegan cultures, you can re-use your own yogurt but then re-introduce a new packet every 6-8 weeks as long as you are making yogurt every 7-10 days. I tend to make the lactose free stuff every week because the vegan cultures are expensive and I don’t want to have to keep using packets every few weeks! I tried about 7 batches with soy milk and tried various recipes that I found online but they all required about 12 different ingredients and a lot of them required thickeners and artificial ingredients to get them to become yogurt. I did the research and the ultra-pasteurized milk is the way to go for someone who has a diary intolerance or allergy for homemade yogurt.
Although our methods vary, I also LOVE making homemade yogurt! Aside from having fewer cartons to throw away, it’s definitely cheaper than what yogurt costs in the stores now! [#TALU]
I just found you on TALU. I haven’t tried making yogurt before, but this looks reasonable. Thank you.
Being of Greek descent I have made yogurt for years in exactly the same way my immigrant grandmother did. Home made yogurt is so much creamier than store bought yogurt and easy to make. 🙂
Wanted to say “hi” and thanks for stopping by Corn today! You only live about 2 hours north of me– I just learned last year, that Iris’ don’t bloom every year. I thought my purple Iris’ had turned white (I know, silly me!) but while researching, I found out that the whites ones were on a different ‘cycle’ than the purple to bloom. Go figure.
If your’s have not bloomed yet, maybe they will next year.:)
thanks again for stopping by, now I have to go back and read about your yogurt!
nice to meet you, Pat
Just found you on the Friday Farmgirl Blog Hop…This has got to be the easiest yogurt recipe I have I yet to find! I so want to give this a try!!! Thank you!!
Making yogurt is on my to-do list today. Although I’ve made it before, I think you use more powdered milk than I do. I’m going to try your proportions. Thanks!
Yummy! I do love yogurt. When my doe goats start producing milk, I plan to make some 🙂
Thanks for linking up!