by Texas Homesteader ~
*contains affiliate link
A dear friend told me about dehydrating tomato puree (sometimes seasoned) into a leather. WHAT?? Tomato leather??
Yes, tomato leather can be used to simplify your pizza night. Just plop a tomato leather on top of your crust and start adding fillings. The leather rehydrates as the pizza cooks. Oh yeah, I’ve gotta try this!
Note: Some links in this post are for further information from earlier posts I’ve written. But links preceded with * are affiliate links. If you click them and buy something (almost anything, not just the item noted) I could receive a small purchase. But the price you pay will NOT change. It’s an easy way to support this blog without anything coming out of your pocket. So click often! Thank you!)
Bumper Crop Of Garden Tomatoes
The weather this summer has been odd, unusually cool and with timely rains. The result has been the perfect storm (in a good way) for my tomatoes.
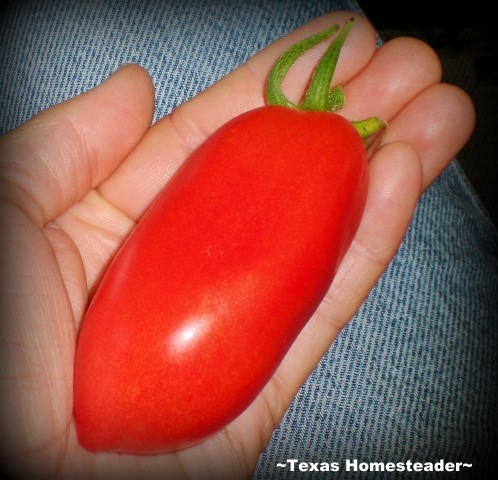
Although I only planted two tomato bushes this year they were my favorite heirloom San Marzanos . They always produce more than we can eat fresh and also plenty for us to preserve.
This year is my first attempt at making a tomato leather in my dehydrator.
What To Do With All The Fresh Tomatoes?
The onslaught of tomatoes from the garden means that RancherMan & I have eaten them fresh with our daily meals of course. And I’ve made blender salsa and frozen many of them for future use.
I’ve dehydrated the skins to make tomato powder and made tomato sauce as well as pasta sauce. But now I want to try my hand at something different.
What Is ‘Tomato Leather’?
A dear Facebook friend suggested I try to make tomato leather per the directions in my Excalibur book. Hummm… I’d never heard of tomato leather – I’m intrigued.
The friend stated that supposedly if I make this tomato leather I can roll it directly onto pizza crust and just start adding toppings – no need to rehydrate first. NOW she had my attention!
Upon glancing through my Excalibur book I saw that they did indeed suggest this was true. I have onions and garlic in the garden, as well as fresh oregano so why not flavor the whole thing with Italian seasonings before dehydrating?
Preparing Tomatoes
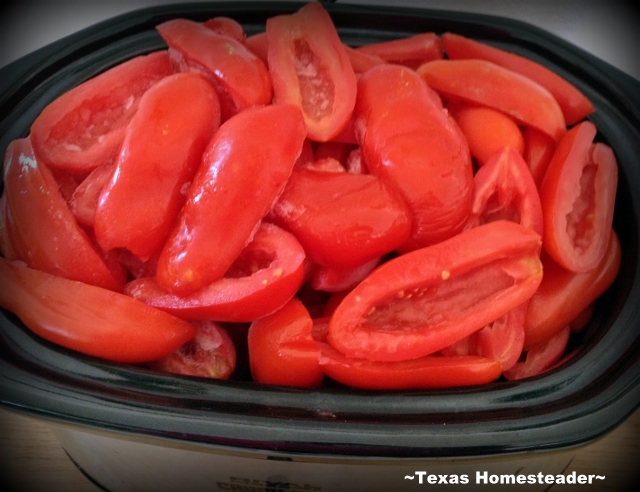
First I pulled all those beautiful fresh ripe tomatoes that from the garden, halved and seeded them.
This was an easy task since I can halve & seed these beautiful San Marzanos in about 10-15 seconds. LOVE IT! After I got them all seeded I added them to my slow cooker.
I added some chopped onions from the garden, a few pressed garlic cloves and some chopped oregano as well as some dried basil from the spice cabinet. I didn’t measure anything, just added about the same quantities as I would if I were making pasta sauce.
Then I put the lid on the slow cooker, turned it to high and let the tomatoes cook overnight.
The next morning there was quite a bit of water released in those tomatoes. So I drained most of the liquid and then I used a stick blender to puree the tomatoes.
Then I took the top off of the slow cooker and allowed it to cook several more hours so it could evaporate the liquid & thicken the sauce.
Dehydrating Seasoned Tomato Puree
When it was as thick as I wanted I gave it a little taste. The spices were perfect but I added salt to taste, then got busy with my dehydrator.
For those of you asking, I purchased this * Excalibur dehydrator) and love it!
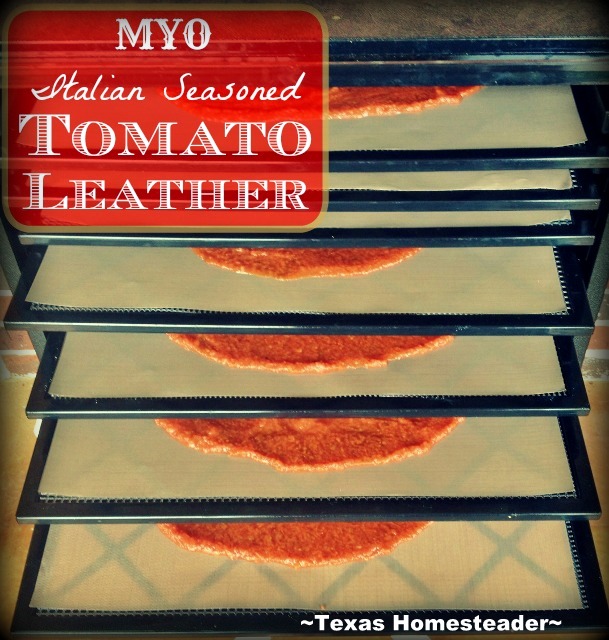
I put dehydrator sheets onto each of my dehydrator trays. These *dehydrator sheets were recently purchased from Amazon. Now that I’m making leather I’m so glad I did!
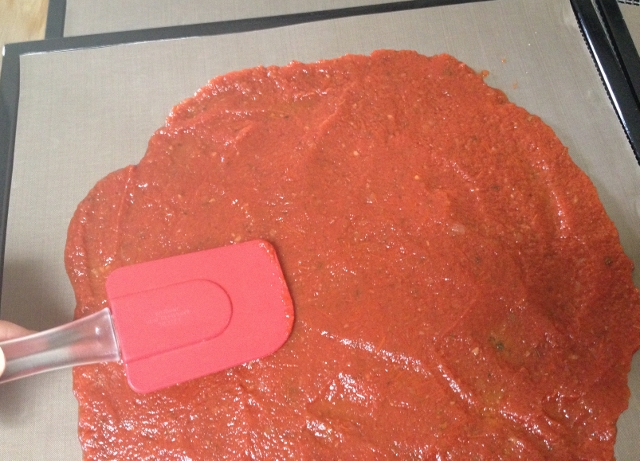
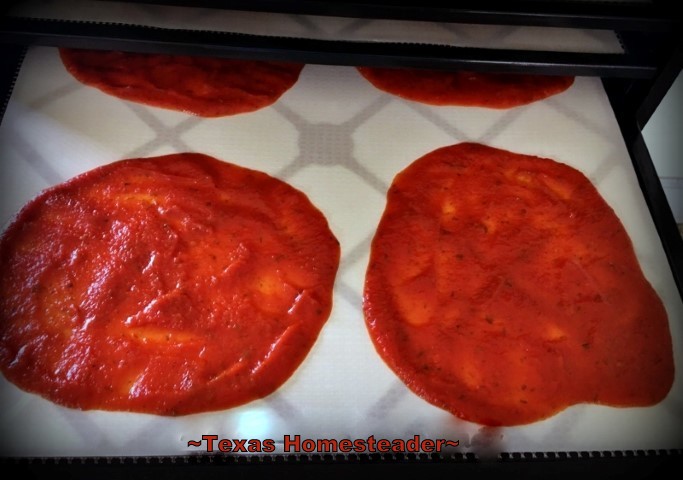
I poured about 1 cup of my tomato puree onto each dehydrator sheet and spread it thinly with my spatula. By laying the spatula almost flat and with a light hand I swirled the puree toward the outside corners of the sheet, keeping the shape circular.
Extra Caution For Thickness of Puree
My dehydrator book warned that I’d want the circle to be thinnest in the center, a little thicker at the outside of the circle so that the outsides didn’t over dry and crack before the insides of the circles were thoroughly dehydrated.
So I spread my circles about 1/8″ thick at the center and about 1/4″ thick at the edges.
Then I placed those trays into my dehydrator & took it outside. I placed it on a small table on my back porch so the heat would stay outside where it belongs during this hot humid season.
My Excalibur book says to dehydrate my tomato leather about 8-10 hours or until the center is no longer tacky. So I turned the temperature to 135 degrees and waited.
After about 4 hours I rotated all my trays. That helps result in a more even drying for my leathers. Properly dehydrated leather will lift up at the edges but will not be brittle. For me that took about 9 hours.
Your dehydrating time will vary based on many factors such as how thick your sauce is, how thickly you spread the puree circles, how humid your environment is and of course the power of your dehydrator.
Be sure to check your puree frequently and pull it when the centers are no longer tacky.
Storing Tomato Leathers
Although I read it’s best to roll the leather while it’s still warm I always worry about condensation resulting from cooling. So I allowed my leather to cool before rolling it up and it did fine.
But I needed a way to separate my leathers. I took a food-safe plastic bag that previously held cereal and cut it apart into squares that were larger than my leather circles and placed a square between each one.
Then I rolled the whole stack tightly and placed it into a heavy plastic Ziploc bag. Of course I’m going to want to know what’s included in this bag so I always include a label.
I use a small scrap piece of paper to I write what’s enclosed and the date – then I slip it into my Ziploc bag and seal it tight. I can’t wait to give this leather a try on our next pizza night!
Using Tomato Leather
The dehydrator guide states I can use these leathers rolled out onto pizza crust and of course that will be my primary use for them. But some of it will also be used in soup by pulling off chunks and dropping it into my simmering soup pot this winter when I once again start making my endless soup lunches. Italian seasoned soups are my faves.
Although my dehydrator book stated I didn’t have to peel my tomatoes before making the leather, my stick blender doesn’t puree quite as smoothly as I’d like. I found there’s remnants of the skins in the leather.
I don’t think that will bother us on pizza with all the textures that are typically present. But I’m not sure about my soups. Next time I may go ahead & peel my tomatoes for a smoother leather.
Has anyone else ever made tomato leather? Did you peel your tomatoes first? How did you most enjoy using your tomato leather? Weigh in & let me know how you liked it – let’s all learn from each other.
Observations & Updates
UPDATE: I’ve since tried using this tomato leather when making homemade pizza. Sure enough, all I had to do is roll the leather out on the dough (or french bread for my homemade french-bread pizza) trim it to fit and start adding toppings. LOVE IT!! ~TxH!
Update #2: Now, NOW my friends we’ve taken it to a different level. We’ve discovered tortilla pizza for lunch in a snap (and the grandbabies love it) So the other night when RancherMan & I had leftover pasta sauce I debated over what to do with it – remake it into another dish tomorrow? No, we already have supper plans tomorrow. Freeze it? Maybe, but dang our freezer is full.
Then RancherMan casually mentioned “Why don’t you dehydrate it into tortilla-sized pizza leather?” YES!! The sauce was already cooked, already seasoned & ready to go. These 5 to 5.5 inch leathers dehydrated in only about 6 hours.
Now that my leathers are made they take no additional energy to store in my pantry. They work great with our tortilla pizza. We just roll one onto a tortilla and start adding toppings, making sure to cover the leather.
Tortilla pizzas are layered like this: Tortilla, tomato leather, small sprinkling of cheese to anchor toppings, finely chopped veggies & topped with mozzarella. 5 minutes in my oven set to 425 degrees on fan-assisted bake and BOOM!
~TxH~
Other Dehydrating Posts
- Preserving The Harvest: Dehydrating Fresh Carrots
- Dehydrating Tomato Sauce Into Leather For Pizza
- Cubed Tomatoes Dehydrated For Winter Cooking
- Preserving Produce: Dehydrating Celery
- Dehydrating Fresh Pumpkin For Easy Storage
- Dehydrating Spinach To Enjoy All Year Long
- Using A Dehydrator To Preserve Fresh Onions
- Dehydrating & Storing Cabbage
- A Solar Oven Dehydrates Jalapenos
- Dehydrating Shredded Potatoes For Hash Browns
- Bell Pepper Dehydration
- Using A Solar Oven To Dehydrate Garden Produce
- Using It ALL – Dehydrating & Powdering Tomato Skins
- How To Make Dehydrated Blueberry Powder
- Dehydrating Plums
- My Simple, Zero-Waste Herb Drying Setup
C’mon by & sit a spell! Come hang out at our Facebook Page. It’s like sitting in a front porch rocker with a glass of cold iced tea – lots of good folks sharing! You can also follow along on Pinterest, Twitter or Instagram.
If you’d like to receive an email each time a new blog post goes live it’s EASY to
Subscribe to our blog!




I’ve never had tomato leather! Thanks for sharing on the What’s for Dinner link up and don’t forget to leave a comment at the party – Next week’s features that also leave a comment get pinned and tweeted!
Looks like a wonderful idea to dehydrate…I always freeze my abundance of tomatoes and sauces!! Thanks for sharing on My 2 Favorite Things on Thursday – Pinned!
I have tomatoes in the freezer as well Elaine, but freezer space is currently at a premium until we go through some of the meat RancherMan has harvested from the wild hogs on our property. PLUS, I really like the homemade pizza use for leather – roll onto your crust and start piling on toppings, no rehydration required. Add to that the fact that these leathers take no additional energy to store – they’re stored in our pantry – and it’s a perfect fit for the Taylor Homestead! ~TxH~
I’ve never heard of tomato leather, but it looks so convenient as a way to keep excess tomatoes. Thanks for sharing on the #WasteLessWednesday blog hop.
I’d never heard of it either Katy, a FB friend of mine mentioned it to me and suggested I look in my Excalibur dehydrator book. Low & behold! This week I made a bunch of tortilla-sized ones using leftover pasta sauce, I can’t wait to try them out on our tortilla pizzas. ~TxH~
Tammy, one question, does the rollup get enough moisture from the dough to re-hydrate it or do you spritz it with a little water before adding toppings?
John, truly – I roll the dehydrated leather onto my pizza dough and start adding toppings. As the dough and topping cook they rehydrate the leather beautifully. I’ve not yet tried it on the tortilla pizza, that WILL be happening soon! LOL ~TxH~
Man, now this makes me want an Excalibur. I have a round dehydrator and it leaves a giant hole in the middle of my leathers. I haven’t had much luck with tomatoes, but hopefully this winter will yield better results. Gardening in Florida can be tricky. This leather looks really interesting. Can’t wait to hear how it is in soup.
I do love the square trays of the Excalibur Bonnie. And when the garden is going well (this year is NOT representative of that!) my Excalibur dehydrates all the excess garden produce to drop into those bubbling soups over the winter months. Nothing wasted! ~TxH~
What an awesome idea! I would have never thought of this…thanks for the tutorial!
Thanks for linking up with Green Thumb Thursday. We’d love to see you back again this week!
Lisa
I’ve never had tomato leather before, but it sounds interesting! We had a ton of grasshoppers this year, too. They completely destroyed my goldenrod and my tickseed. Thanks for sharing with us at the Merry Monday Link Party!
Tomato leather is very helpful in making homemade pizza night a snap Tiffany, we love it. Hate that the grasshoppers caused you grief too. ~TxH~
How cool that you can put the tomato leather right on the pizza! I just canned a bunch of my plum tomatoes from the garden, but now I might need to find someone to let me borrow their dehydrator. Thanks for sharing with us at Dream. Create. Inspire. Link.
Yes John, I simply rolled them up with a piece of plastic between them so they wouldn’t stick together & put them in an air-tight ziplock bag in my pantry. ~TxH~
Can these leathers can be stored at room temp and not be vacuum sealed or frozen???
I drug my dehydrator out of the store room this summer. It’s been great fun dehydrating tomatoes. I’m may try this leather too. Never thought to do leather with tomatoes! #homesteadbloghop
I never thought of it either Diane until a friend suggested it. Our homemade pizza just got oodles easier! ~TxH~
I love this idea! I dehydrated a lot of my tomatoes in pieces last season and I’ve thought about blending them into a powder to use in soups, etc. I can’t wait to try leather next season. Keep the dehydrating recipes coming! 🙂
I dehydrated chopped tomatoes this year too Missy, I’ve been using them in my endless soup, grinding them into powder, and many other uses. I’m hoping I’m blessed with a bundle of tomatoes from the garden next year too because tomatoes are so versatile. ~TxH~
What a great idea! I do a lot of dehydrating, but never knew the dried tomato leather could be put right on the pizza – I would be interested to know how it turned out when you made a pizza. 🙂 Thank you for sharing this.
I’ve given it a test run and it turned out BEAUTIFULLY! I have several seasoned tomato leathers rolled & stored in my pantry, pizza night just got easy! ~TxH~
I was wondering what you would use this for! I thought maybe people liked to eat it like the fruit leathers, lol. Great idea to use it in soups. I grow San Marzanos too. I like them because they are nice and juicy, not dry like lots of the plums
I LOVE San Marzanos! ~TxH~
I’d love to hear how these tomato leathers turn out when you use them on pizza. I’m always amazed at all the things you can dehydrate. Thanks for sharing on Merry Monday.
I’ve never thought to make this – it sounds amazing! I do appreciate you sharing with Home and Garden Thursday,
Kathy
Wow! I, too, would like to hear if it works for you on a pizza! Genius!
Doesn’t that beat all! I can hardly wait until you report about the pizza. No need to rehydrate–huh— Who knew?
I know – that will make it so easy. ~TxH~
That’s an awesome idea! I can’t wait to hear how it works using it without rehydrating first. This sounds so much more awesome than canning! 😀
I enjoy seeing how others preserve produce from their gardens. We’re in an apartment now, but planning to build a small home and I’ll be back to gardening again once we get settled. I like your blog. We live in Oregon cattle country and while we’re not ranchers we surely do enjoy the cattle and horses all around us. Thanks for visiting my blog and leaving the nice comment. I’m following you on Google+ and looking forward to seeing more posts of your homestead. Blessings, Nancy
I know you can’t wait to get your hands in the dirt again Nancy. Until then hopefully container gardening is pacifying your need to garden. 🙂 ~TxH~
Not in a million years would I have ever thought of dehydrating tomatoes. I don’t think I like tomatoes enough to try it, but it’s a pretty great idea. Thanks for sharing with us at the #yuckstopshere link up. Please come share again with us next week. Also, feel free to join our Foodie Bloggers and Writers FB group.
Nicole, RancherMan’s not a big fan of tomatoes, but he absolutely LOVES his pizza. So this will work perfectly! ~TxH~
Holy smokes that’s ingenious!!! I wonder if I can do this on my crappy little dehydrator? (I did ask for an Excaliber, but the big guy is leery of shopping online)
The problem with attempting this in a smaller dehydrator is the fact that it will be a ring and not a circle, as most dehydrators have that hole in the middle to allow the air through. I bought this Excalibur online & I’ve had no troubles with the actual shopping or shipping and I absolutely love my Excalibur –>
http://amzn.to/1rv9d40
The large trays of the Excalibur have allowed me to do things I hadn’t been able to do with my smaller home-appliance dehydrator, especially larger quantity things and of course this leather. ~TxH~
you can make little circles to fit where the heat hole is in the dryer. when you take the rings out of the dryer just pop a little circle into it. tahdah full big circle! : )
make you little circles just a smidge bigger than the heat hole space will be in your circle.