by Texas Homesteader
*affiliate link
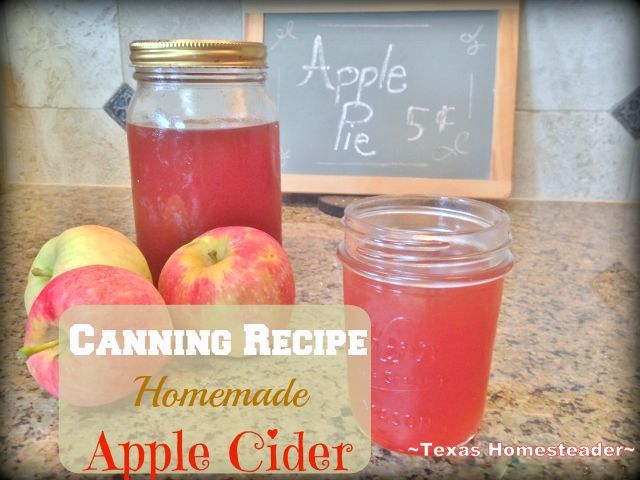
I made and water-bath canned apple cider and it was delicious. It’s just the byproduct of cooking down the fresh apples from my aunt’s tree. Nothing else was added – no water, juice, sugar or seasonings. Pure, sweet, delicious!
(Note: Some links in this post are for further information from earlier posts I’ve written. But links preceded with * are affiliate links. If you click them and buy something (almost anything, not just the item noted) I could receive a small commission. But the price you pay will NOT change. It’s an easy way to support this blog without anything coming out of your pocket. So click often! Thank you!)
Fresh Apple Series
Well, we’re almost at the end of our Fresh Apple Series where I share various things I’ve been able to preserve using fresh apples in the peak of their season. And what a series it’s been!
I’ve of course made Slow-Cooker Applesauce with many of the apples. I’ve even made and canned some of that applesauce into Cinnamon-Vanilla Flavored Applesauce.
Plus I made and canned Apple Pie Filling. It sure makes a pantry convenience item for quick homemade pies when unexpected company drops by. Everyone’s impressed by homemade apple pie!
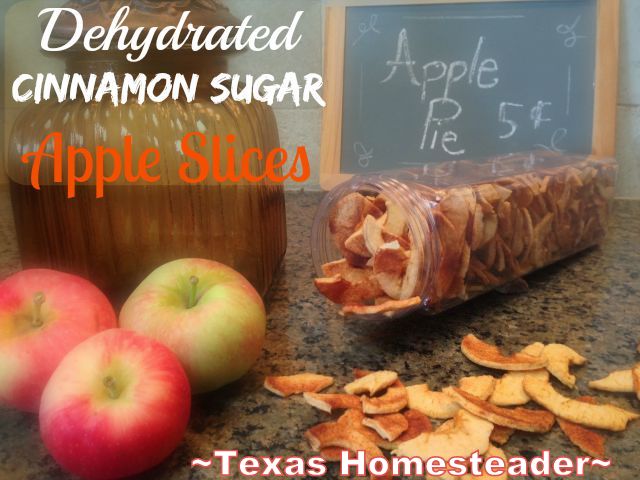
And of course I made up some of RancherMan’s favorites too. I dehydrated some of those delicious apples into crispy Cinnamon/Sugar Apple Chips.
But we’re not done yet, oh no! Those apples still have deliciousness to offer to our family. Today I’m sharing how I preserved my Homemade Apple Cider.
Byproduct of Homemade Applesauce
While cooking my applesauce, the apples released much of their juice. But I’m not going to drain it off and dispose of it.
When I saw all the juice that was remaining I couldn’t help but to think about the cooler weather to come. I want to save that juice and water-bath can the apple cider to enjoy this winter!
So as I was making my applesauce I strained the juice using a fine mesh strainer. The juice was then stored in my refrigerator. When all my applesauce was done I pulled out that juice and strained it once again.
Some people might like this final strain to be done using a coffee filter to get all the teeny tiny particles of apple that are remaining. But I like the slightly thick consistency that these small bits offer.
So I just strained it again using the fine mesh strainer and stopped when I got to the apple sediment at the bottom of my container. This was about perfect for me.
I placed that strained juice in my stock pot and turned on the heat to medium to begin heating it up.
Sanitize The Canning Jars
In the meantime I pulled out my canning jars and washed them up. I filled them with water and placed them in my water-bath canner. The canner was also filled with water to the top of the jars.
Then I placed the whole shebangie on the stove to heat. By heating these clean jars for a bit I’ve sanitized my jars in preparation for canning. Plus by filling hot jars with hot liquid you have less chance for breakage than if your jars were not hot.
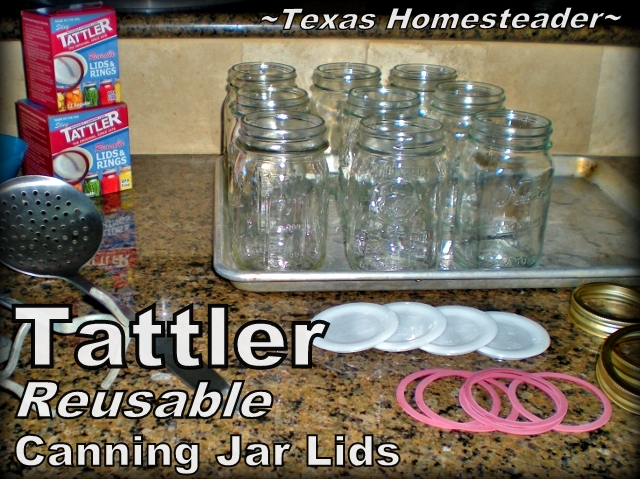
I also brought out my canning jar lids. Some were standard lids but some were my *Tattler reusable lids because I love that they can be reused over & over again.
I typically use about half traditional & half Tattlers when I’m canning so I get the pleasure of hearing that “PING” with the traditional lids while still utilizing the reusable Tattlers.
Plus I don’t want my Tattlers leaving the house. So using some traditional lids when I’m canning assures that I have some of these jars of cider available to give out with our homemade Christmas Gifts if we want.
About Tattler Reusable Canning Lids
Tattlers fit regular canning jars and use standard rings too. The canning procedure is exactly the same as with traditional canning lids with the exception of how tight you put them on before processing and the fact that you go ahead & tighten them the rest of the way after processing.
According to the Tattler website:
TATTLER REUSABLE CANNING LID USAGE
Tattler Lids do require a bit of variation from conventional metal lids. Being a two piece combination with a rubber gasket ring, Tattler Lids must remain a bit loose during processing in order for the jar to vent the pressure that has built in the jar during processing. An online customer gave us a very good tip on how tight is ‘Just Right’. To get the feel for the correct tightness prior to processing, place the jar on a counter top or other smooth surface, then place your index finger on the lid (do not apply too much pressure while tightening the metal band). Screw the metal band on until the jar begins to spin on the counter top (or other smooth surface). This is the perfect tightness for processing!
THE FOLLOWING FINAL STEP IS CRUCIAL TO ENSURE A GOOD SEAL:
Once the process is completed and the jars are removed from your canner, Let the bubbling die down (approximately 4-5 minutes), as this is pressure still releasing from the jars. Place a towel over the still hot jars (for safety) and finish tightening the metal bands. Now, let your jars cool naturally and when cool to room temperature, remove the metal band and lift the jar slightly by the lid. It should be well sealed. Your food is ready for storing (store without metal screw bands).
Anyway, I prep the lids by first boiling some water in a small pan. Then I remove the pan from the heat and drop the lids into the hot water to soften the rubber.
You don’t want to boil them – just get them nice & hot. I cover the pot to keep everything good & hot until I need them.
Preserved Apple Cider In Water-Bath Canner
By now my apple cider is boiling and my jars have been sanitized. Finally I’m ready to start canning.
In this case the canning is easy-peasy! I just ladle in my hot apple cider into my hot jars leaving only 1/4″ head space.
Then I wipe the rims of the jar with a damp rag to assure no apple bits or juice are between the jar and the lids to keep them from sealing properly.
Finally I attach the canning lids and return the filled jars to the water-bath canner.
Once my water begins boiling again I set my timer for 10 minutes to process the jars. When the timer goes off I carefully bring out the hot jars and place them on a kitchen towel. There they will remain there undisturbed overnight. I do love hearing all those jars go “PING!”
The next morning I removed the rings and tested for proper seals. The traditional lids will be slightly sunken in at the middle and will make no plinky-noise when pressed.
The Tattlers will remain tight when light pressure is used as if you were trying to gently lift the lids.
Hooray – all sealed! Now all that’s left to do is wash down my jars, label them with contents and date. I store them all in my pantry.

5 Delicious Ways To Preserve Fresh Apples:
- Apple Pie Filling
- Cinnamon/Vanilla Applesauce
- Apple Cider
- Cinnamon/Sugar Apple Chips
- Fruit Leather Rollups
Other Delicious Apple Recipes
- Homemade Apple Pie
- Apple Pies Baked In Canning Jars
- Single-Serve Apple Hand Pies
- Apple Crumble from Apples in Syrup
- Baked Apple Pie Tortilla Roll
- Quick, Hot Apple Dessert
- Applesticks – Frozen Applesauce Sweet Treat
- Quick Spiced-Rum Fried Apples
- Chunky Apple Cinnamon Muffins
See All Our Recipes
C’mon by & sit a spell! Come hang out at our Facebook Page. It’s like sitting in a front porch rocker with a glass of cold iced tea. There are lots of good folks sharing!
And you can also follow along on Pinterest, Twitter, Instagram
If you’d like to receive an email when a new blog post goes live,
subscribe to our Blog!
*Amazon affiliate


I see this is a fairly old thread, but am wondering what exactly you are using to make this.
Is it the water/juice mixture that is from boiling the apples to soften them to make the apple sauce?
This cider was made using only the byproduct of my cooking down apples for applesauce. When making my applesauce I didn’t add any seasonings, juice or water – just the apples. So this byproduct is just the juice the apples themselves made as they cooked down. Using the apples from my aunt’s trees there was nothing further needed. When they cooked down I simply strained off that juice, let the apple bits settle and strained it a few times to get out the tiny solids, and then canned it. That cider was so delicious sipping during the colder winter months. I’d heat it in an oversized mug and stir it with a cinnamon stick. Aaaahhhh… Delicious! ~TxH~
I have a question, when you put the cider in the water- bath does the water have to be over the jars
Yes, water-bath canning procedure is to lower the sealed jars into the hot water (jars about an inch beneath the water line) and return water to a boil before beginning your time. ~TxH~
I like to cook a lot of things myself, but my favorite part of cooking is sharing with everyone else. I’d like to send some of this cider to my relatives for Thanksgiving, but I’ve never shipped canned goods before. Any recommendations on transportation/packaging?
This would be a wonderful gift, Shawn! I know many fragile things are safely shipped, they’re packed very well with lots of padding between the fragile item and the box. With canned goods I’d be concerned that tossing the box during shipment (and we all know that happens) could pop the seals, but to be honest I’ve never shipped canned goods. Maybe you could screw the bands on tightly and pack well? Does anyone have first-hand experience in shipping canned goods to share with Shawn. ~TxH~
Yes, I have shipped canned good to one neighboring state. It was not a successful experience. The seals broke and the recipient received canned goods with mold already starting to form at the top. I sent 12 jars….none of them were successful. Yes, they still had the bands attached when shipping….keeping the seal is a problem. I will never waste food like that again.
Ugh, that would certainly be my fear too Angela. No telling how much rough-housing those packages go through from point A to point B. And after you put all that work into homemade and home canned? Pfffft! ~TxH~
I have shipped canned goods, many, many times. I tie each jar individually in a plastic grocery bag (just in case it does break). Then I uses news paper or bubble wrap (whatever I have at the time). I always pad the bottom with what I’m using, then pad between each jar and the sides, and lastly between the jars and the top of the box. In all the years of sending things I have only had one jar break. You just need to pad it really well and I haven’t had a problem with the seals either. They’ve gone from Texas and Georgia to Milwaukee, Tacoma, Woodinville (suburb of Seattle), and Boise. But the padding is what can make or break (litterally) the jars.
Hi! I had a question about the spiced part of apple cider. Do you add those when you heat the cider? How long will this keep in the pantry?
Whelp Gennelle, when I can the cider in the fall and I always enjoy it during the winter months so it’s only in my pantry for a few months. I’m assuming it’ll last a year or so? And these apples are sweet enough by themselves so I don’t add any sugar at all. When I’m ready to enjoy the cider I just heat it up, pour into a mug & stir it with a cinnamon stick for a subtle cinnamon flavor and I’m good to go. I’m sure you could add whatever flavorings you like and of course sweeten if your apples aren’t quite as sweet as my aunt’s were. ~TxH~
Love this. I have so much to learn about canning.
The How-to Guru
What a smart (and delicious!) idea! Thanks for sharing with Merry Monday last week 🙂
This sounds so delicious! I’ve never done anything like this but always want to try new things after reading your posts! Thanks so much for sharing with us at Share The Wealth Sunday! I hope you’ll come back and join us again tonight!
xoxo
Lisa
This is amazing and sounds so delicious! Now, I need some apples to make some!! Hopping over from the homestead blog hop. Pinned so I can remember this. Thanks for sharing!
Gasp, I need to do this! We drink so much apple cider so this would be great.
What a great idea! This is really close to orchard cider making where whole apples are squashed in a big press so that all the juice is pressed out. Until I have the money (and space) to get a cider press of my own, this will certainly do! Thanks.
Jodi, I’m not gonna lie – it’s DELICIOUS! And in my earlier years it would have just been drained off and wasted.
I”ve never made apple cider or canned but this looks fun.
I can’t wait until that first cold snap so I can enjoy this cider! ~TxH~
what a great idea….A cup of hot cider by the fire during a snowstorm sounds good to me, I will be apple picking next week and will try this!
Oh yeah, it’s apple season Patti and I love being able to use ALL of the apple. I’m going to once again attempt to make apple cider vinegar with the peels and cores, we’ll see if I can be successful this time.
This is such a smart idea! I love apple cider and I can’t believe I’ve never thought to do this. Thanks for sharing!
I almost can’t wait for cold weather to hit Marie so I can enjoy this cider steaming hot to warm me from the inside out. Delicious!