by Texas Homesteader
*contains affiliate link
My sweet aunt shared with me many delicious sweet apples from her tree. Not a few mind you, but a LOT! (as in 5 bushels of a lot!)
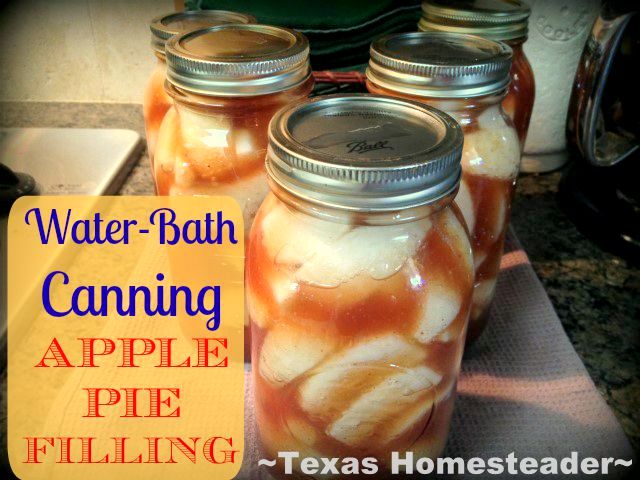
Thankfully this apple pie filling is pretty straightforward and canning it requires just a 20-minute stint in a water-bath canner. Wanna see how I did it?
I’ve been processing those apples into such deliciousness as applesauce, or apple cider, or apple butter. I’ve even shared 5 Ways to Preserve Fresh Apples. And yes… that includes delicious Apple Pie Filling.
A few years ago we gave our home-canned apple pie filling as Christmas gifts and they were well received so they may very well grace some of our Christmas baskets this year. RancherMan & I love to give homemade gifts for Christmas and you don’t get any more homemade than first picking the apples from the tree! LOL
(Note: Some links in this post are for further information from earlier posts I’ve written. But links preceded with * are affiliate links. If you click them and buy something (almost anything, not just the item noted) I could receive a small purchase. But the price you pay will NOT change. It’s an easy way to support this blog without anything coming out of your pocket. So click often! Thank you!)
Easier Harvesting Of Apples
First of course came the harvesting of the apples. I’ve seen this handy-dandy little *apple-picking basket on a telescoping pole to make picking apples higher up in the tree a breeze. Oh yeah, I’ve definitely gotta get one of those!
My aunt already had several bushels of apples picked before we arrived at her house for a visit but in no time the remaining apples were removed from the tree. Once we finally got all that appley deliciousness home we got busy processing them.
First I washed my canning jars and placed them in the canner filled with water to begin boiling. This serves two purposes, to sanitize the jars for safer canning and also to begin heating the huge amount of water for this mammoth hot-water bath canner – it takes a while!
Preparing The Apples
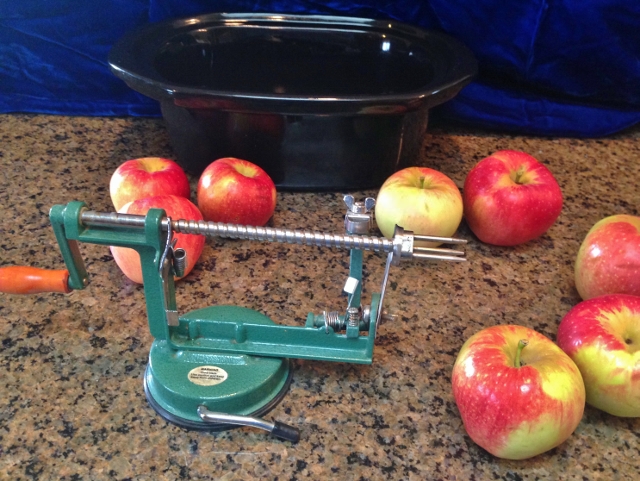
Then to begin making the apple pie filling RancherMan & I processed the apples. We used this handy-dandy *apple peeler. Using it we can get an apple peeled in less than 6 seconds!
We left the cutter/corer portion disengaged so that it would only peel the apples. I wanted thicker slices than this peeler will allow.
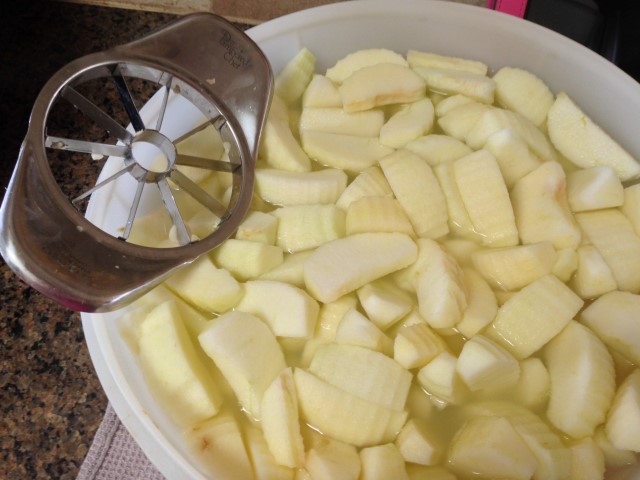
After they were peeled I placed each apple into a solution of about 2 quarts of water and 1/2 cup lemon juice to keep the apples from turning brown. When all the apples were peeled I went to coring and slicing them with this handy *apple slicer. Now those slices are the perfect size!
I estimated that each quart jar would hold about 3 cups of sliced apples. And my water-bath canner will hold 7 quarts. So I need 21 cups of apple slices!
With RancherMan & me working side-by-side all this prep work went pretty fast. When the apples were ready I made the syrup that would be poured on the apples.
Making Apple-Pie Filling Syrup
I combined 5 cups of sugar with a cup of Modified Corn Starch.
(IMPORTANT NOTE: for canning pie filling it’s no longer recommended to use regular corn starch. Clear Jel (REGULAR, not instant) modified corn starch is a safer alternative. Although I could not locate it in any local stores it can easily be found on *AMAZON)
I also stirred in 1 tablespoon of cinnamon, 1/4 teaspoon of ground nutmeg and 2 teaspoons of salt.
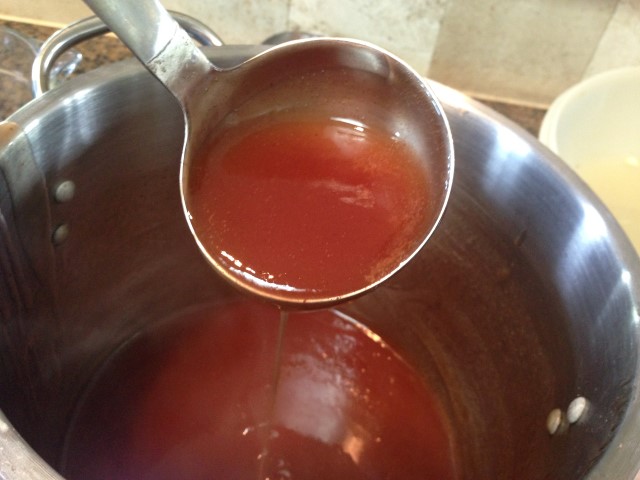
When it was all combined I added 10 cups of water and started it to boil. When it had boiled around 8 minutes it was as thick as I wanted it.
I removed the pan from the heat & stirred in 3 tablespoons of lemon juice and 1 tablespoon of vanilla. Then I got to assembling my jars.
Properly Filling The Jars
The jars had been boiling in my canner for about 12 minutes. So I removed each jar one at a time. (carefully – lots of boiling water and steam burn potential!) I poured the water from the jar. Then I packed the now-empty jar with my apple slices.
When the jar was filled within about 1 inch from the top I tamped the jar a couple of times on a soft hot pad to compact the apples. If they compacted much I added more apples until they were again about 1 inch from the top of the jar.
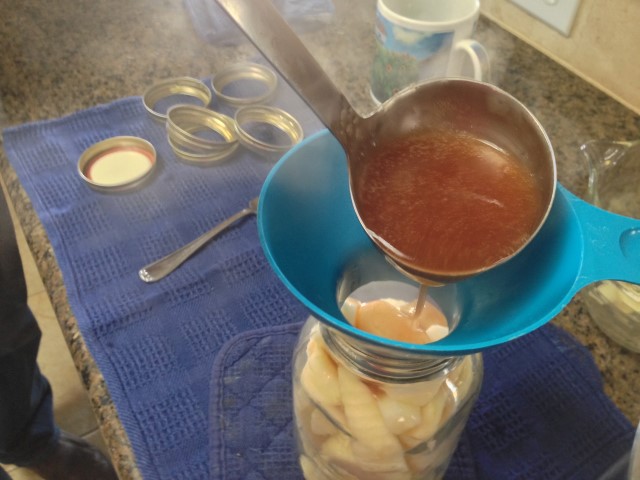
Then I carefully poured in my thick hot syrup, still leaving 1 inch head space for expansion during canning. I used the plastic handle of my spatula to slide down the jar to dislodge any air bubbles since bubbles can cause your seal to fail.
Then I wiped the mouth of the jar to assure there was no syrup or apple bits, which would also cause a seal failure. Finally I carefully placed the 2-part canning lid and ring onto the jar, tightened it ‘finger tight’ and placed it back into the canner, pulling another jar & repeating the process until all jars were filled.
When all jars are filled and in the canner I made sure that the water covered at least 1″ over the top of the jars. Then I covered the pot to allow the water to return to boiling.
Water-Bath Canning Apple Pie Filling
When the water came back to a boil I set my timer for 20 minutes. (your time may vary based on your altitude) When the time was up I turned off the heat.
UPDATE: In the past I’ve had some jars ‘siphon’ (bubble over) the filling from beneath the lids when I brought them out of the canner. I’ve read that if you leave the jars in the canner undisturbed for about 5 minutes it alleviates the siphoning issue.
I’ve tried it several times and it does seem to make a huge difference. So set the timer for 5-10 minutes before removing the jars if this is an issue for you too.
Now it’s time to get at those jars. I removed the lid to the canner AWAY from my face. Careful, steam can cause severe burns to your face & hands!
Then using my jar lifter I removed each hot jar and placed it on a clean folded kitchen towel and allowed them all to sit undisturbed overnight.
Testing The Seal
The next morning I removed, washed and put away the rings. I’ve found keeping rings on the jars in storage speeds up their rusting. Then I tested the seal of each jar by pressing the flat lid. If the lid is firm and makes no noise when pressed it’s sealed. Simply wipe down the jar and lid, label the jar with the contents and date & place it in your pantry.
However if the lid makes a plinky noise when pressed it’s not sealed. Place that jar in the fridge and consume within a few days.
I’ve used this apple pie filling for some pretty delicious homemade desserts in a flash. Of course the standard apple pie but also Apple Crumble and Apple Handpies. But also when I was really crunched for time I made a SUPER quick Hot Apple Dessert using just heated apple pie filling and crushed graham cracker crumbs served in cute vintage dishes.
Now keep in mind that although I’ve shared with you how I made this delicious apple pie filling fresh with the apples from my aunt’s tree, your circumstances might require slightly different times, etc. For your specific circumstances be sure to consult your canner’s manual. Also be sure you read and understand the USDA’s recommendations on safe canning and follow their directions closely. Food safety is important!
Aaaaanyway – here’s my Apple Pie Filling recipe. Enjoy!

Apple Pie Filling (yield about 7 quart jars of apple-pie filling)
This homemade apple pie filling recipe is pretty straightforward. There's no greater pleasure than whipping up a homemade apple pie in minutes using your own home-canned apple pie filling! #TexasHomesteader
Ingredients
Ingredients:
- 21 cups peeled, sliced and cored apples
- 5 cups white sugar
- 1 cup ClearJel modified cornstarch (REGULAR, not instant)
- 1 Tablespoon ground cinnamon
- 1/4 teaspoon ground nutmeg
- 2 teaspoons salt
- 10 cups water
- 3 Tablespoons lemon juice
- 1 Tablespoon vanilla
Instructions
Directions:
-
Sterilize canning jars by washing, rinsing & then boiling them in a large pot of water, preferably your water-bath canner. In separate pan boil a small amount of water, remove the pan from heat and drop the two-part canning lids into the water and cover the pan to keep them hot. (NOTE - do not boil the lids)
-
Peel, core, and slice apples. As each apple is prepared drop slices into a solution of 2 quarts water and 1/2 cup lemon juice to keep the apples from turning brown.
-
In a large pan, mix sugar, ClearJel cornstarch, cinnamon, nutmeg and salt. Your syrup will expand as it bubbles so a large stockpot is best. Stir water into the dry mixture and bring to a boil, stirring constantly. Continue cooking, stirring constantly, until syrup is thick and bubbly - approximately 8-10 minutes. Remove syrup from heat and add lemon juice and vanilla, stirring to combine.
-
Pack the sliced apples into hot canning jars, and top apples with hot syrup, leaving a 1 inch head-space. Gently remove air bubbles with the plastic handle of a spatula, then wipe the rim of each jar to remove any juice or bits of apple that would keep the jar from sealing properly.
-
Put 2-part lids 'finger tight' on the jars and carefully place in water-bath canner. When water begins boiling again set timer and process apple pie filling in water bath canner for 20 minutes.
-
After 20 minutes, turn off the heat but let the jars stay in the canner for about 5 minutes more. Then carefully move them to a draft-free spot and leave them undisturbed for 8 hours before testing seal, wiping them down, labeling jars and storing in your pantry.
~TxH~
5 Delicious Ways To Preserve Fresh Apples:
- Apple Pie Filling
- Cinnamon/Vanilla Applesauce
- Apple Cider
- Cinnamon/Sugar Apple Chips
- Fruit Leather Rollups
Other Delicious Apple Recipes
- Homemade Apple Pie
- Apple Pies Baked In Canning Jars
- Single-Serve Apple Hand Pies
- Apple Crumble from Apples in Syrup
- Baked Apple Pie Tortilla Roll
- Quick, Hot Apple Dessert
- Applesticks – Frozen Applesauce Sweet Treat
- Quick Spiced-Rum Fried Apples
- Chunky Apple Cinnamon Muffins
See All Our Recipes
C’mon by & sit a spell! Come hang out at our Facebook Page. It’s like sitting in a front porch rocker with a glass of cold iced tea. There are lots of good folks sharing!
And you can also follow along on Pinterest, Twitter, Instagram
If you’d like to receive an email when a new blog post goes live,
subscribe to our Blog!
*Amazon affiliate


What would you say the shelf life is on this canned reciepe??
According to the National Center for Home Food Preservation, at least a year –> http://nchfp.uga.edu/questions/FAQ_canning.html#5
I didn’t know you could water bath apple pie filling! I haven’t bought a pressure canner yet so I’m always looking to try new water bath recipes. Thanks!
Thanks again for liking up with Green Thumb Thursday. There’s still time to link up…we’d love if you’d join us again!
Lisa
Thanks for sharing your recipe. I’ve only canned beans and jams, but I would like to add more foods to this list. Thanks for sharing with us at Merry Monday.
I let my husband go to the auction without me this week. He brought home lots and lots of fresh apples. This recipe comes just in time, since I have to figure out what to do with them all. I don’t can much, because my kitchen is so small. I wonder if this recipe would also work for freezing the apples. Have you tried freezing using this recipe?
How exciting Linda – lots of apples!! My freezer space is at a premium so I always preserve my produce by either dehydrating or canning. I’ve heard that you can freeze apple slices, I’m not sure how apple pie filling would thaw and be ready for use after being frozen. Anyone have an answer to Linda’s question – can you freeze apple pie filling and have it thaw and be used the same as canned? ~TxH~
We grow organic apples and I don’t peel ours for canning/baking. Lots of fiber and nutrition there!!!
I agree with you Nancy, lots of fiber & nutrition are in the peels. But when I’m making apple pie filling I’m not fond of the texture when peels are left on soI always peel them for this recipe. When eating fresh I always, ALWAYS wash & enjoy the peels along with that delicious crispy apple! ~TxH~
We love homemade apple pie filling around here! I also just purchased some clear jell as I had been using the regular cornstarch for years. I think the new stuff does make it look prettier too. The regular corn starch isn’t so lovely looking after awhile. Thank you for sharing your recipe and tutorial with us on the Art of Home-Making Mondays! 🙂
For the person asking about arrowroot; I would suggest tapioca flour. I have successfully used it in canning. I think I have used arrowroot powder/flour successfully in the past, but I have no record of it. Also, do you have any apple browning with the recipe? I have used more lemon in the past. Just wondering. I also like to add raisins with the apples, but I love raisins. Thank you for this great post!
Dawnie
Thanks for the tip for tapioca flour Dawn. Regarding my apples browning, I did not see any browning of the fruit either before or after canning. Plus using the ratio that I did kept my fruit from tasting overly lemony and tart (I’ve had that happen in the past) ~TxH~
What a great idea! This looks so delicious and a great gift idea for the family around Thanksgiving! 🙂 Thanks so much for sharing this! I can’t wait to try it out!
Thanks for sharing the recipe. I recently got into canning this summer. I have done strawberries, blueberries and cherries. I need to try apples now. Stopping by from Sundays Down Under link party.
So glad you stopped by Kimberlee – RancherMan & I have been processing apples for hours each day for about a week and I *think* we can see the light at the end of the tunnel now… LOL ~TxH~
Hi there! Visiting from Share the Wealth Sunday. Thank you for sharing. I miss farm life and canning my own veggies. Thank God our new city has an excellent farmer’s market! Sounds like I need to go and get some apples.
It’s a great time of year for apples Deborah, they should be perfectly ripe, plentiful and less expensive now. ~TxH~
Sounds delish! I wonder if arrowroot starch would work instead of clearjel? We are allergic to corn.
I have no idea if you can substitute arrowroot starch for the ClearJel Megan – from what I understand regular cornstarch couldn’t hold up to cooking temperatures when canning so the ‘powers that be’ have recommended against regular cornstarch and recommended instead that home canners use ClearJel. I’ve never used arrowroot starch so I have no basis of comparison – maybe you can check with your extension agent? ~TxH~
Oh, Bless you for sharing and posting your recipe. I was so hoping you would.
I have seen many recipes on the net for apple pie filling but I like the ‘tried and true’ recipes and this coming from you, I just know it’s gotta be a Good one.
Can’t thank you enough for sharing this recipe with us.
I have everything I need…………………….except for the apples that is. Now, if only there was an orchard close by.
Have a wonderful weekend.
Colleen, I’ve canned apple pie filling before and although it was delicious, the apples seemed just a bit too soft for my liking. So this time I cut the slices larger and raw packed them. I’m going to like this recipe better! ~TxH~