by Texas Homesteader ~
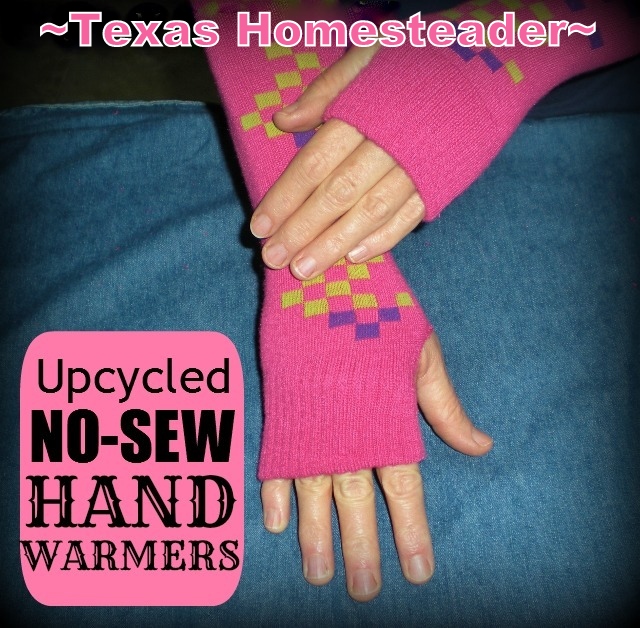
I wanted fingerless gloves, but I wanted to make them myself. In 5 minutes I was able to upcycle long socks into oh-so-cute fingerless gloves with NO SEWING! See this easy tutorial.
Looking For Fingerless Gloves
I’ve been dreaming of a pair of fingerless gloves all winter, I absolutely love the style and functionality of them.
You know how it is. You want your hands to be warm. But sometimes a full pair of gloves are just too restrictive.
But fingerless gloves allow you to use your fingers to work your smartphone or for picking up things while still offering warmth to your hands.
Oh how I wanted them! So I started shopping, hoping I would find a pair that I would love.
Making My Own Fingerless Gloves
But then I saw someone share ways to upcycle long socks into hand warmers and (here’s the kicker) it took NO SEWING!
Now I’ve joked before about my lack of sewing prowess but I kid you not – I have NO sewing skills.
None. Nada. Zilch.
So when I read the idea of using socks to make a no-sew hand warmer I was intrigued.
Bright, Colorful Long Socks
Rewind back to last year when I bought a pair of bright pink socks. Although I loved the color & design, they were full calf-length socks. And after wearing them all day the elastic cuff was uncomfortable. They were just too tight. I hated that because I loved the socks. Plus – dang they were brand new!
Hummm… PERFECT opportunity to try these no-sew fingerless gloves!
Fingerless Gloves Easy To Make!
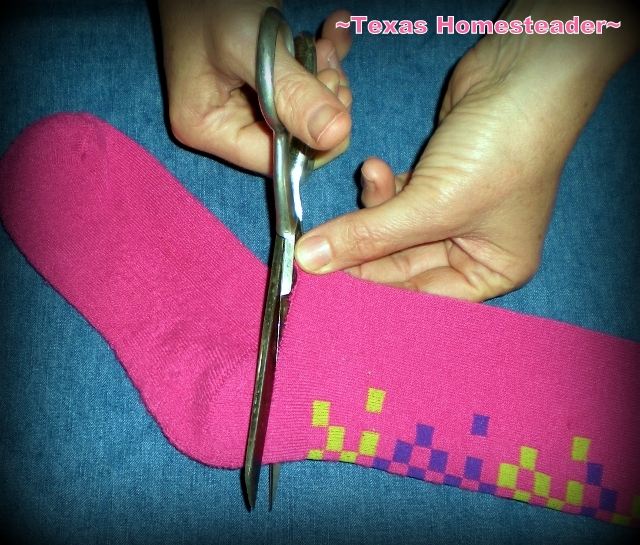
First I laid out the clean socks & cut them just above the heel leaving the sock in two pieces.
I wanted to leave most of the length for my fingerless gloves so they would cover much of my forearms as well. But you might want to decide how long you want your warmers to be so you’ll know how high up the sock you wish to cut.
I sat the foot section of the cut sock aside & focused my attention on the long calf section that would become my fingerless gloves.
Then I needed to cut a hole for my thumb to go through. So I slipped my hand into the section of sock with my fingers at the finished cuff end to measure where the thumb hole should be cut.
For me it was right at the bottom of the cuff. So I cut a very small slit for my thumb to come through.
Keep in mind that the material will stretch when you put it on your hand. So this cut in the fabric for your thumb needs to be just barely enough to squeeze your thumb through.
Don’t try to make this hole too big. You can cut it bigger if you want later, but you can never make it smaller once it’s been cut. So err on the side of too small initially.
I will say that when you’re wearing these fingerless gloves the thumb goes through a little deeper than you think they will. That means you’ll naturally pull the glove higher up on your hand, which will result in slightly less coverage for your fingers.
I thought these gloves would cover as shown in the picture when I was wearing them. But because the thumb typically goes in further when wearing the fingerless gloves they actually ride just about 1/4″ higher than that.
So be sure you measure the thumb hole location based on the very highest part of the thumb that will fit through for an accurate fit.
Anyway, I absolutely L-O-V-E these fingerless gloves and they are long enough to cover most of my forearm as well.
If you have some favorite socks that you’d like to upcycle to a new life give these fingerless gloves a try.
And hey, did I mention there’s NO SEWING??
~TxH~
Easy Beginner’s Crafts & Projects We Love
Gifts
Home Décor
Clothing & Accessories
Other Easy Projects
…And Much More
See All Make-It-Yourself Posts
C’mon by & sit a spell! Come hang out at our Facebook Page. It’s like sitting in a front porch rocker with a glass of cold iced tea – lots of good folks sharing! You can also follow along on Pinterest, on Twitter or on Instagram.
If you’d like to receive an email each time a new blog post goes live it’s EASY to Subscribe to our blog!


Hello,
I always enjoy reading your posts and the comments. But I do miss the opening photo you had on the web site of your place. Seems like I remember there was a photo of your barn and some pasture with a few head of cattle.
Thanks for keeping on posting.
Candace in Oregon
I love that photo too Candace. But it wouldn’t fit properly when we upgraded the website so I had to switch it to the current leader photo (although I love this foggy sunrise photo too!) Hope all is well with you, sweet girl! ~TxH~
These are great! I was going to try something with cutting and sewing old sweaters, but this is even easier! Thanks! tweeted and pinned!
Those socks are so fun! They are perfect for this use. Thanks for sharing on the Waste Less Wednesday Blog Hop!
Now if only I could find a clean pair of socks.! Lol.
Smart idea! My hands get so cold in the winter, especially when I’m typing. I need to dig out an old pair of socks and try this! Thanks for linking up with Merry Monday 🙂
I loved those cute pink socks but they were never worn because they ended up being too long on my calves for my comfort. But DANG they worked perfectly for fingerless gloves. ~TxH~
Where in E, Texas are you located? We live in Gilmer and have a small ranch. Love the old barn look.
We’re in NE Texas. Thanks for the compliment on our barn – it was built in the 1880’s and was in pretty sad shape when we first laid eyes on it. But its presence is the reason we decided this was the place we wanted to plan our future, I absolutely fell in love with its history! We had a contractor refurbish the crumbling exterior of the barn while leaving the interior intact. The heavy beams are sturdy bois d’arc and I’m sure they’ll outlast us! After having the barn refurbished we installed working pens, etc and it’s a very-much used feature on our Homestead today. LOVE IT! So glad you stopped by today Babs, hope you enjoy the barn posts… ~TxH~
Very cute! I wish I could get away with something like that, but I have to stick with my ugly mitten gloves (you know the ones where the tip of the mitten flips of so you can use your fingers) other wise I would be sticking to everything metal in the winter when it is -30. Thanks you so much for sharing on the (mis)Adventures Mondays Blog Hop. I look forward to seeing what you share this week!
So easy and cute!
Easy & cute is a great combination Diana. 😉 ~TxH~
Clever! I’d need these! My hands get sooo cold! I am delighted that you shared with Home and Garden Thursday,
Kathy
What a great idea! Love those socks turned into gloves! Thanks for sharing at TTF!
These are a great idea…………and I can tell they would be something we would use. Thank you for posting this. 🙂 Gentle Joy
I can’t wait to go find a pair of socks to make these with!
Well ain’t that the neatest thing ever! Love that!
That is the best idea for cute socks that have holes in the toes!! Awesome!
Very nice, one question though, won’t the socks start to unravel or fray? I like the idea of being able to use socks that have holes in the toes for this. Thanks.
So far they haven’t frayed or unraveled. I use old socks cut into squares as my cleaning rags and I don’t have a problem with any of them unraveling even after multiple washings so I think my fingerless gloves will be fine. Yea! ~TxH~
Neat idea. I like the pink socks/gloves too.
Thanks Judy – I love them! ~TxH~