by Texas Homesteader ~
*contains affiliate links
I was recently asked to give a talk to a delightful women’s group about the procedures of homemade cold-process soap. Of course there’s no way for me to actually make the soap as part of the presentation.
Not only would mixing lye not be wise in an unknown setting but start to finish it takes about 2 hours to make the soap. (although once the lye & oils are combined it comes together in only about 20 minutes)
What??! You don’t think I could be entertaining enough to engage a group of strangers for 2 whole hours?? LOL
So RancherMan & I decided to make the soap in advance. That way the soap could cure for 6 weeks before the presentation. We would be able to send everyone home with a sample of the finished soap all ready to use. But what soap shall we make??
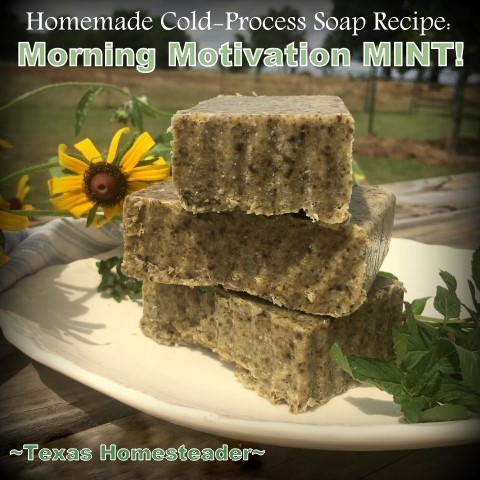
After pondering a bit I decided to put that rambunctious mint to good use and make a mint-scented soap. I think I’ll call it “Morning-Motivation Mint”! Come see how we did it.
Note: Some links in this post are for further information from earlier posts I’ve written. But links preceded with * are affiliate links. If you click them and buy something (almost anything, not just the item noted) I could receive a small commission. But the price you pay will NOT change. It’s an easy way to support this blog without anything coming out of your pocket. So click often! Thank you!
Now let me first say that making cold-processed soap is not hard at all. In fact, making soap is truly easy and incredibly fulfilling.
But many soap recipes call for specialty oils. I don’t like making soap with palm oil in the ingredient list since it’s not easy to obtain palm oil living out here in the boondocks. I stick with recipes that call for common oils that I can pick up at our local grocery store.
And I especially love this base recipe since it uses only standard ingredients found in any grocery store. And you can add different botanicals and scents to make each batch appear totally different.
But just because it’s not complicated to make your own soap doesn’t mean you don’t have to use caution. If you’ve made soap before you already know the precautions to take.
But for those new to soap making, please beware of the dangers! Now’s not the time to have the children or small pets underfoot to trip over.
And realize if not done properly, dealing with lye and the chemical reactions involved can be dangerous. So please do your homework first and proceed at your own risk.
I’m no soap-making expert and don’t pretend to be, but here are precautions RancherMan & I take each and every time we’re making soap:
Precautions:
- Making cold-process soap relies on measurement by WEIGHT, not by volume, so you’re going to measure all oils, water & lye on a digital scale, not rely on what a measuring cup reads. This is important!
- Make no substitutions to either quantity or type of oils unless you consult a trusted soap-making oil calculator. Oils must be combined per the recipe in both type as well as quantity measured by weight to result in a safe product. (I’ve used oil calculators before to tweak a recipe but I typically follow this tried-n-true recipe and just tweak my scents or dried botanicals for variations.)
- When mixing lye water – be sure to measure (by weight) the water first and then measure (by weight) the lye and carefully sprinkle the lye into the water to keep from splashing caustic liquids. Never pour water into measured lye – always sprinkle measured lye into measured water.
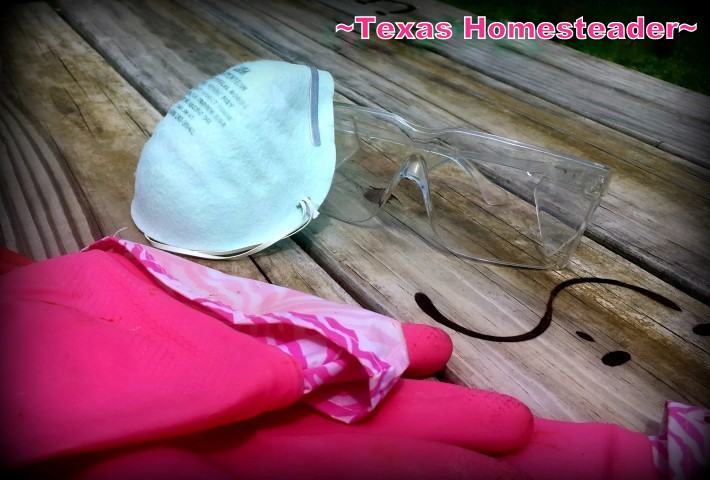
- Lye is caustic – be sure to wear eye protection, rubber gloves and a paper painter’s mask to protect yourself.
- Always make soap where there is adequate ventilation to avoid inhaling caustic lye fumes. When we’re making soap we typically set up in the garage and open doors & windows on opposite sides to get a cross breeze. As mentioned earlier, we also have protective eye-wear, rubber gloves & a paper mask. Breathing lye is not a good thing.
- Never use metal containers for caustic lye solutions – opt for silicone spoons, glass or plastic containers and porcelain-lined pans.
- Raw soap must cure for at least 6 weeks before use. Curing longer is even better.
- Follow recipe & directions carefully. Do not substitute oils or change amounts from the recipe.
- Proceed at your own risk.
Preparations for Soap Making
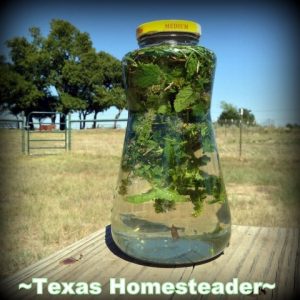
Now that we’ve decided to make a couple of batches of mint soap I need to do some preparation. I like to use natural rainwater in my soap. So several days ago I poured some rainwater into a jar. Then I pulled & crushed fresh mint & crammed it into the jar. Finally I set that jar on our picnic table out in the sun. The rainwater will infuse with the mint and give the water just a tint of color and scent. Why not? I’ve got mint coming out of my ears!
When it’s time to make our mint soap RancherMan & I set up a work station out in the garage. We opened doors & windows on opposite ends of the garage which offered a nice cross breeze. We both donned our safety goggles, protective painter’s masks and rubber gloves to protect ourselves. Before beginning the soap we read over the directions one last time so we knew what we were going to do and when. Finally we sat out all the tools (that are designated for soap-making only) such as a silicone stirring spoon, porcelain pot, plastic containers, etc. Having those things ready meant we wouldn’t be scrambling looking for things at the last moment.
Tools:
- Rubber Gloves
- *Paper Painter’s Mask
- *Safety Goggles
- *Digital Scale
- Silicone Spoon (not metal)
- *Glass Measuring Cups
- *Plastic Bucket for Lye (no metal)
- *Porcelain-Covered Pot for Soap (no exposed metal)
- Small Plastic Containers for Measuring Dried Botanicals & Essential Oils
- *Stick Blender
- *Soap Mold for Raw Soap
- Plastic Wrap to Top Raw Soap in the Mold
- Thick Towels for Insulation
Over the years, this has become my favorite base recipe for soap. We change it up using the base recipe but different scents & dried botanicals. Each 2-lb batch from this recipe makes about 9 small bars so this recipe works great for us.
Ingredients:
- Mint-Infused Rainwater
- Vegetable shortening (ie: Crisco)
- Mid-Grade Olive Oil
- Coconut Oil
- Dried Mint Leaves, pulverized in coffee grinder
- Sodium Hydroxide Lye crystals
- Mint Essential Oil
Making The Soap
First we mixed our lye solution by measuring the water FIRST, then sprinkling the measured lye crystals on top of the water. You never want to pour water into lye, always measure water first and then add the lye. Finally blend the lye and water together by stirring with a non-metal silicone spoon. The water and lye will cause a chemical reaction so we were sure to have our eye protection, rubber gloves and paper mask and kept our faces away from the fumes.
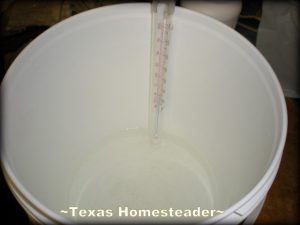
We stirred the lye/water mixture gently with a silicone spoon until the lie completely dissolved. The chemical reaction caused the lye water to heat quickly to about 150 degrees F. We used a glass candy thermometer to measure the temperature as it cooled. We needed it to cool down to about 100 – 110 degrees.
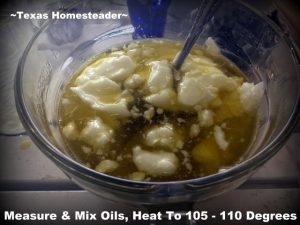
As the lye water was cooling it was time to get started with the oils. We measured (by WEIGHT) the liquid olive oil and added it to our measured solid coconut oil & shortening. I poured them all into a large glass measuring cup and heated them in the microwave in 10 second intervals. Soon the solid oils melted and the oil mixture measured around 100 – 110 degrees.
When the oils and the lye water were both between 100 – 110 degrees it was time to get to blending! We carefully poured the lye water (cooled to 110-110 degrees) into the melted oils (heated to 110-110 degrees) and gently stirred with a silicone spoon to get everything blended.
Reaching Trace
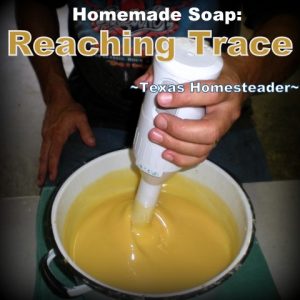
Now it was time to make some mint soap! You’re wanting to get the oils and lye water to reach something called “trace”, where the soap changes from just an oily mixture to a thicker almost pudding consistency. Here’s where I incorporate my shortcut, my secret weapon, my SANITY! Stirring with a spoon will eventually give you trace, but it takes quite a bit of time. I can get the soap to reach trace much quicker – about 20 minutes – using a stick blender.
Now you can get false trace by just turning on the stick blender & going to town, so you don’t want to do that or your soap won’t turn out correctly. False trace looks like it’s thickened into trace, but it doesn’t stay thick. That’s because the emulsification you’re trying to achieve has not really been achieved.
So what you want to do is turn the stick blender on for a very short duration and stir about 2-3 times around your pot with the stick blender turned on. Then turn it off & just use the stick blender itself to continue stirring manually to remove the bubbles that have been created beneath the surface. When the bubbles are gone give it another blast with the stick blender then turn it off and use it to stir again. Your mixture will become thicker over time.
It’s reached trace when you can drizzle the liquid soap across the top of the mixture and have it leave a little trail for a few seconds before disappearing beneath the surface. When it reached trace it was time to add the essential oil and dried botanicals. When that’s done you give everything a final stir to get it all blended.
Place Raw Soap In Soap Mold
Now the raw mint soap is ready to be poured into a soap mold. For this smaller 2-lb batch we typically use a silicone pan that measures 8.5 inches by 8.5 inches and about 1.5″ deep. But we’ve been experimenting with various things we have around the house. I’ve used the small single-serve plastic containers from fruit with mixed results. (The soap seems overly hard to remove from the containers.) But I really enjoy using an empty waxed cardboard ice cream container. But today we’re using the silicone pan. We poured the thickened mint soap into the mold, smoothed out the top with a plastic spatula and covered the top of the soap with a piece of plastic. Then we topped the whole thing with thick towels to keep it all insulated and allow it to cool slowly.
We will leave the soap in the mold for about 48 hours before removing it. At the end of that time the soap is solid but still pretty soft. We carefully folded back the silicone pan to release the soap and placed the whole soap block on a cookie rack to air dry for another 24-48 hours or so.
Cut & Cure Soap Bars
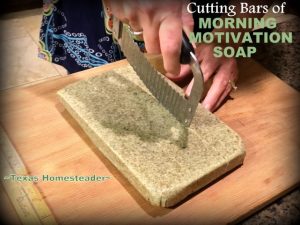
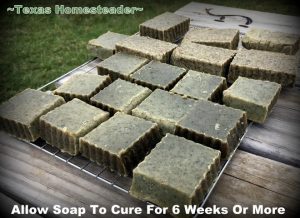
After that time the soap is still soft but a slightly more firm than before. It’s ready to cut, so we placed the soap to the counter and cut it into 9 bars. I like to use a *crinkle cutter to put a rippled edge on my soap bars.
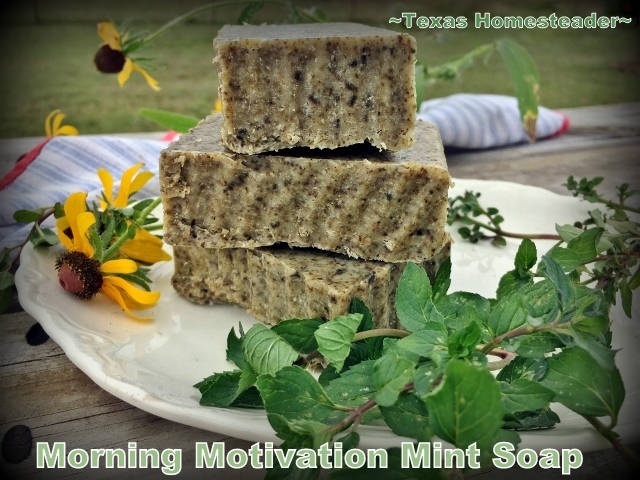
But even though it’s cut into bars, it’s still not ready to use. The mint soap needs to cure for at least 6 weeks before it can be used. Longer is even better since the longer it cures the harder the bar of soap gets. Harder soap bars will last longer in the shower. So to begin curing our soap we place it on a wire rack to expose it to the air for several weeks. After that cure time your soap is ready to use! I love the different tones of this soap. Even though they were both made using the same recipe, one had almost completely powdered dried mint. It lent a delightful minty-green color to the soap. I love using natural ingredients to color my soap! The other had some pulverized leaves and some crushed leaves. The mottled appearance of the lighter-skinned soap is very pretty to me. Both smell amazing!
I’ve made various different soaps using a basic recipe and then changing around the EO scents or dried botanicals. Although the recipe must remain the same, it’s easy to change up your soap by changing up your scents & botanicals. RancherMan loves the scrubbability of my Rosemary Soap. I coarsely chop dried rosemary & add rosemary EO for more scent. My favorite is always going to be Lavender/Rosemary scented. And we’ve even made a vanilla-scented shampoo bar.
So if you’re ready to try your hand at making soap, this is a very easy recipe. Be sure to read and follow the precautions first! Here’s my recipe for the Morning-Motivation Mint Cold-Process Soap:
3-Oil Morning-Motivation Mint Cold-Process Soap:
2-Lb Recipe, Makes 9 small bars
I love this minty eye-opening soap. I make it with only 3 common oils, rainwater & dried mint leaves from my own garden.
Ingredients
(2-Lb Recipe, about 9 small bars)
Ingredients:
- 9.4 oz . vegetable shortening (ie: Crisco)
- 6 oz . Olive Oil (mid-grade is fine & even preferable)
- 6 oz . Coconut Oil
- 7 oz . Mint-Infused Rainwater
- 3 oz . Sodium Hydroxide Lye Crystals
- 0.9 oz . Mint Essential Oil
- 2 Tablespoons of dried pulverized mint leaves (it’s ok to measure this ingredient by volume)
Instructions
Directions:
(read precautions above first)
-
Mix lye solution by measuring the water first, then sprinkling the measured lye crystals on top of the water. Stir with wooden spoon until the lye is completely dissolved. Mixture will heat up, so allow to cool to about 100 – 110 degrees.
-
In the meantime measure liquid olive oil and add it to the measured shortening & coconut oil. Pour all into a porcelain-lined pot and heat to 110 – 100 degrees. (or use a large glass measuring cup & heat in a microwave)
-
When the oils and the lye water are both between 100 – 110 degrees, carefully pour the lye water into the melted oils & gently stir with a wooden spoon to get everything blended.
-
Continue stirring until mixture reaches ‘trace’. It's at this point the soap mixture will thicken to almost pudding consistency. There will be trails left behind when you drizzle soap from the stick blender that will stay on the surface for a short time before disappearing. For me that takes about 20 minutes or stirring with intermittent blasts from a hand-held blender stick.
-
At trace, add measured essential oils and dried mint, giving everything a final stir to get it all blended.
-
Pour raw soap into 8.5″ x 8.5″ x 1.5″ deep soap mold, top with a piece of plastic wrap & then cover everything with thick towels. Leave undisturbed for 24-48 hours
-
Carefully remove soap from mold and place soap block on a wire rack to air dry for another 24-48 hours.
-
After this time, cut into 9 bars and place bars on a wire rack exposed to the air to fully cure for at least 6 weeks. The longer you cure the soap the harder the bar will be & the longer it’ll last in the shower.
~TxH~
PS: Wondering what it costs? Here’s the cost breakdown per recipe for 9 bars of homemade soap (as of 06-17) Prices are what I paid here in NE Texas.
9-Bar Price breakdown:
- $4.88 – 1 oz spearmint essential oil
- $1.43- Sodium Hydroxide Lye, 1 lb $7.59 (3-oz = $1.43)
- $1.40 – Olive oil 17 oz $3.96 (6 oz = $1.40)
- $0.90 – Store Brand Shortening $3.88/42 oz (9.4 oz = $0.90)
- $1.58 – Coconut oil $3.68/14 oz (6 oz = $1.58)
$10.19 – 9-bars of soap (or $1.13 per bar)
Zero-Waste Health & Beauty
- Zero-Waste Shaving Using A Safety Razor
- Low-Waste Snap Toothbrushes
- Homemade Minty Mouthwash
- Quick & Easy Homemade Deodorant
- MYO Light & Sheer Face Powder
- 3-Ingredient Beeswax Lip Balm
- Homemade Vanilla-Scented Shampoo Bar Soap
- 3-Ingredient DRY SHAMPOO Mix
- Homemade Hairspray
- MYO Naturally-Scented Hair Conditioner
- Morning Motivation Mint Soap
- Homemade Soap: Lavender/Rosemary
- Soap Grows On TREES! Soapberry Shampoo
- How A Bidet Can Be An Eco Win
C’mon by & sit a spell! Come hang out at our Facebook Page. It’s like sitting in a front porch rocker with a glass of cold iced tea – lots of good folks sharing! You can also follow along on Pinterest, Twitter or Instagram.
If you’d like to receive an email each time a new blog post goes live it’s EASY to
Subscribe to our blog!
Save


Nice!
Can you give us recipe for the lavender and the rosemary soaps and the shampoo bars. I have always wanted to try this and your recipes sound easy enough for a beginner. You instructions about safety are great. Thanks for sharing
That’s the great thing about this recipe Sharon – the recipe remains the same but I just change the dried botanicals & fragrance for my different variations. For instance for the lavender soap, in place of the crushed dried mint leaves & mint essential oil, I crushed the same amount of dried lavender blooms and used lavender essential oil instead. For the rosemary I followed the same recipe but in place of the mint & mint EO I used dried crushed rosemary & rosemary EO. As long as the ingredients of the soap remain the same, you can change up the dried botanicals & scent to make whatever different scent you like! The shampoo bar is a different recipe, but you can see that recipe by clicking the link within the post Sharon, or you can search “shampoo” on the blog’s home page and locate it that way.