by Texas Homesteader
*affiliate link
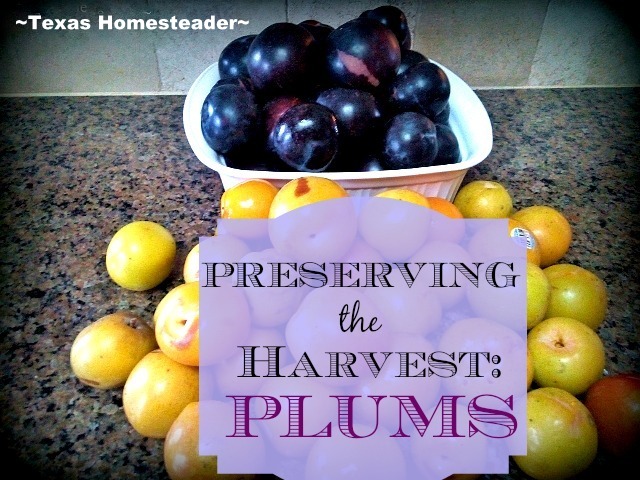
I recently acquired two different varieties of ripe plums that totaled about 30 lbs. Now I love fruit, and plums are some of my faves – so sweet, so juicy! But I’m going to have to preserve some of these plums if I’m going to keep them from going bad before they’re all consumed.
I love plum jelly but I’ve made so much jelly lately including apple butter, blueberry jam and even honeysuckle jelly that I don’t need any more in my stockpile. Even though I like to stock my pantry with jellies to sweeten my homemade yogurt, with only two of us at home these days I don’t want to make more than we can use. What else can I do with these delicious plums?
Hummm… I like to sweeten my homemade pumpkin granola with dried fruit and I recently used the last of my dehydrated jujube fruit. So maybe I can dehydrate these plums into raisin-sized chunks to naturally sweeten my granola?
It’s times like this, staring boldly in the face of thirty whopping pounds of fruit to dehydrate, that I’m more than grateful to have my large 9-tray * Excalibur Dehydrator! I’m able to fill all nine trays with prepared fruit, which significantly reduces the time I’m stuck processing all of these plums. And y’all know I’m all about gettin’ in there & gettin’ it DONE!
I started off by washing the fruit. The plums that still felt a little firm were put aside so they could ripen a little longer. Then I took the remaining fruit to my counter. With a cutting board & a sharp knife I got to work.
Thankfully RancherMan’s no stranger in the kitchen and he asked if there was something he could do to help. “Um, YEAH! Oh, sorry – were you truly offering, or just asking to be polite?” LOL
Removing The Pit
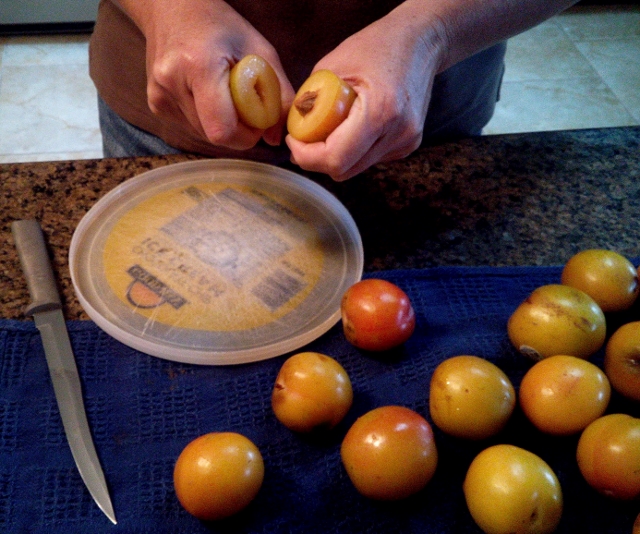
We took each ripe plum and cut around the circumference of the fruit from the skin to the pit. Then it was easy to grab each half of the cut plum and twist, pulling the pit from the plum. If the plum was ripe enough and with half the pit already exposed on the remaining side a quick pinch & twist of the pit would usually release it from the fruit.
Oh, and seriously folks, don’t act like you’re not secretly insanely jealous of my fancy-schmancy cutting board! My baby sister still has teens at home that enjoy ice cream from time to time. She saves me the lids from the ice cream tubs for this purpose.
The lids make a perfect cutting board. Lightweight, recyclable, and the lip on the lid keeps any juices from spilling onto the counter. (Yeah, yeah, I’m a genius… HA!)
Aaaanyway… We just tossed the pits into the compost bucket. Now those pits probably won’t fully compost down by the time I’m pulling compost for fall or even spring planting. But that’s where all of my veggie/fruit scraps go, so in ya go!
Cutting Fruit To Size
Now that we have two pitted halves we went to work cutting them into the sizes I wanted. I’d like to use these dehydrated plums in the place of purchased raisins. So I’m cutting them about 2-3 times the size I want them to be when they’re fully dehydrated.
I also cut some into larger 1/4″ slices to experiment with the different sizes/textures when fully dehydrated.
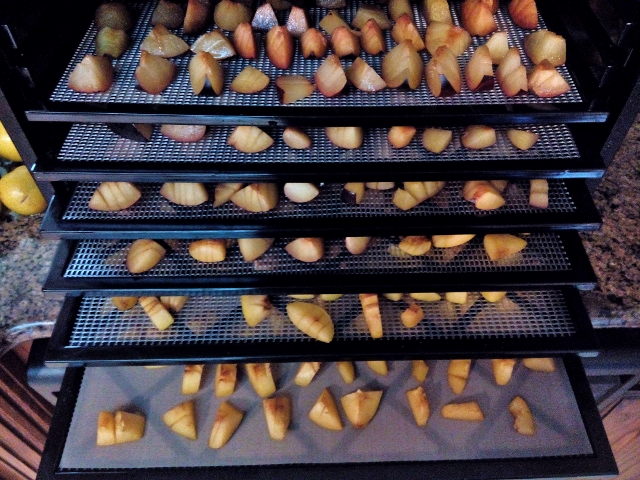
After the plums were cut to size I scored the flesh of each wedge piece 2-3 times. This should allow the dry air to penetrate the thicker fruit. I set the pieces skin-side down on my dehydrator tray.
(note: I wasn’t impressed with the wedge pieces when they were dry so the rest of them were simply cut to chunks)
Dehydrating The Plums
I started out using dehydrator sheets over the trays because I was worried these juicy plum pieces would stick to the trays. But after loading a couple of trays I just started laying the cut pieces directly onto the trays themselves. They seemed to dry just fine that way & much quicker too.
My dehydrator manual instructed me to set the temperature to 135 degrees for plums that are to be dried in halves. They should be leathery and fully dehydrated in 8-16 hours.
But since I’m cutting mine up into smaller chunks I figured it won’t take that long to dehydrate these sweet jewels.
After about 4 hours in the dehydrator I pulled out the trays and moved the pieces around to make sure they wouldn’t stick. My raisin-sized plum chunks were dried to my satisfaction in about 10 hours, although the larger wedges took a little longer.
There are many variables when dehydrating food including your humidity level, power on your dehydrator, size & residual juiciness of the food, etc.
I tend to dry mine just a tad past optimum. I think I’d probably cry like a little child if I inadvertently left a bit of moisture in the food & it molded in storage. So I’m one of those “better safe than sorry” kind of gals.
You’ll want to use your best judgement when you’re dehydrating your food. But your dehydrator’s manual will direct you to the proper time/temp for the specific food you’re dehydrating.
After that first batch was complete I repeated the process for batch two. But with my second batch I decided to experiment a little more. The plums were just a tad softer & more ripe. So it was super easy to remove the peel by hand before I cut the plums into chunks.
This made them dehydrate faster still. My raisin-sized chunks were now dehydrated to my satisfaction in only about 8 hours.
Make Sure No Moisture Remains
Although it took several dehydrator loads to dehydrate that many plums, after each batch I removed the pieces from the dehydrator trays and placed them into large-mouth glass jars. The lid was propped on top but not screwed on. For a couple of days I shook the contents of the jar to release any residual moisture that may be still present.
It’s a common option to just freeze them if you want to be sure they don’t mold. But I like to store mine in the pantry. So this procedure gives me a little extra assurance.
But how do they taste? Ummm… The chunks with skins still attached had a sweet-tart taste, much like craisins.
The chunks that didn’t have the skins still attached were not quite as tart but just as sweet. But they all had the soft & chewy texture of raisins. I’m really glad I now have a hefty supply of natural sweetness to add to my homemade granola!
I’ve also got a glass jar of them prominently placed so RancherMan will be more apt to grab a handful when he’s in the mood for something sweet. Now THAT’S some healthy snacking!
And by making my own dehydrated fruit instead of purchasing it I’ve not only saved money in our food budget but contributed no packaging to the landfill Win/Win!
How do you most like to preserve & enjoy your plums?
~TxH~
Links Included In This Post
- Blueberry Jam Without Added Pectin
- Honeysuckle Jelly – Childhood memories In A Jar
- Easy Homemade Yogurt
- MYO Pumpkin Granola
- Dehydrated Jujube Fruit
- *Excalibur Dehydrator
- Repurposing Items For A Cutting Board
Other Dehydrating Posts
- Preserving The Harvest: Dehydrating Fresh Carrots
- Dehydrating Fresh Pumpkin For Easy Storage
- Dehydrating Spinach To Enjoy All Year Long
- Using A Dehydrator To Preserve Fresh Onions
- Dehydrating & Storing Cabbage
- Bell Pepper Dehydration
- Using A Solar Oven To Dehydrate Garden Produce
- How To Make Dehydrated Blueberry Powder
- Dehydrating Plums
See All Our Dehydrating Posts
C’mon by & sit a spell! Come hang out at our Facebook Page. It’s like sitting in a front porch rocker with a glass of cold iced tea – lots of good folks sharing! You can also follow along on Pinterest, Twitter or Instagram.
If you’d like to receive an email each time a new blog post goes live it’s EASY to Subscribe to our blog!
*Amazon affiliate
* A word about our Affiliate Link – We are currently enrolled as an Amazon Affiliate. Occasionally I will insert an affiliate link into one of my posts if I think it may be of interest to you. I receive nothing from the manufacturer. But I love my Excalibur dehydrator & thought you might too. If you click on any of my affiliate links and buy something (almost anything, not just what was linked) I get a small referral percentage from Amazon. But here’s the really important part – the price you pay for your items is UNCHANGED.
When you buy something through the affiliate link it’s a great way to support this blog without anything coming out of your pocket. So please click often!


I’ve never dehydrated plums (we have a very mature plum tree). I always suspected they would come out tart and unsweet for my picky eaters.
I love this idea. I’ve been trying to dry fruit to add into granola, but I think I’ve been leaving them in the dehydrator too long. They end up a little on the crunch side before I’m done. Need to do more experimenting.
Can you Can Jujube’s to make Jam Or Jelly?
I never thought to dehydrate plums! You are just constantly giving me new ideas!!!
Thanks again for linking up with Green Thumb Thursday. We hope you’ll stop back this week!
Lisa
Nice! Pinned, tweeted, see you next week on The Yuck Stops Here! HUGS
Once again a great and informative post, thanks for linking up at Good Morning Mondays. Blessings
I always learn something new when reading your blog! Dehydrated plums–super yum!!!
I adore plums… and also my dehydrator! I can’t wait for plums to be ready around here to try this out! 🙂
This is my featured post this week for the From the Farm Blog Hop! Thanks for joining us, and I can’t wait to see what you share next!
~ Christine
Yum dried plums sound so good. I love dried fruit of any kind and a food dehydrator is on my wishlist. BTW- love the cutting board 🙂 Thanks for sharing with us on Merry Monday.
Thanks so much for joining the Say G’Day Saturday linky party this week. I’ve just pinned your post to the Say G’Day Saturday board.
Best wishes for a great week.
Natasha in Oz
Love the cutting board! I can’t wait for our trees to really produce. This year we got 3 plums and I have it on good authority that they were wonderful. Thanks for sharing at Simple Lives Thursday; we hope to see you again this week.
My family loves dried fruit, but I’ve never tried drying plums before. We will have to try that this year! I’ve only gotten a lot of plums once, and I made plum perogies with them that time. They were super yummy! I’m hoping to get some plums from a local u-pick this year and try that again 🙂 Thanks for sharing!
30 lbs! Wow! Well if you’re going to have 30lbs of something, plums are the perfect thing. One of my favorite fruits! Thank you for linking at the In and Out of the Kitchen Link Party. Hope to see you again next week.
Such a great idea! I love putting dried fruit and kasha in my yogurt! I never thought about dehydrating prunes, but now I certainly will. Thanks for the inspiration and the tutorial!
Thanks for sharing. We just bought a large dehydrator and while we don’t have plums to test it out on, we hope to some day. We do have tomatoes and I pinned your tomato skin post recently so we’ll probably test that out soon. Keep posts like these coming – I love them!
Great idea! I keep a bag of dried fruit and toasted nuts in my purse. On my recent vacation I caught my Sister-In-law reaching into the back seat while driving, searching for my snack bag. I think I would have made jam, I LOVE plum jam. Have you ever made Jam Bars?
I just dried some the other day and yes, with the skin on it is sweet and sour 🙂 My son loved them! Thanks for sharing these preserving tips!
Thirty pounds of plums! That’s a log of pits to deal with.
Now, you could had always made plum wine but then it would had been 6 months – a year before you would be able to drink any of it so dealing with that many plums, in your case, dehydrating was the way to go. Could also had made some plum sauce.
At least with the dehydrated plums they can be used in meat dishes.
By the way, I like your cutting board. I use my lids to put potted plants on or when I take something from the freezer I will set the frozen item on my lid / cutting board and put in frig. Not only do I save the lids but the containers themselves.
All my cans, plastic, glass, etc. I take to Target and put in their recycle bins
Colleen, we tried our hand at persimmon wine using the sweet wild persimmons that grow here. It was a full year or racking and transferring, fermenting and straining before we could taste it. When the day came we popped the bottle, let the wine breathe, and tentatively took that first exciting sip. It was AWFUL! LOL
I have made homemade beet wine and had found that the longer it sat the better it was so over the years it got better and better. Gosh, that was over 40 years ago when me and my mom made beet wine.
As they say, wine improves with age
That is a lot of pits… but the pits have tons of flavor. I boil them in water with a touch of sugar, a squeeze of lemon juice or zest. Then let it set over night before straining. You can use this to add to sparkling water or a cocktail.
No flavor wasted.
That’s a great idea Marsha – and no waste. Thanks for sharing! ~TxH~
We picked a small handful of our very first plums last night. They were sweet and juicy! We did not have enough to do anything with other then to enjoy them but I can not wait to have enough to dry. I have saved this post and will come back to it next year!