by Texas Homesteader ~
*contains an affiliate link
Now y’all know that I love me some blueberry… ANYTHING. I’ve planted blueberry bushes to keep myself in steady supply of those delicious & oh-so-nutritious orbs. But until those plants grow large enough to satisfy me I’m stuck using purchased frozen berries.
Recently I realized that I had two bags of blueberries in the freezer. So I decided to make blueberry jam with some of them.
I searched around online & decided on this recipe I found at Food.com since it didn’t contain any added pectin. Of course as is the norm for me, I amended the recipe to suit our tastes.

Single-Batch of Jam Only
I’ve read that it’s not wise to double the recipe batch when making jams. Unfortunately I found out firsthand when I didn’t heed that warning that double-batches of jam often just don’t turn out right. So I stuck with the quantity of berries shown in the recipe.
First I measured out the ingredients: 6 cups of blueberries, 3 cups of sugar, 1/4 cup lemon juice squeezed from the lemon, a couple of teaspoons of finely grated lemon rind and a teaspoon of vanilla extract.
Preparing To Make Jam
I chose a large stockpot to cook my jam. Because as you know when a sugar mixture begins to bubble & boil it can splatter causing painful splatter burns. So my larger stockpot and a long wooden spatula were my tools of choice today.
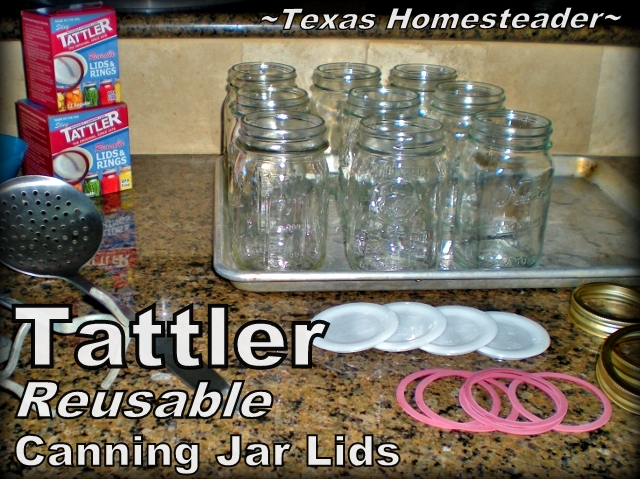
Then I washed my canning jars and lids. And I placed the jars in my oven set to 220 degrees to keep them hot.
To prepare the canning lids I boiled some water, removed it from the heat & placed my Reusable Canning Lids into the water to soften the seals.
Lastly I placed a few metal spoons in the freezer to use to test my jam. (a super-cold spoon will cool the hot jam quickly so you can test for sheeting.)
Now I’m finally ready to begin making the jam!
Cooking The Blueberry Jam
I read that the rind of a lemon contains lots of natural pectin.
So after mixing all the ingredients in my stockpot I cut the leftover lemon rind into thick strips & tossed the strips into my stockpot with the other ingredients. (I’ll remove these strips before ladling the cooked jam into my jars)
Finally I brought the mixture to a rapid boil.
Cold Spoon To Test For Sheeting
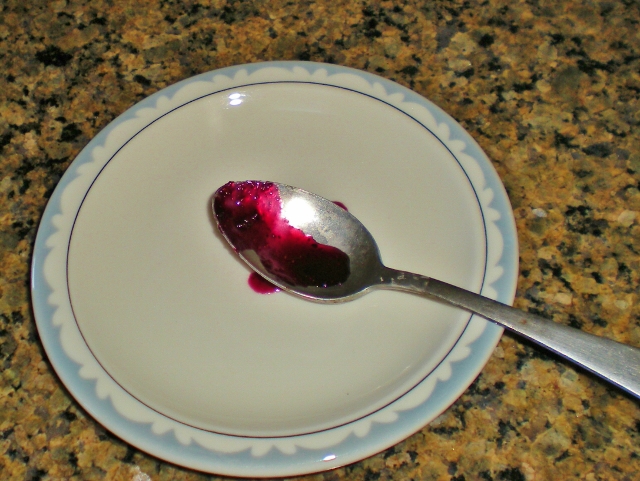
After about 20 minutes I tested for sheeting using one of the spoons from my freezer. I scooped up some jam with one of the cold spoons and held the spoon at an angle to see if it coated the spoon or simply dripped off.
Humm… still looks just a little too thin for me. It wasn’t quite ready yet.
After about 5 more minutes of boiling my jam I noticed the mixture seemed to be getting thicker. Now when I stirred it I could temporarily see the bottom of the pot before the jam covered it again.
So I decided it was time to test it again using a cold spoon.
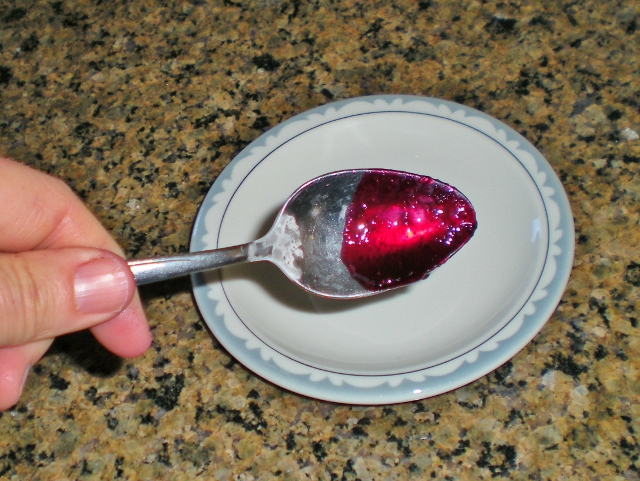
This time the jam was about as thick as I wanted it to be. Notice how the jam sheets along the surface of the cold spoon?
Since I’ll primarily be using my jam stirred into my daily homemade yogurt for breakfast I don’t want it to be too thick. Twenty-five minutes of boiling was about right for me.
Canning My Blueberry Jam
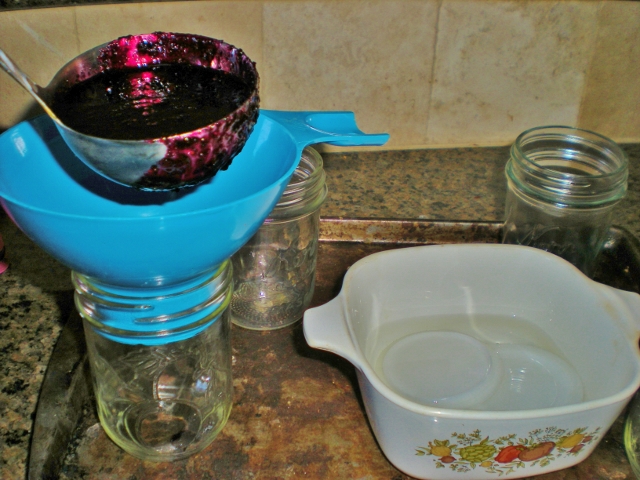
Now I ladled the hot jam into my clean & hot canning jars & wiped the rim to remove any drips that would keep the jar from properly sealing. And I attached my 2-part tattler lid/seal, tightening it just less than finger-tight with a regular metal canning jar lid.
I processed 3 of the 4 jars in a 5-minute hot-water bath to seal them. The remaining jar went into the fridge to be used right away.
Reusable Canning Lids Mean Lower Waste
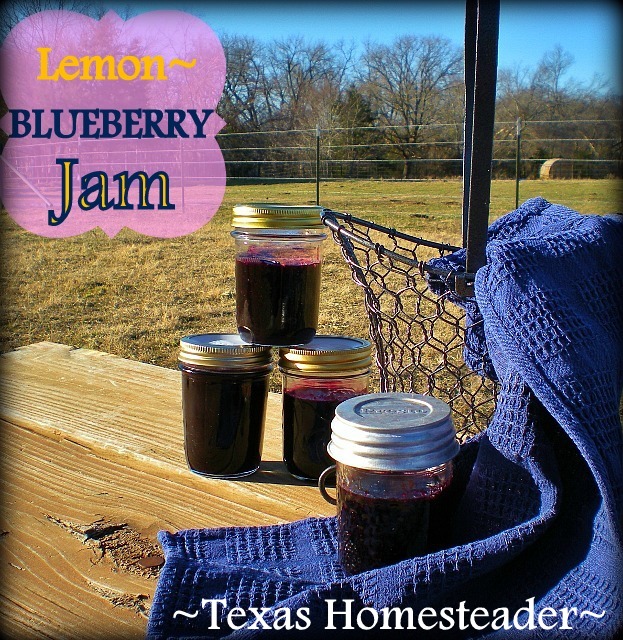
The jam turned out delicious and I loved how inexpensive it was & the fact that both the jelly jars & canning lids are reusable.
I’d bought a supply of reusable canning lids and seals awhile back & I really have given them a workout – I’m pleased to report I’ve never had a failed seal with them.
I had always hated the waste of throwing the canning lid away after a single use. So I love that I don’t have to waste the lid each & every time I do some canning as these * Tattler Lids are reusable for quite some time.
So this blueberry jam is a double win – good for me, good for the environment.
Using Tattler Reusable Canning Lids
Tattlers fit regular canning jars and use standard rings. The canning procedure is exactly the same as with traditional canning lids with the exception of how tight you put them on before processing and the fact that you go ahead & tighten them the rest of the way after processing.
According to the Tattler website:
TATTLER REUSABLE CANNING LID USAGE
Tattler Lids do require a bit of variation from conventional metal lids. Being a two piece combination with a rubber gasket ring, Tattler Lids must remain a bit loose during processing in order for the jar to vent the pressure that has built in the jar during processing. An online customer gave us a very good tip on how tight is ‘Just Right’. To get the feel for the correct tightness prior to processing, place the jar on a counter top or other smooth surface, then place your index finger on the lid (do not apply too much pressure while tightening the metal band). Screw the metal band on until the jar begins to spin on the counter top (or other smooth surface). This is the perfect tightness for processing!
THE FOLLOWING FINAL STEP IS CRUCIAL TO ENSURE A GOOD SEAL:
Once the process is completed and the jars are removed from your canner, Let the bubbling die down (approximately 4-5 minutes), as this is pressure still releasing from the jars. Place a towel over the still hot jars (for safety) and finish tightening the metal bands. Now, let your jars cool naturally and when cool to room temperature, remove the metal band and lift the jar slightly by the lid. It should be well sealed. Your food is ready for storing (store without metal screw bands).
Now I must note here that I’m sharing how I preserved my jam and it worked great. But different canners require different procedures. Even your area above sea level affect your specific procedure.
For safe & specific directions be sure to consult your canner’s manual. And also be sure you read the USDA’s recommendations on safe canning and follow their directions closely – food safety is important!
Now here’s the blueberry jam recipe as I amended it from the original:
Lemon Blueberry Jam Recipe w/o added Pectin
Ingredients
- 6 cups blueberries
- 3 cups sugar
- 1/4 cup lemon juice, or Juice of 1 lemon
- 2 teaspoons finely grated lemon rind
- 1 teaspoon vanilla extract
Instructions
Directions:
-
In large stainless steel or enamel pot, blend with a stick blender or crush with potato masher 3 cups of the blueberries. Add remaining berries, sugar, lemon juice and grated lemon rind.
-
Bring to a boil over medium-high heat and boil for 20 to 25 minutes or until thick, stirring often. When the jam is as thick as you like, remove from heat, skim off any foam & stir in vanilla extract.
-
Ladle hot jam into hot jars to within 1/4" of top rim, wipe the rim clean & attach lids.
-
To preserve jam use preferred safe preservation method.
(I used hot water bath at 5 minutes)
~TxH~
Our Delicious Jelly & Preserves Recipes:
- Clover Blossom Jelly
- Our Favorite Jelly Recipes
- Honeysuckle Jelly – Childhood Memories In A Jar
- Wild Plum Jelly – No Added Pectin!
- RancherMan’s Favorite – Pear Preserves
- Blueberry/Lemon Jam – No Added Pectin
- Concord Grape Jelly – No Added Pectin
All Jelly, Jam & Preserves Recipes
C’mon by & sit a spell! Come hang out at our Facebook Page. It’s like sitting in a front porch rocker with a glass of cold iced tea – lots of good folks sharing! You can also follow along on Pinterest, Twitter or Instagram.
If you’d like to receive an email each time a new blog post goes live it’s EASY to
Subscribe to our blog!
~ ~ ~ ~ ~ ~ ~
* A word about our Affiliate Link – We are currently enrolled as an Amazon Affiliate. Occasionally I will insert an affiliate link into one of my posts if I think it may be of interest to you. Both of the items linked in this post really help me in my canning endeavors! I receive nothing from the manufacturer, but I love my Tattler lids & thought you might too.
If you click on any of my affiliate links and buy something (almost anything, not just what was linked) I get a small referral percentage from Amazon. But here’s the really important part – the price you pay for your items is UNCHANGED.
When you buy something through the affiliate link it’s a great way to support this blog without anything coming out of your pocket. So please click often!



I really love Blueberries so this would be the perfect jam for my taste buds!
Me too Mary. And ya know, it’s always been so hard to find blueberry jam in the stores. Problem solved! ~TxH~
Your blueberry jam sounds so delicious – I’ll have to give it a try! Thanks for sharing the recipe! Blessings, Janet
This Jam looks so amazing! I didn’t know lemon rinds hat natural pectin…good to know! Thanks for sharing on My 2 Favorite Things on Thursday – Link Party! I hope to see you again tomorrow! Pinned!
This looks great and delicious. I have blackberries in the freezer, picked for us by a dear friend, might have to put them into jam. Thanks for sharing at Good Morning Mondays. Blessings
I love blueberries, we bought 40 pounds from our local farmer last year and made so many jams and pie fillings (along with freezing a bunch for smoothies). I would have loved this recipe back then!
Thanks for sharing at the Art of Home-Making Mondays this week!
I’ve planted many blueberry bushes over the years JES but just haven’t gotten any of them to live. I’ve never had any trouble with trees/plants at any place we’ve ever lived, but for some reason the ground here challenges me at every turn.
Our blueberries will be ready soon and I can’t wait to give this a try. I love the fact that is is lower in sugar and doesn’t need pectin. Thanks for sharing at Green Thumb Thursday.
Even better is blueberry-lime jam. It’s a classic Ball recipe. We made it in my beginning canning class a couple of years ago. I was dubious….blueberries and LIME?….but it actually is pretty awesome. Lime juice and a bit of chopped lime rinds.
Lemon skin does indeed contain a lot of pectin; it’s one of the sources of some commercial pectins (although most come from apples). However, blueberries have a lot of natural pectin on their own as well, so they often don’t need added pectin. Good stuff!
Love the buckleberry jam idea. I’ll have to try it sometime.
I love the idea of adding the vanilla. I can’t wait to try it. Thank you for sharing on Green Thumb Thursday.
Yum! I love the combination of blueberries and lemons! I do appreciate you sharing with Home and Garden Thursday,
Kathy
Homemade jam is definitely better than commercially sold . It is a good move to exclude pectin form the jam. Thanks for sharing with 4 seasons blog hop. Cheers
I love the sound of this jam. I never knew you could use lemons to make the jam. I love those lids too! I hate throwing the lid away too! I will have to check them out.
Thanks for linking this great post to the In and Out of the Kitchen Link Party!
One of my favorite memories as a child was making crabapple jelly with my grandmother from a huge tree in the side yard. Interesting that sea level can affect jam. I knew about bread, but I didn’t know this. Thanks for sharing your recipe and procedure.
Dropping by from the Thrifty Things Friday Party!
xo
Sheila
It looks super delicious!
Sounds wonderful! I made Buckleberry Jam this past summer which takes blueberries, raspberries and strawberries. We never seem to get enough blueberries off our bushes to make just a blueberry jam. I always say maybe next year.
Oh YUM!! My hubby is a big, big fan of blueberries too and would love this! I really like that you didn’t have to use pectin too. I haven’t invested in the Tattler Lids yet but have certainly heard many good things about them. 🙂
Give it a try Candy, it really is delicious. I blended 1/2 of my blueberries pretty thoroughly with my stick blender before cooking and the other 1/2 only lightly mashed & I think it gave the perfect blend of texture. ~TxH~